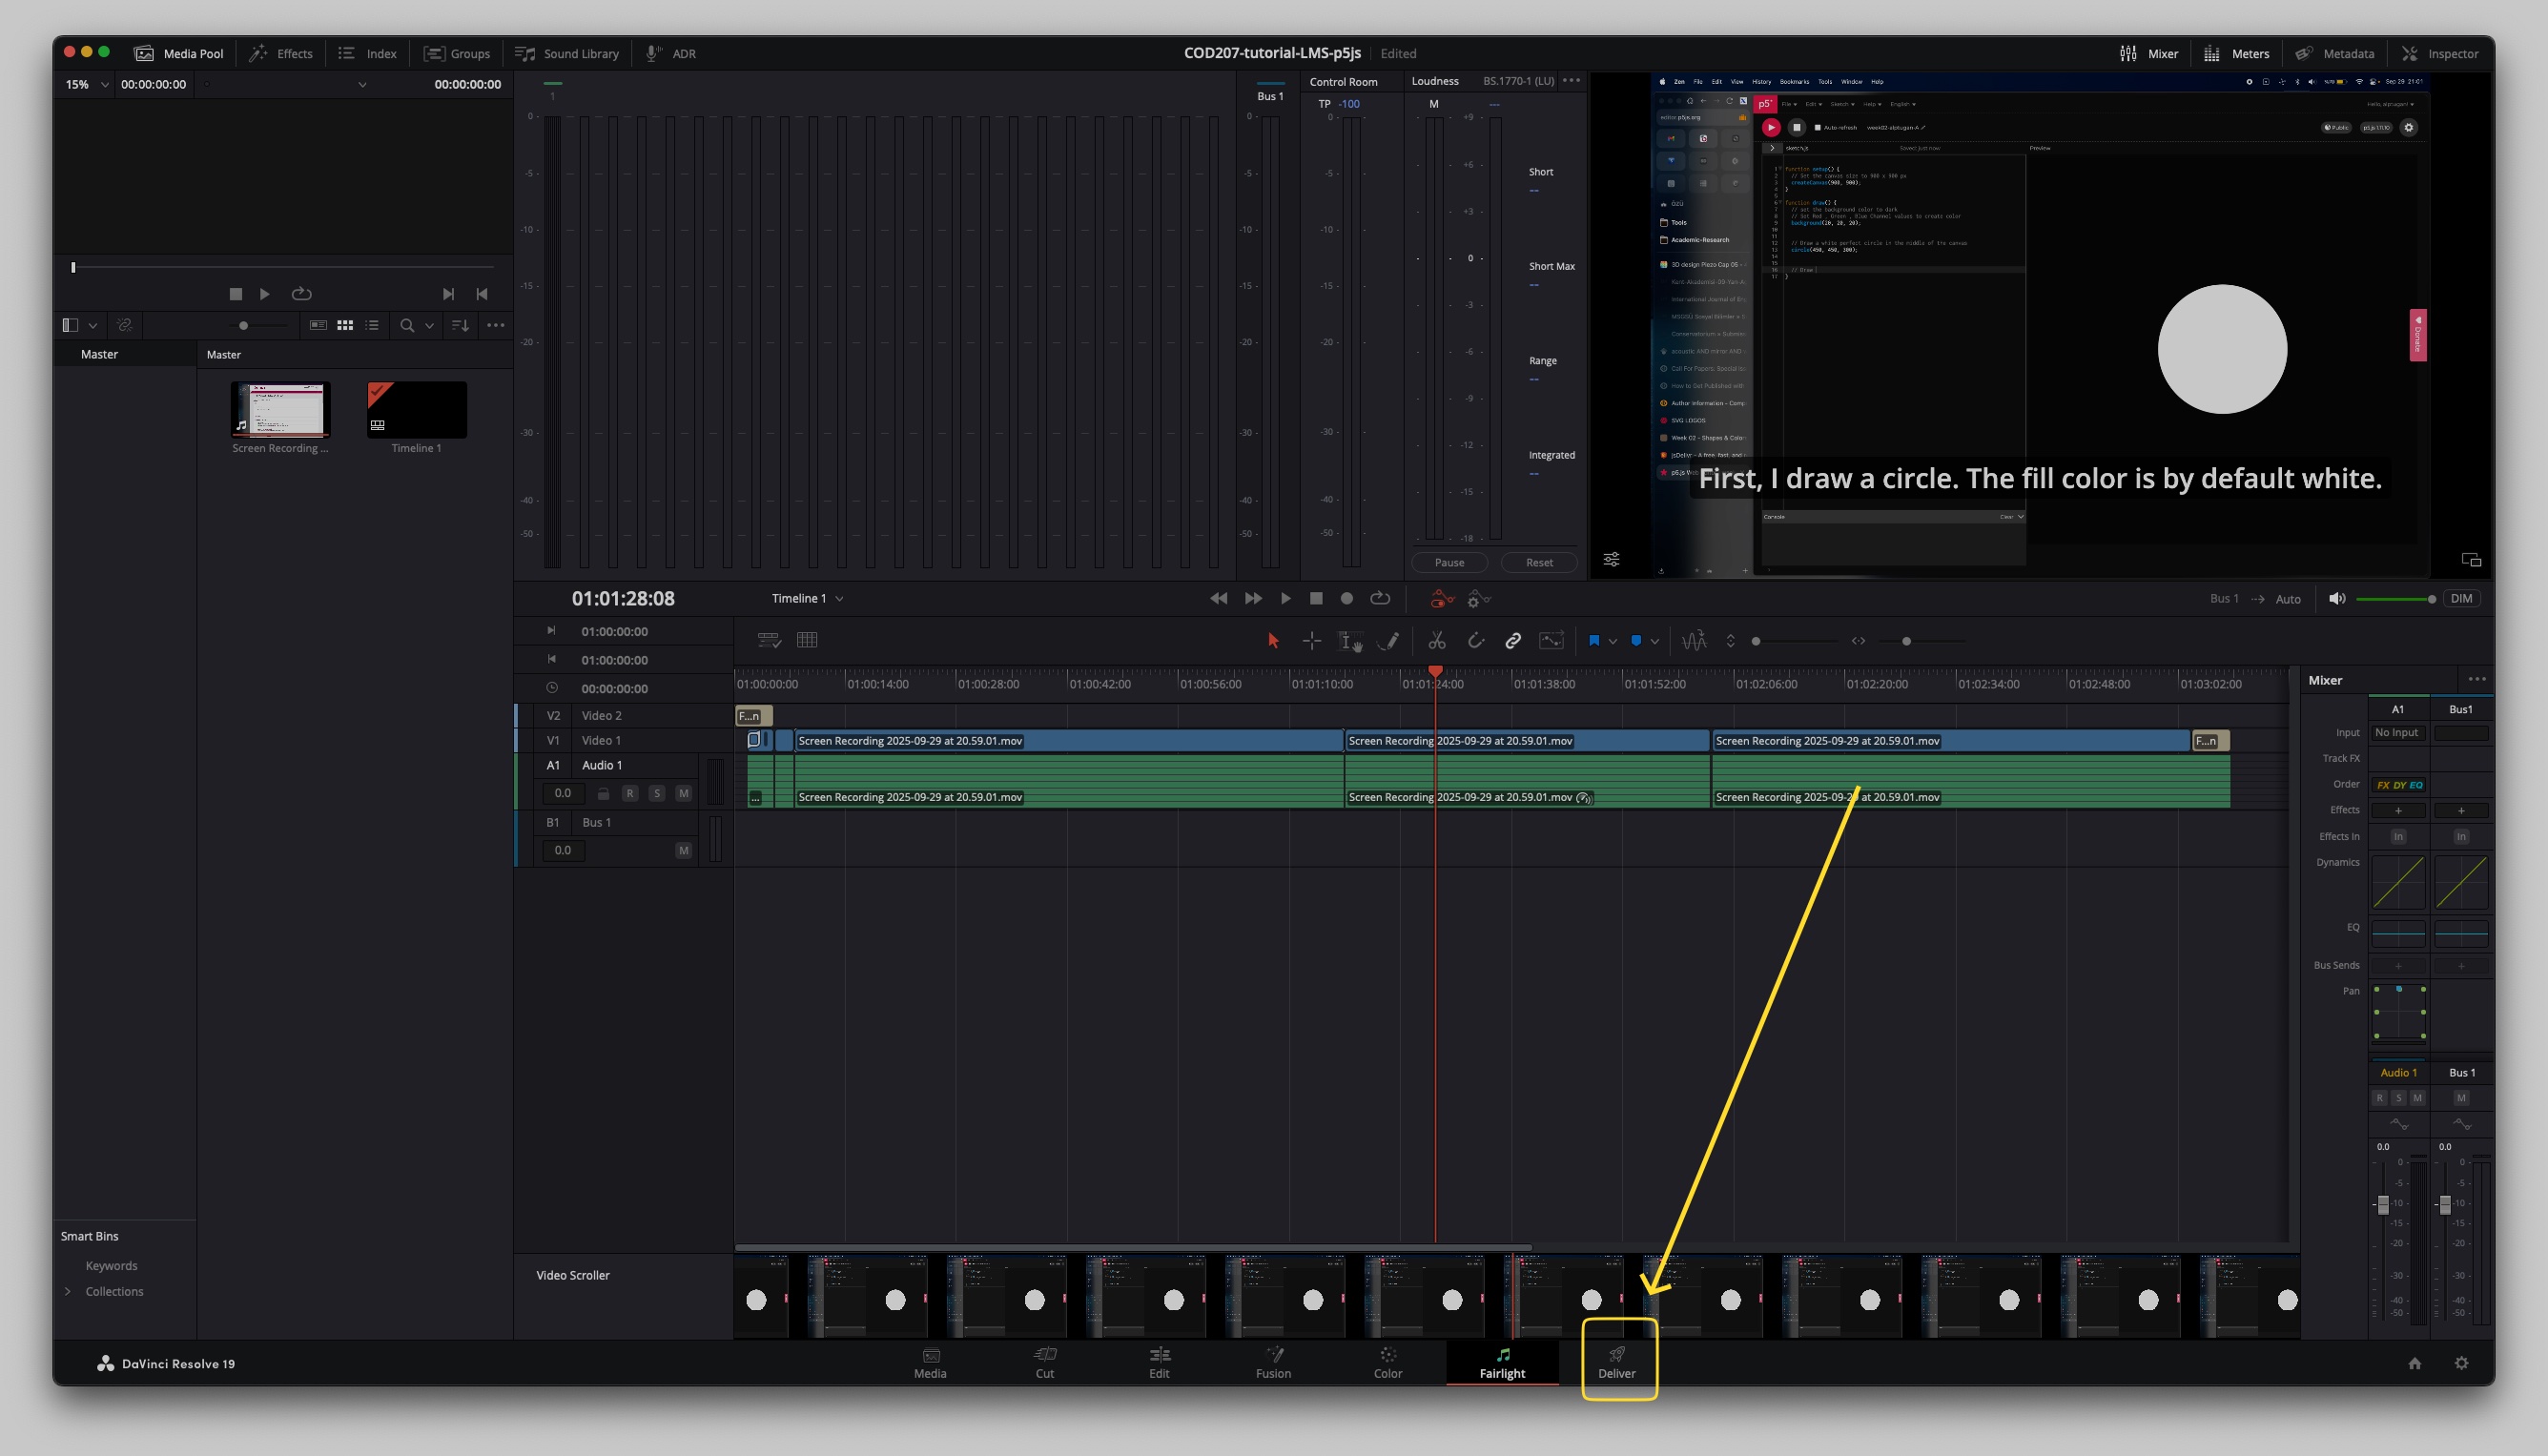
1. Switch to Deliver Section
When you are done with sound design on Fairlight section, switch to Deliver section to export your production in your desired format.
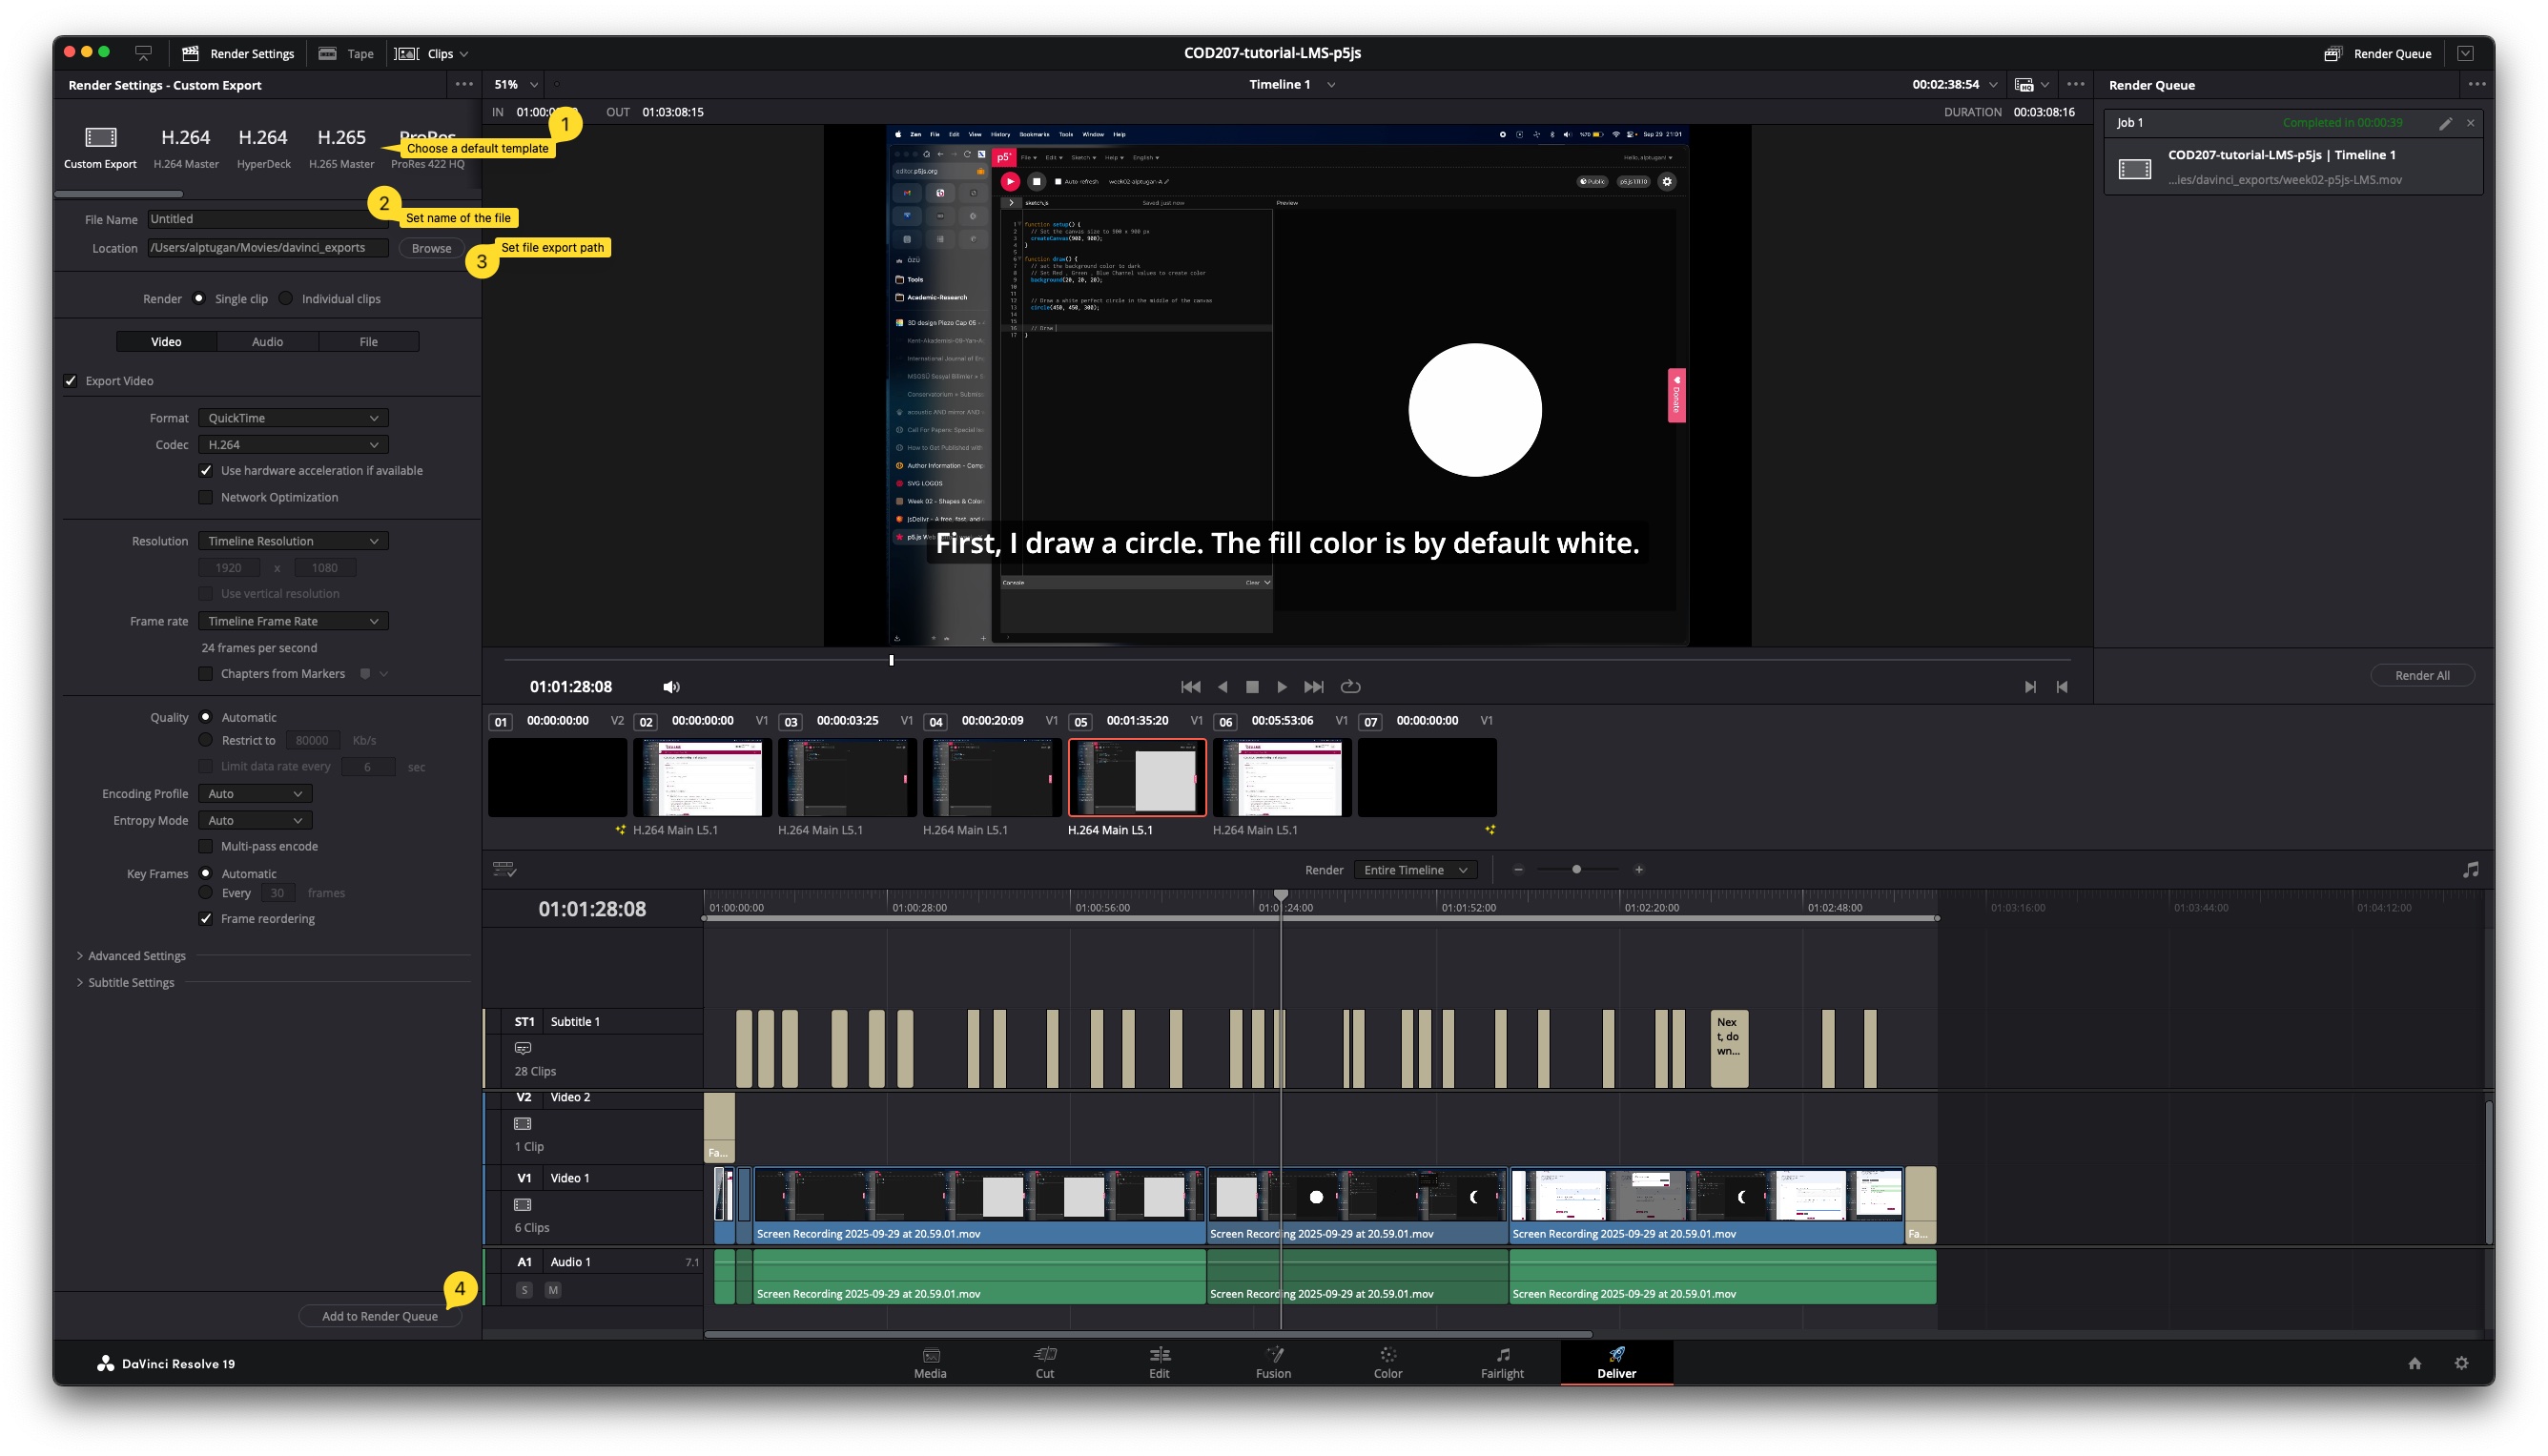
2. Choose a Preset Template
You can choose one of the production ready presets on top-left corner of the Deliver section. H.264 or H.265 (recommended) is decent enough codecs for modern video servers like YouTube.
Do not forget to set the filename and location for the exported video file. You can customize the settings as you wish. For the Sound Design course, you can leave the settings as they are. Then, hit the Add to Render Queue button on bottom-left side of the window.
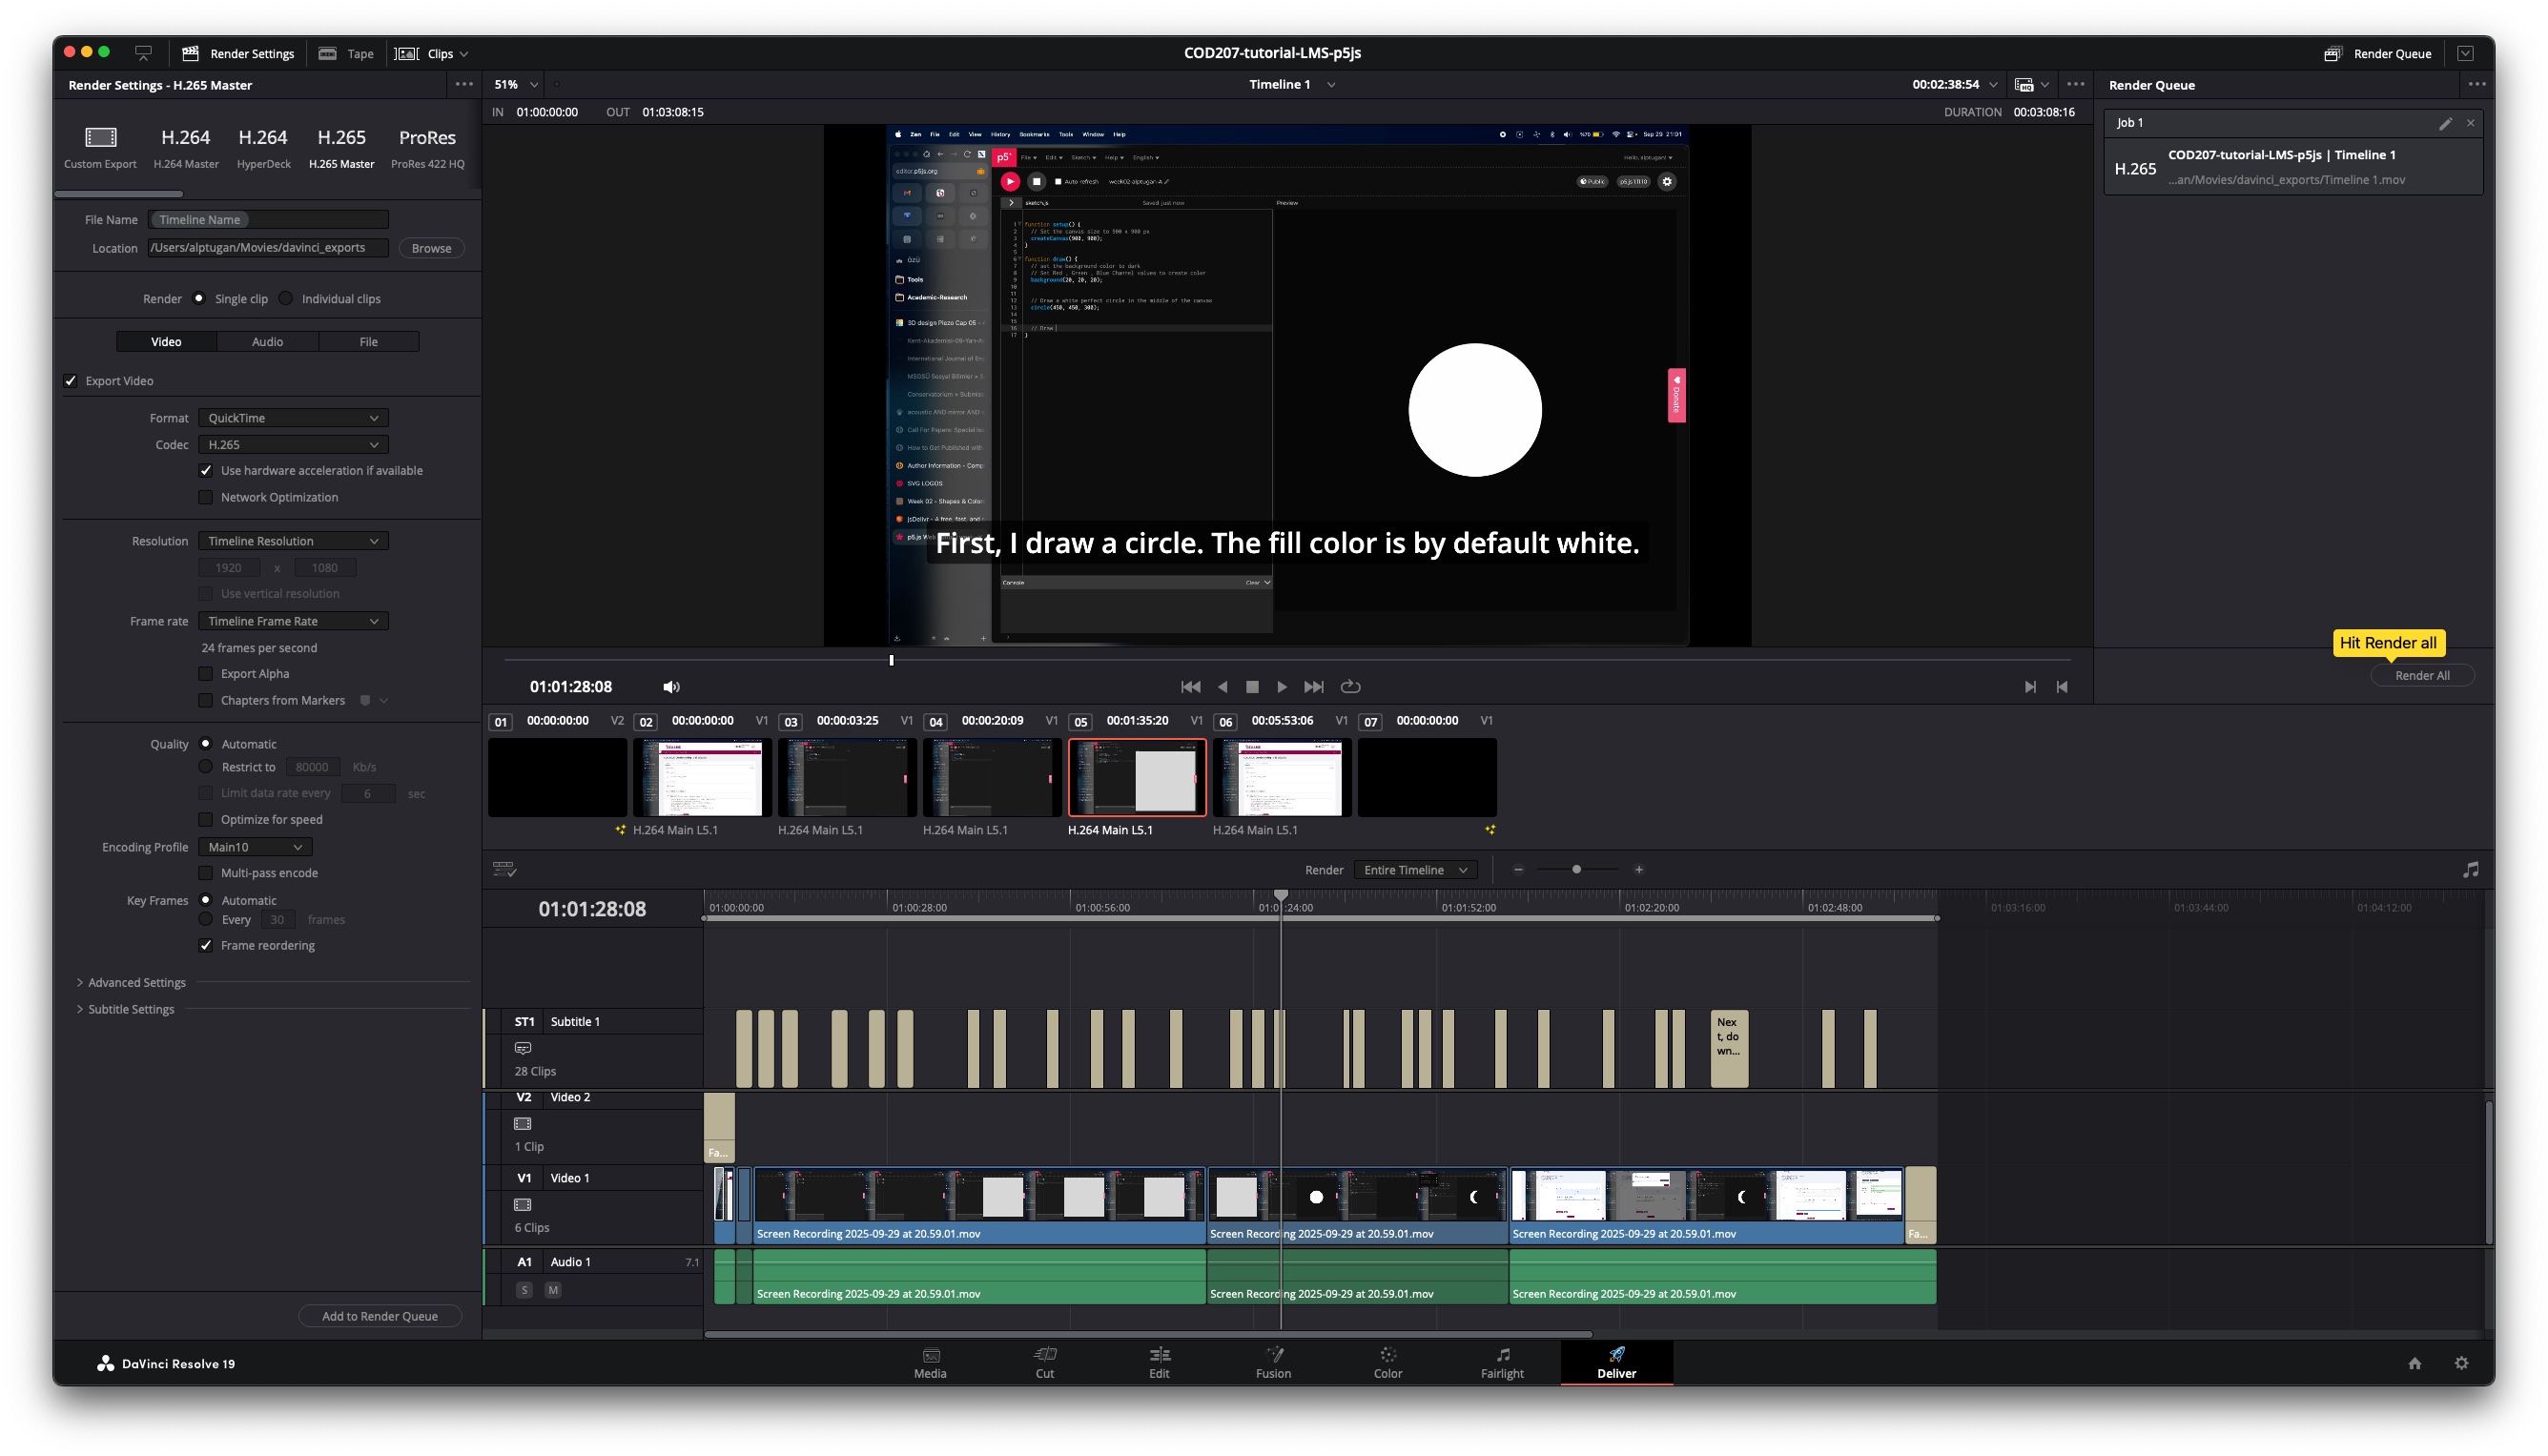
3. Render The Video and Audio
After you add the video to Render Queue, it will appear on the top-right side of the Davinci Resolve window. You can safely hit Render All button to start rendering process.
Advanced Configuration (Optional)
You can review the video for advanced configuration for production ready productions. If you you are curious to learn the industry standards on video production, I recommend you to watch the video.