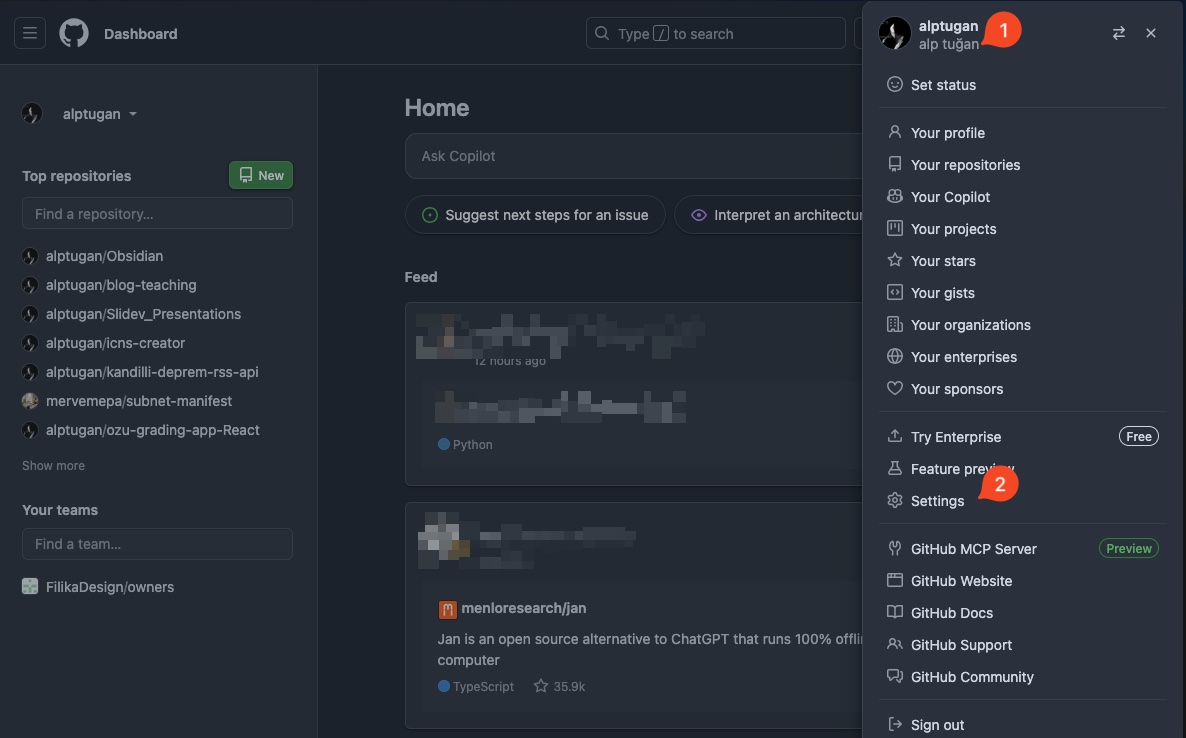
1. Verify the Custom Domain
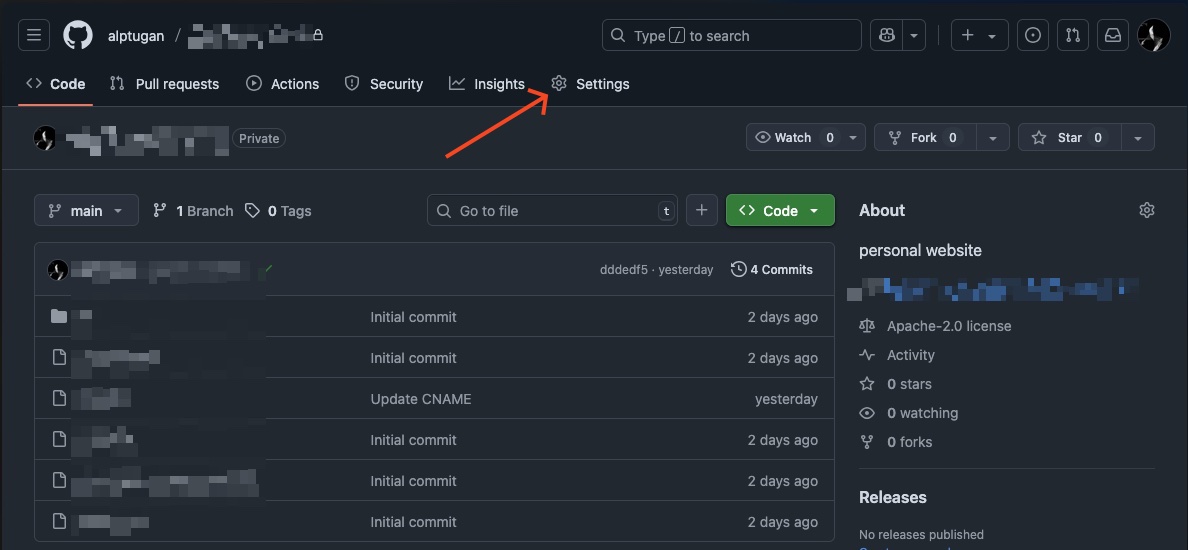
Navigate to the github.com and click on your profile picture and goto Settings menu.
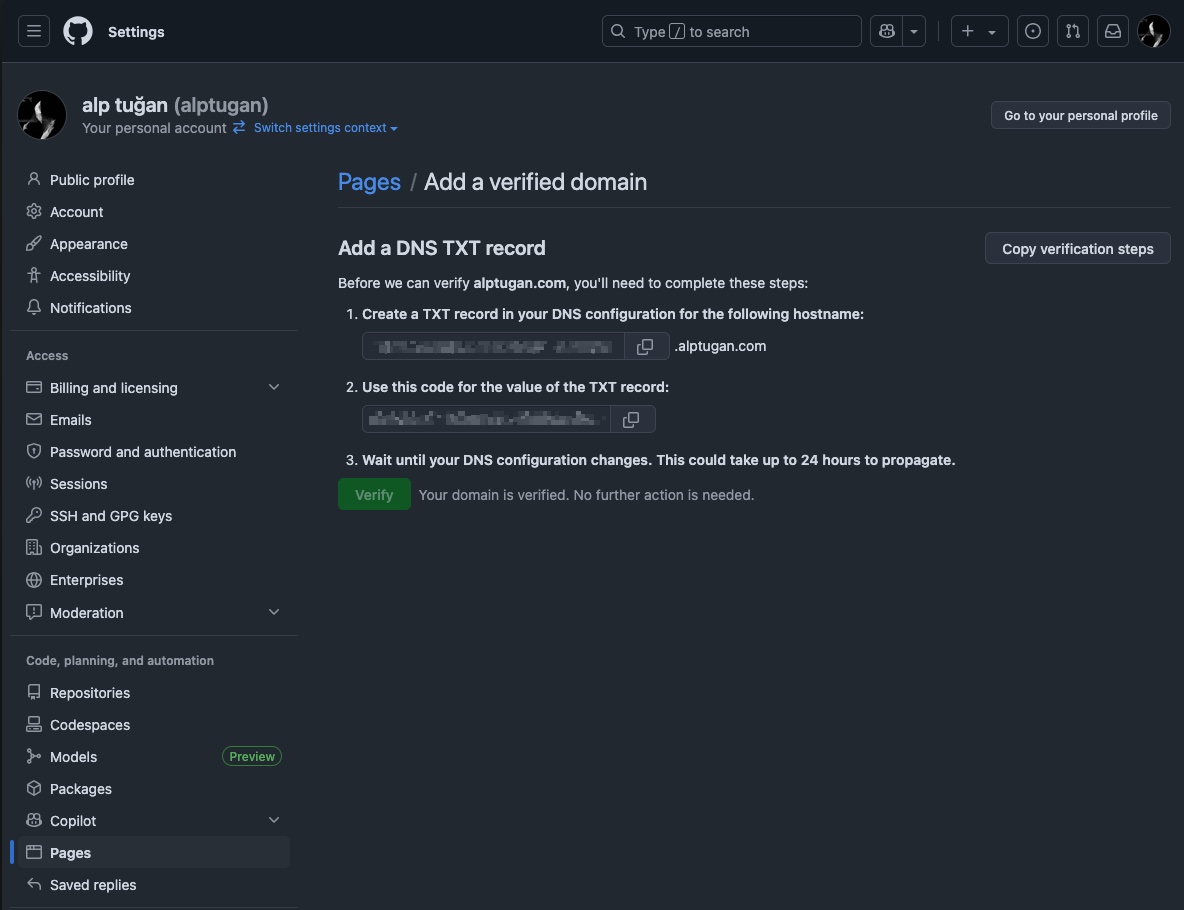
Goto Pages menu. Enter your domain.com and hit Verify. You will get following TXTrecords. You need to update your domain name TXT records with the following ones.
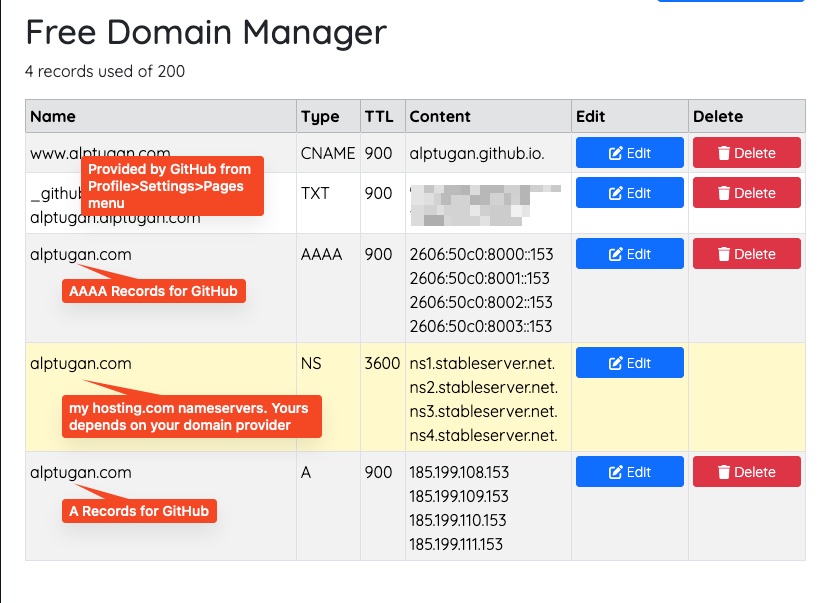
2. DNS Zone Editor
This step varies according to your domain name provider. The following UI might be different for yours. But the process will be same for every domain provider such as GoDaddy. You can search on YouTube in order to edit DNS records for your domain name provider.
Create the following TXT record that you generate on GitHub. Next step, you need to add the A and AAAA records. The ip addresses provided in GitHub documentation page (reference).
The NS recorded should be there already created by your domain name provider.
Now goto GitHub and hit the Verify or Resume Verify button. It may take 15-20 minutes or more for DNS settings applied and become alive. So wait until the verification is completed successfully.
3. Enable Pages for a Repository
Open up your GitHub repo’s setting which you want to set a custom domain name. Your domain should be public, but I have success with the private repo as well. Click on Settings in your repo page.
The rest of the steps can be found in the following article’s Publish the App on Internet title.
4. Set Custom Domain Name
Type your domain name with wwww as prefix. Hit Save, the verification process takes nearly 24 hours for me. So be patient. Wait…

Wait…
Wait…
Check the domain next day.
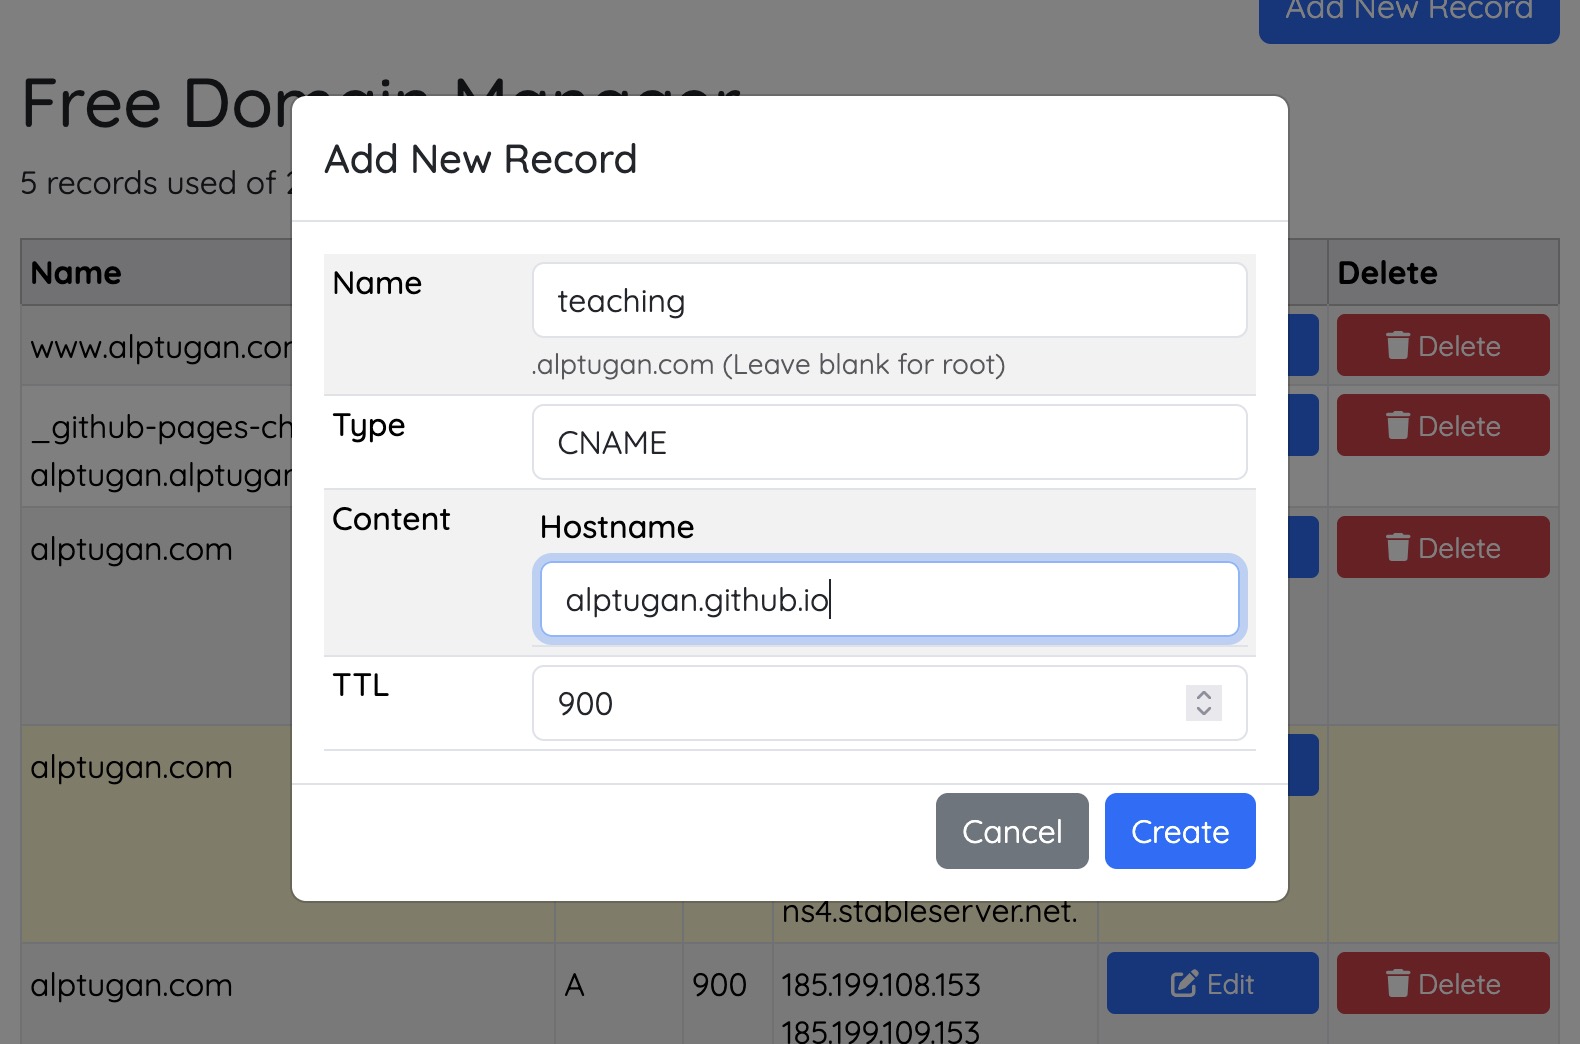
5. Subdomain Entry
After adding the apex domain, you can also add subdomains via CNAME records. You need to verify the subdomain on GitHub as defined above in step 1 and step 2.
- Goto GitHub repository on your local device.
- Create a file called
CNAMEand type the subdomain address.
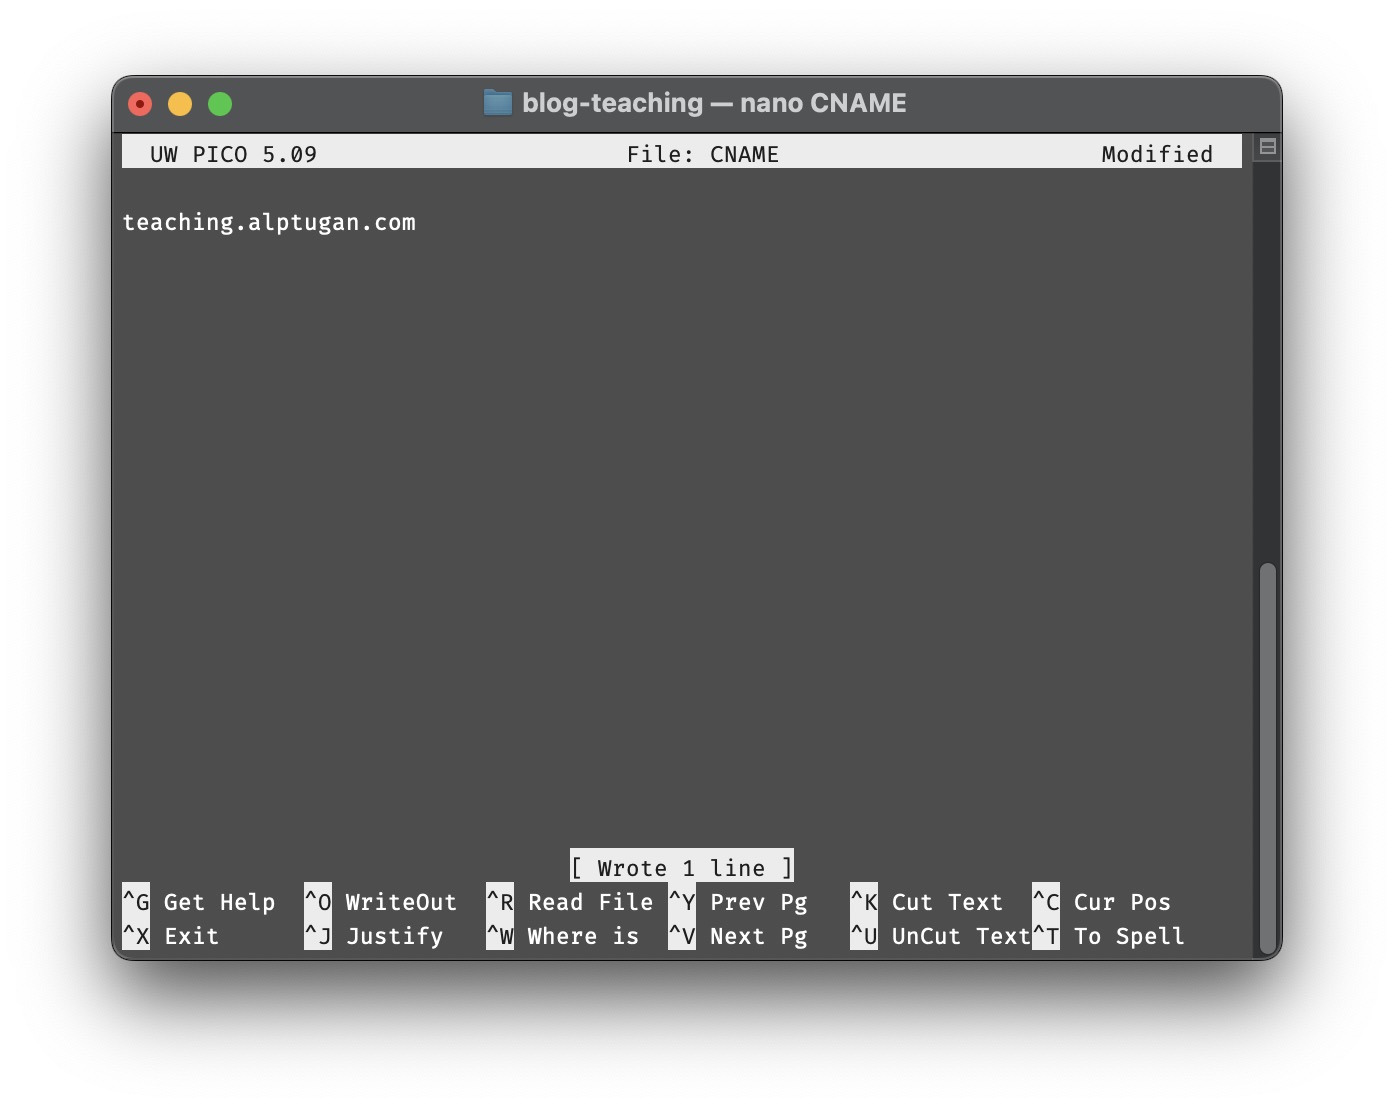
- Save the file and push to GitHub repository.
- Goto the domain provider control panel and add
CNAMErecord for the chosen subdomain as is 2. DNS Zone Editor step.