-
Create a free account on Github. Follow the instructions on Github - Setup Personal Account article.
-
Download the following repository. Unzip the folder. You’ll need the files in later steps.
-
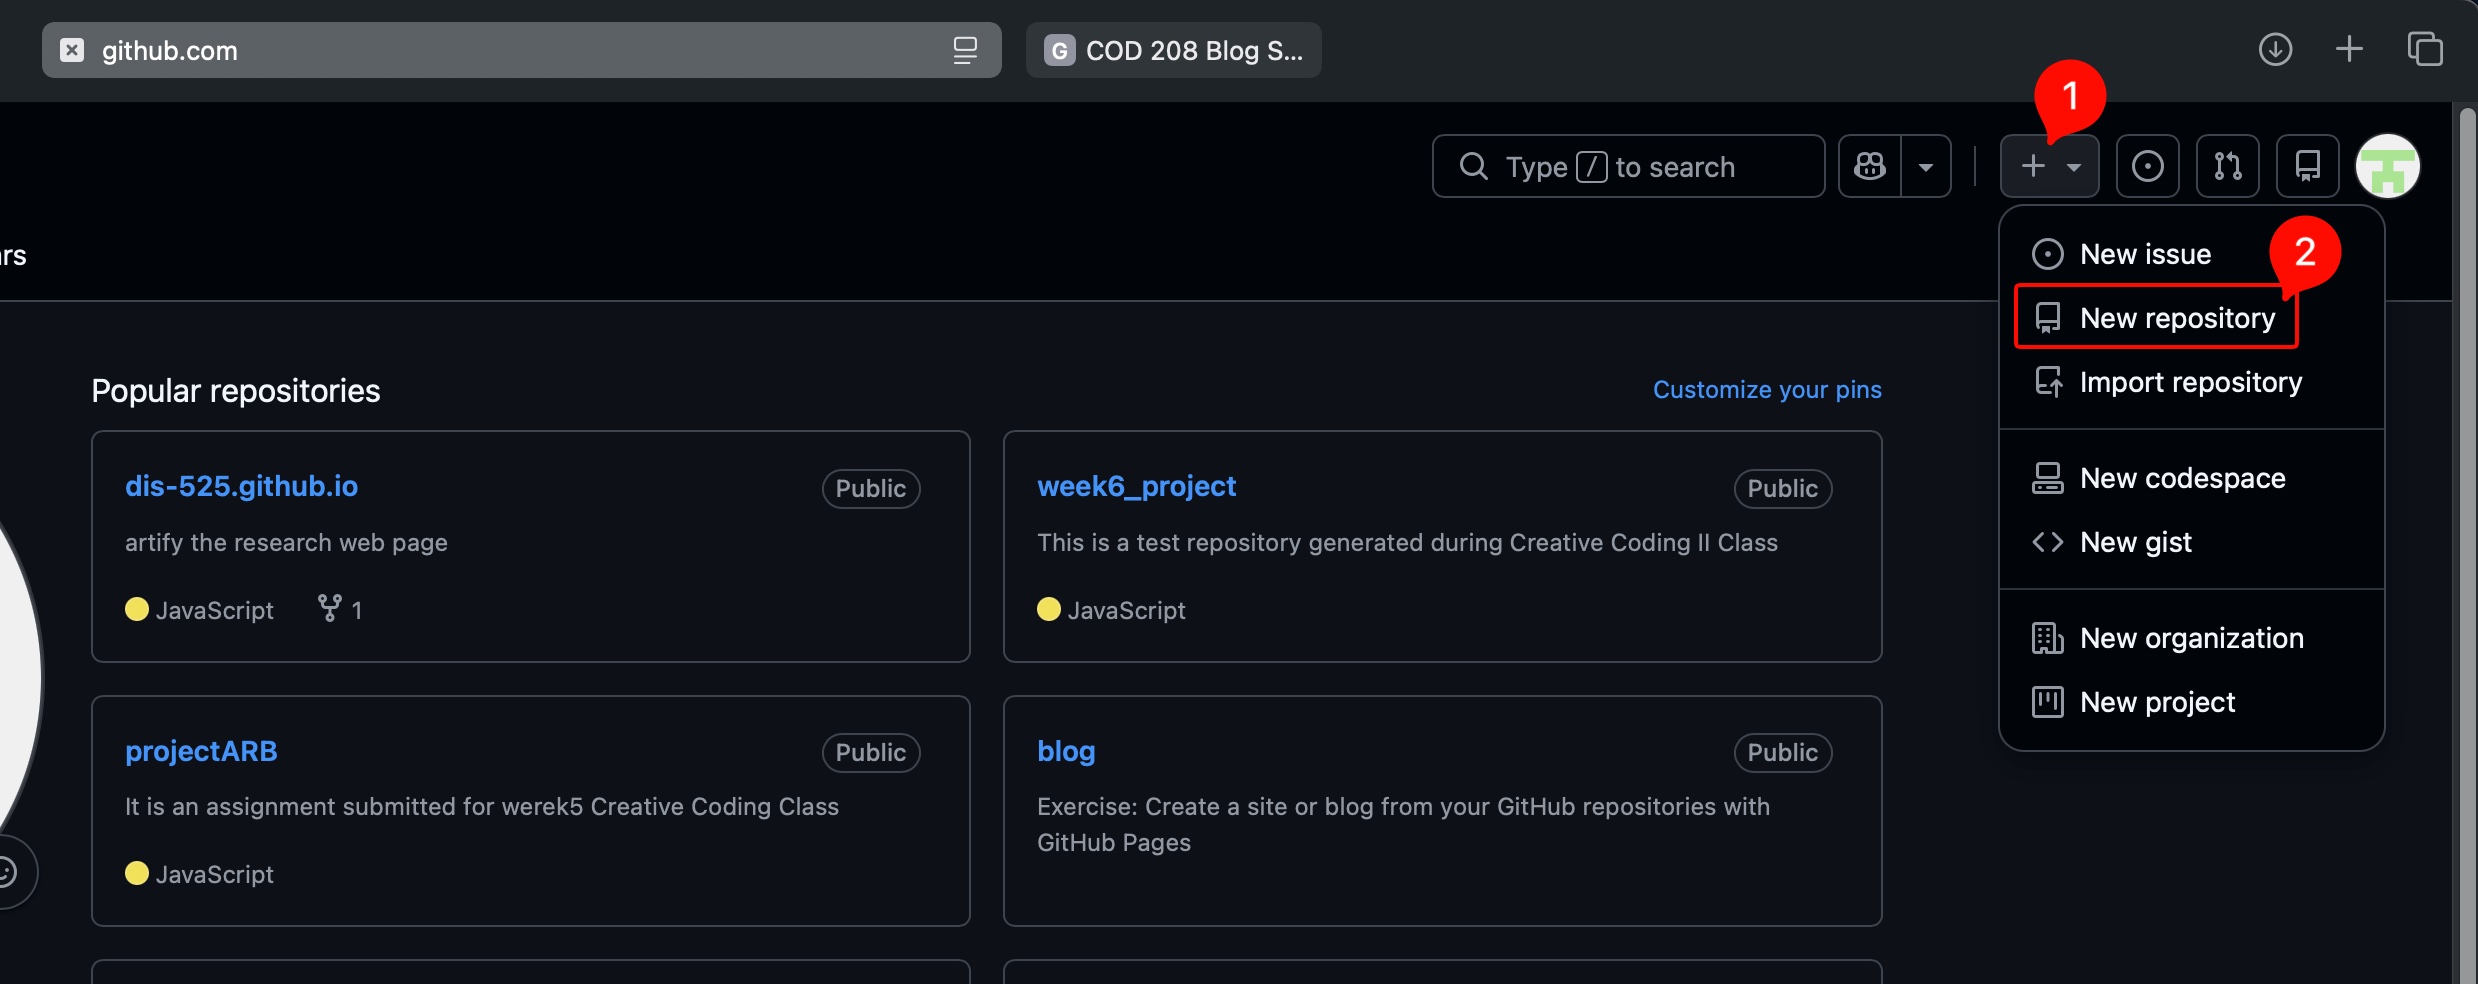
Create a new repository called blog.
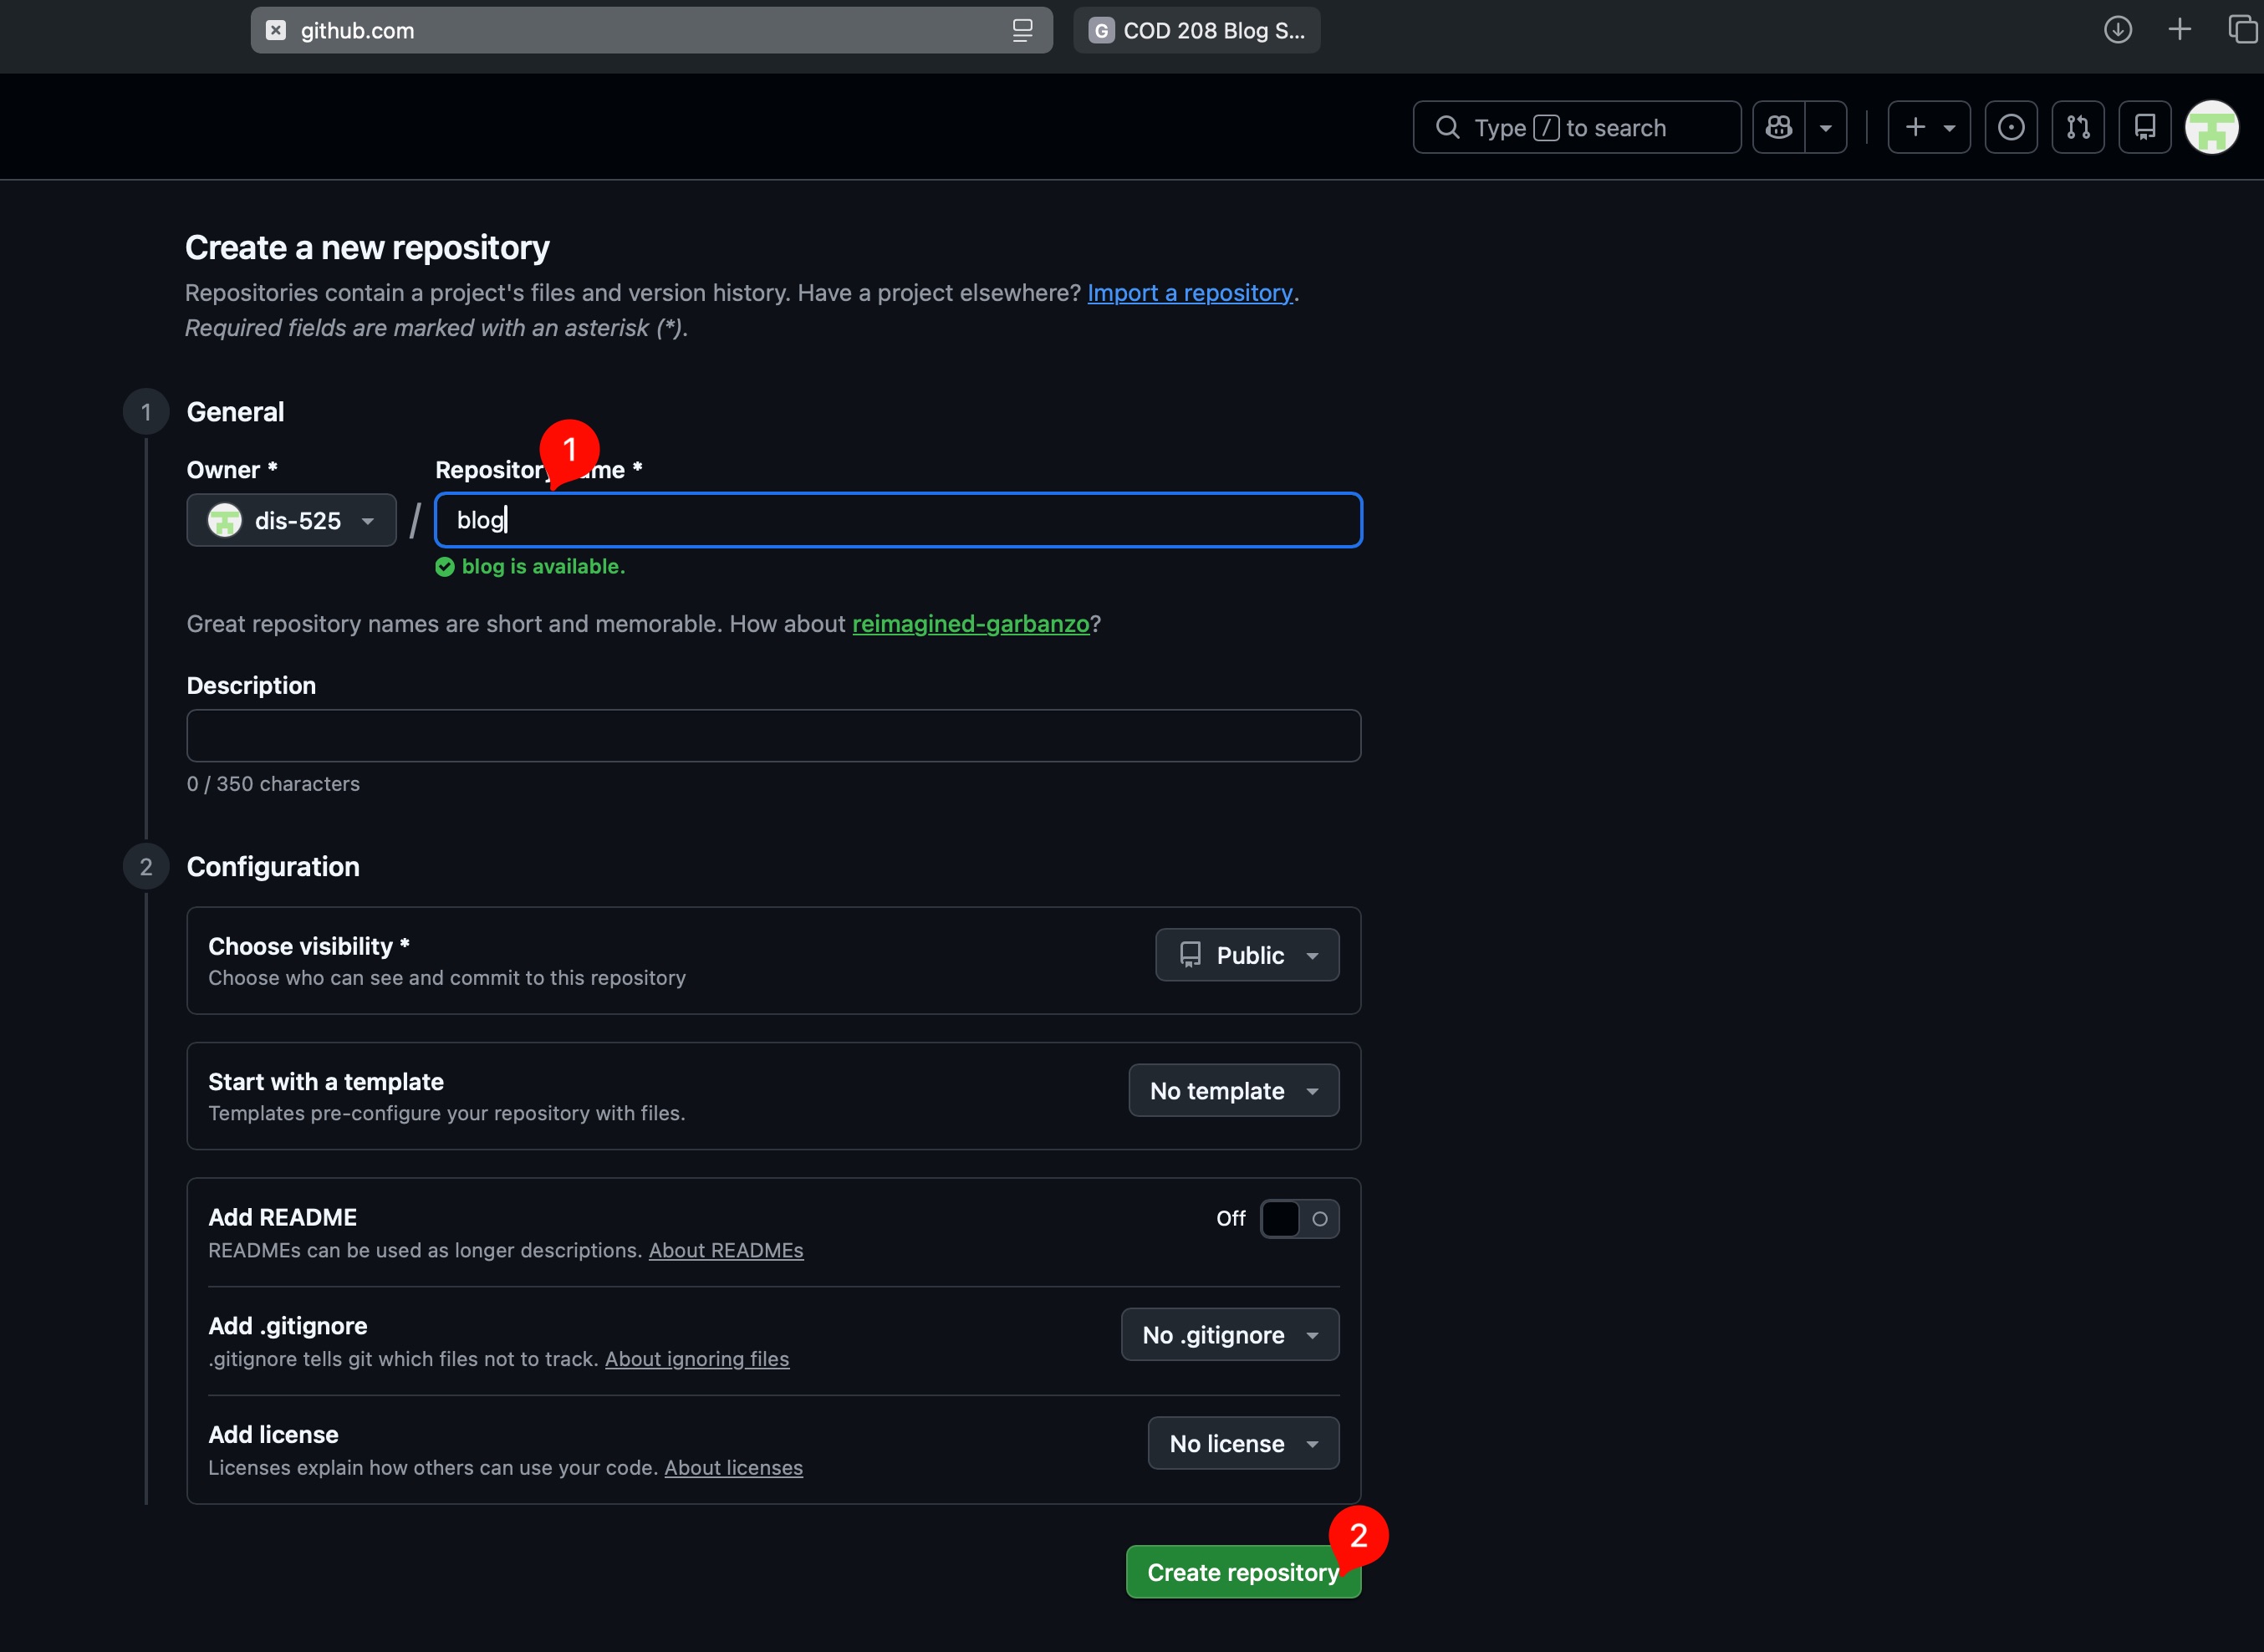
- Once you hit the
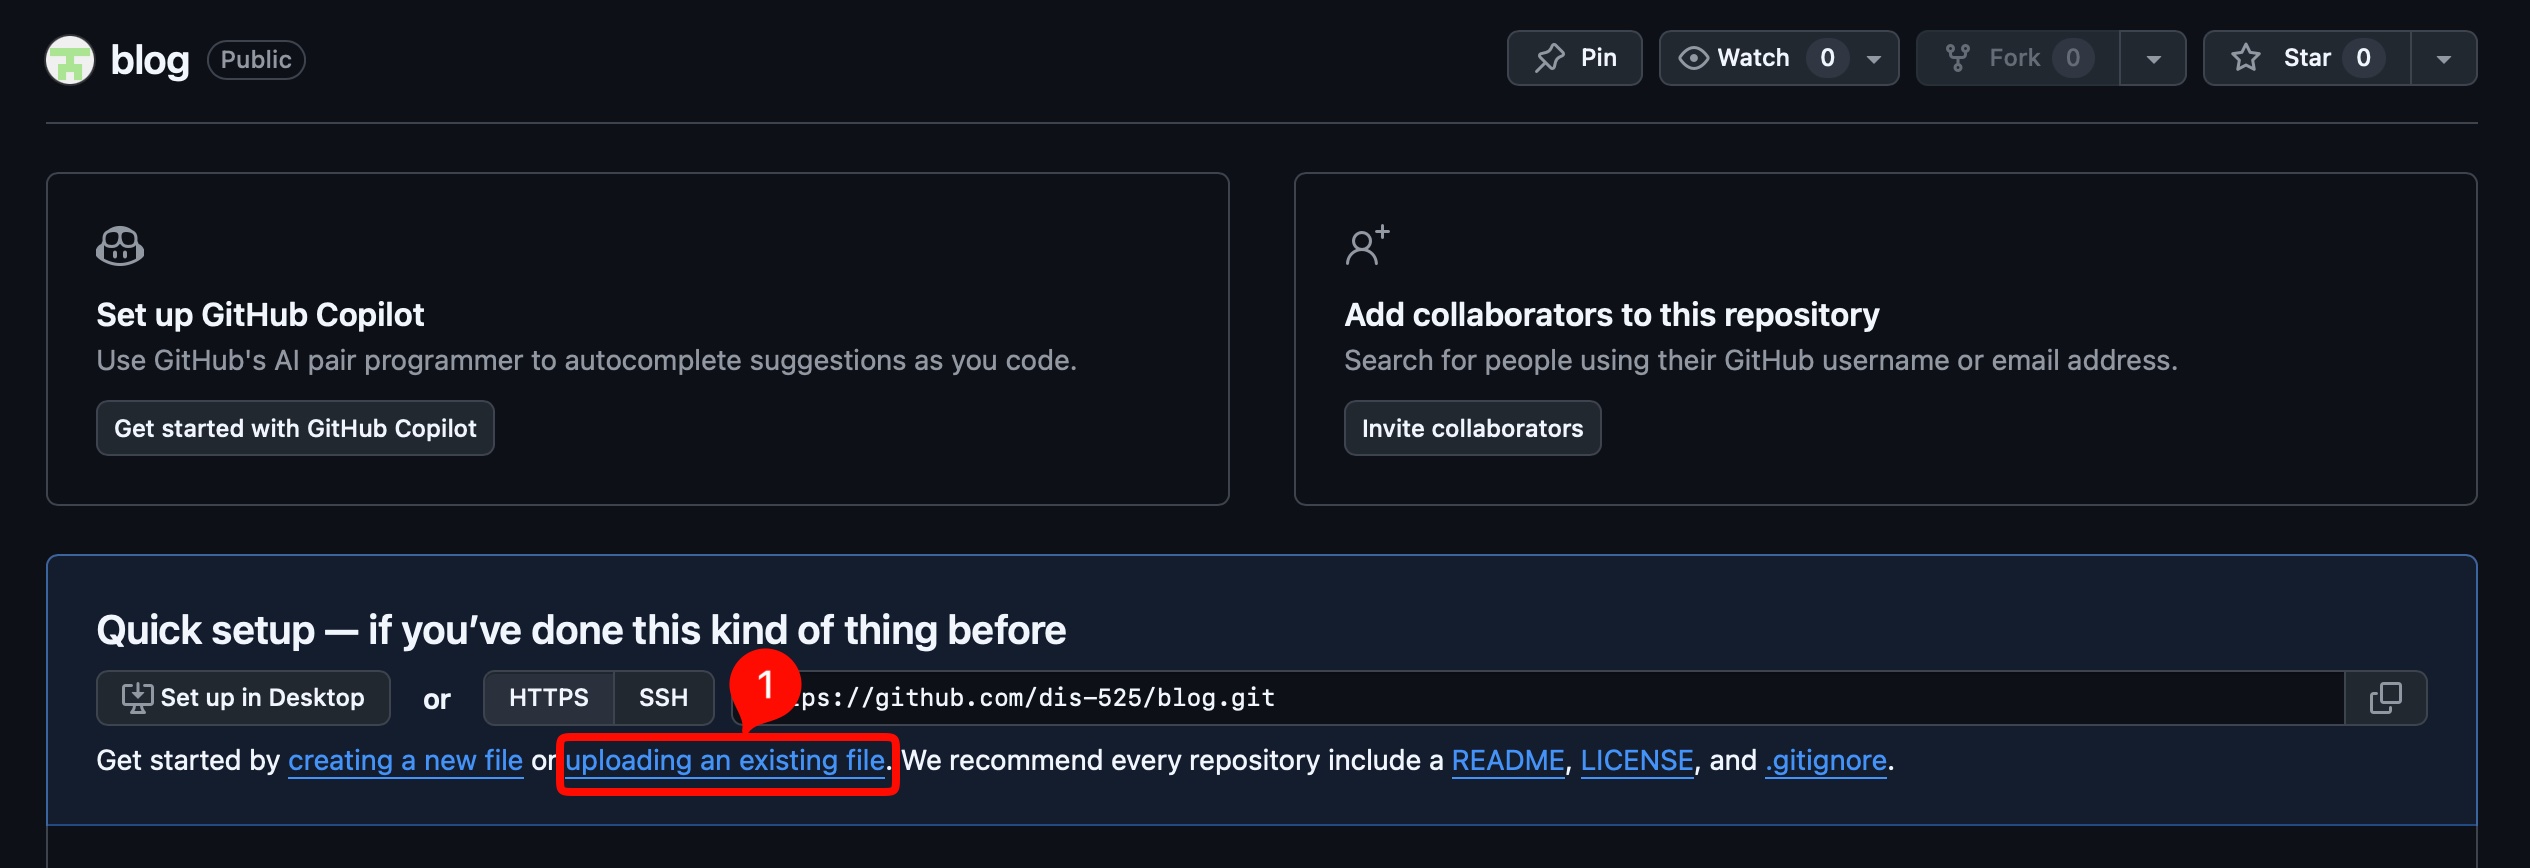
Create Repository, you see the following page. Click onuploading an existing filehyper link to upload the content.
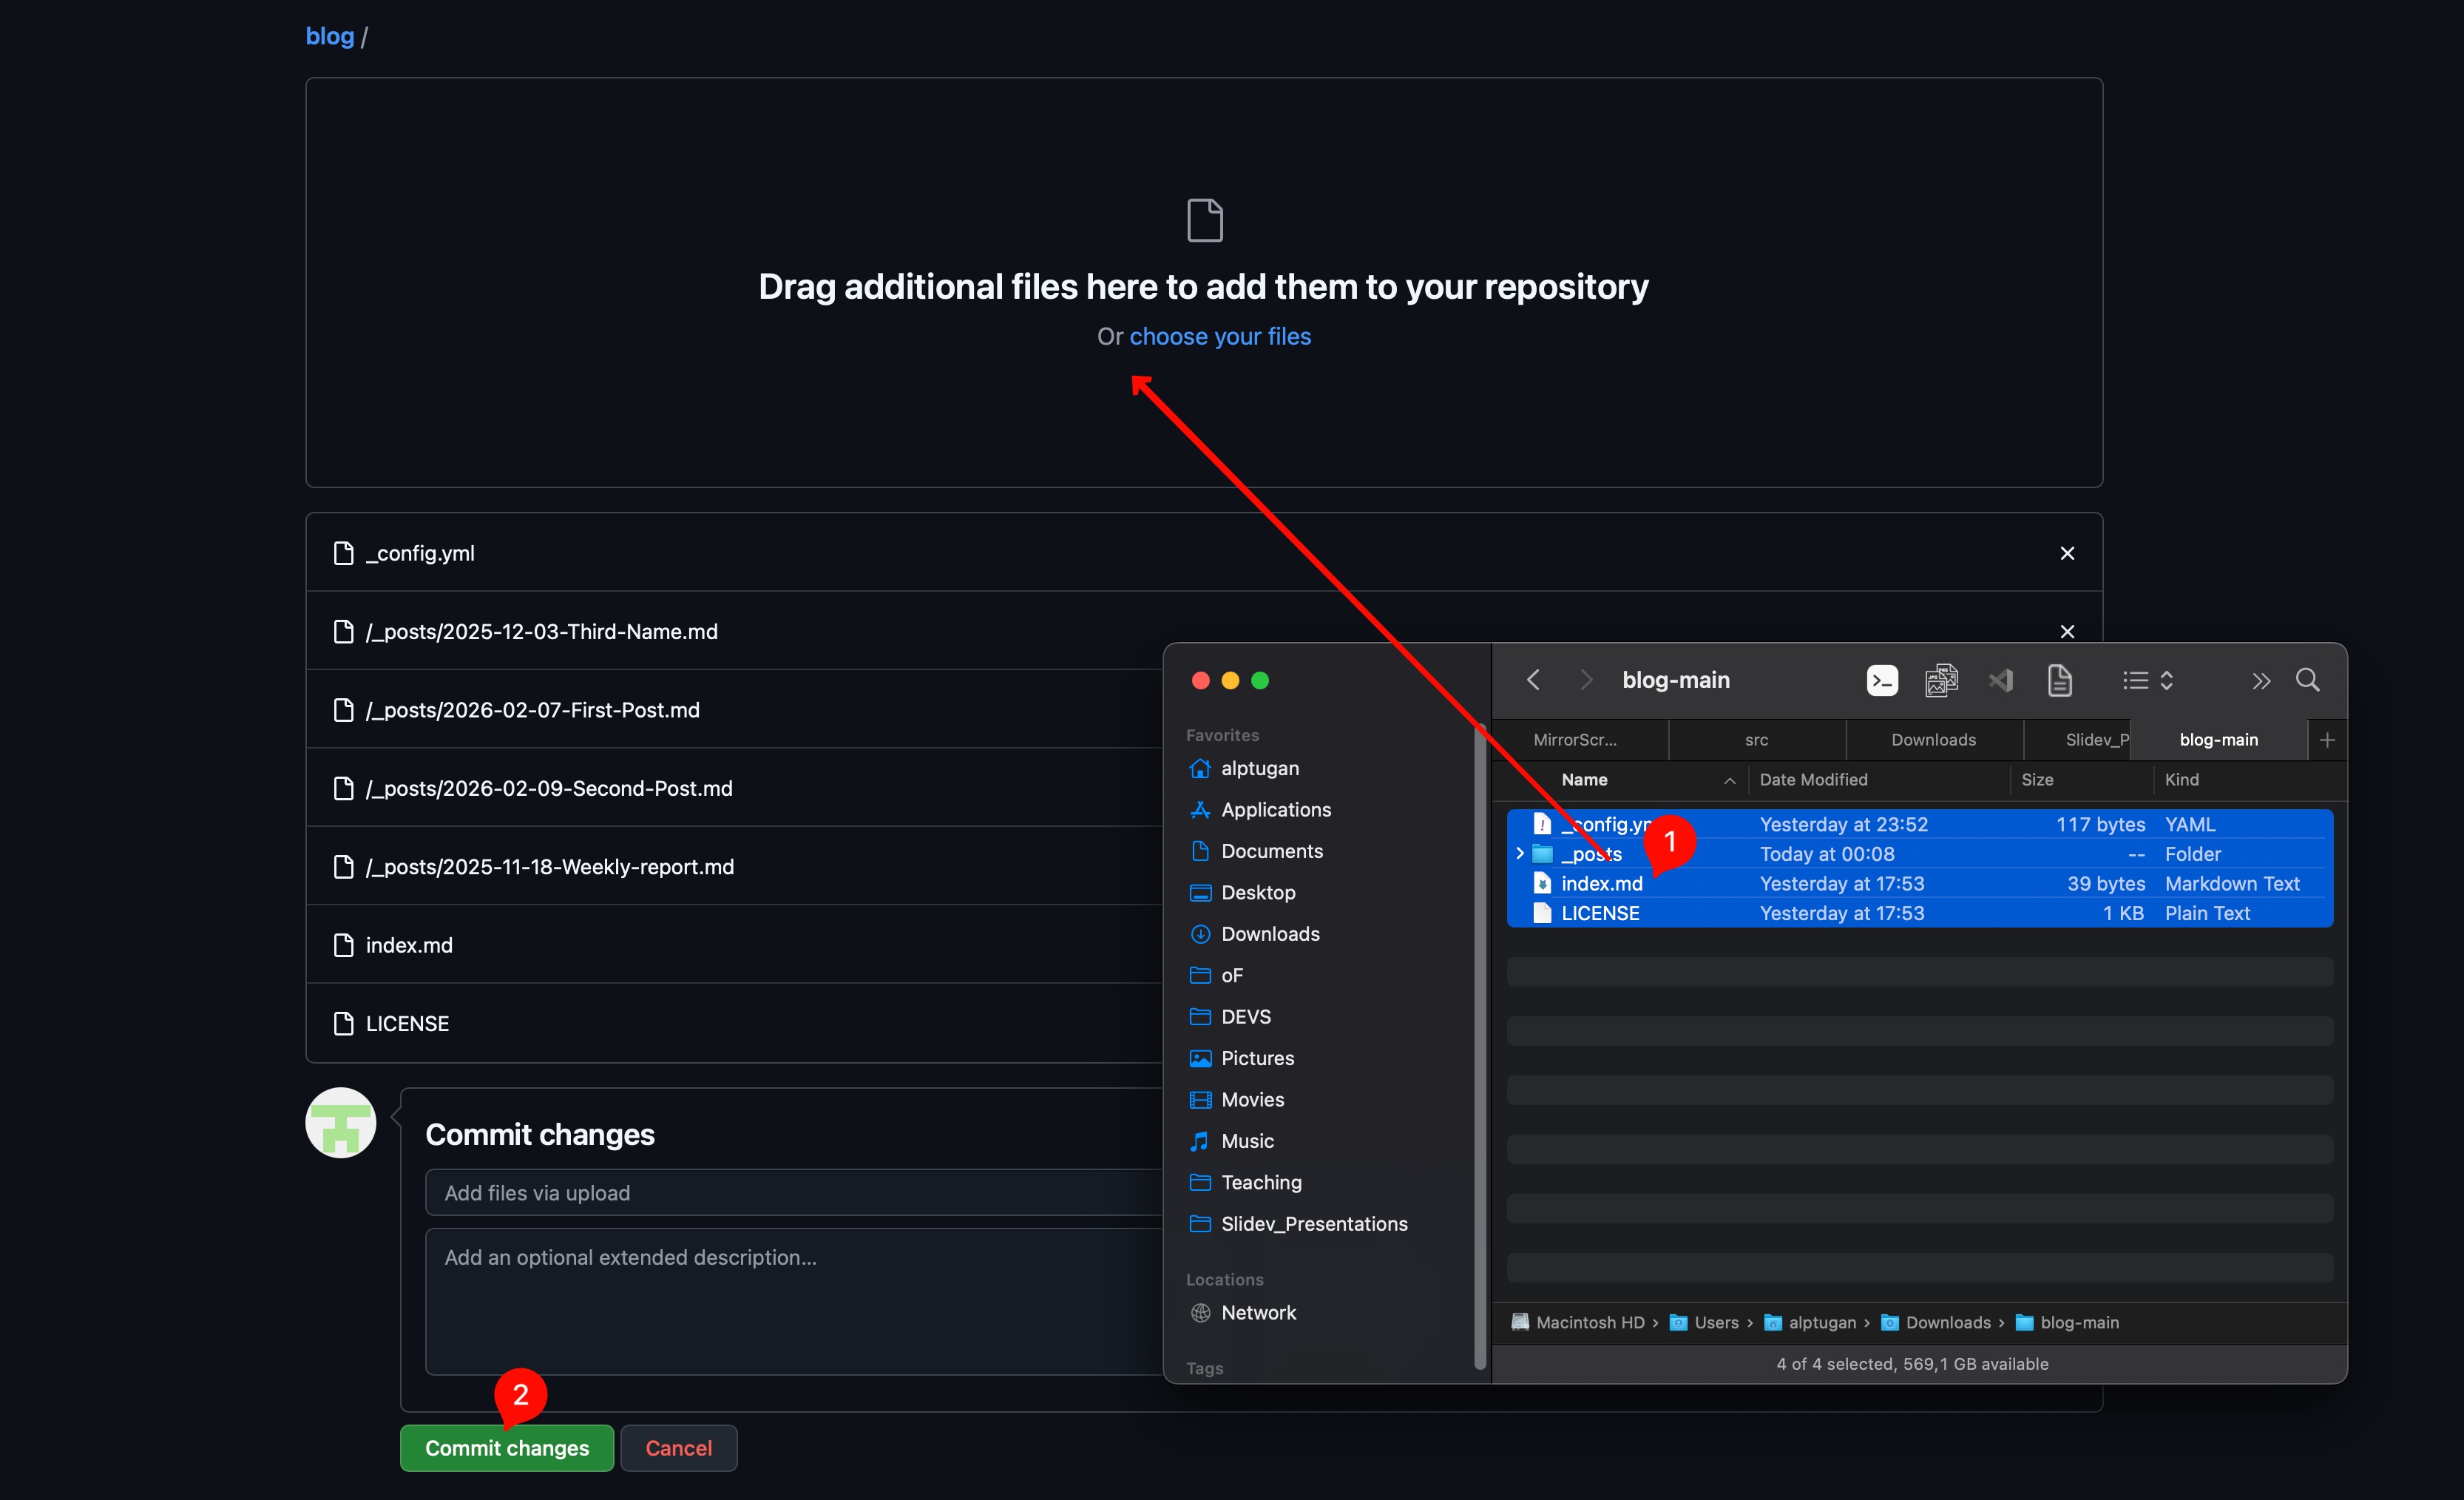
- Drag & drop the downloaded files on Step 2. Upload the folder content as follows. Wait for files to be uploaded completely. Then hit
Commit Changesbutton.
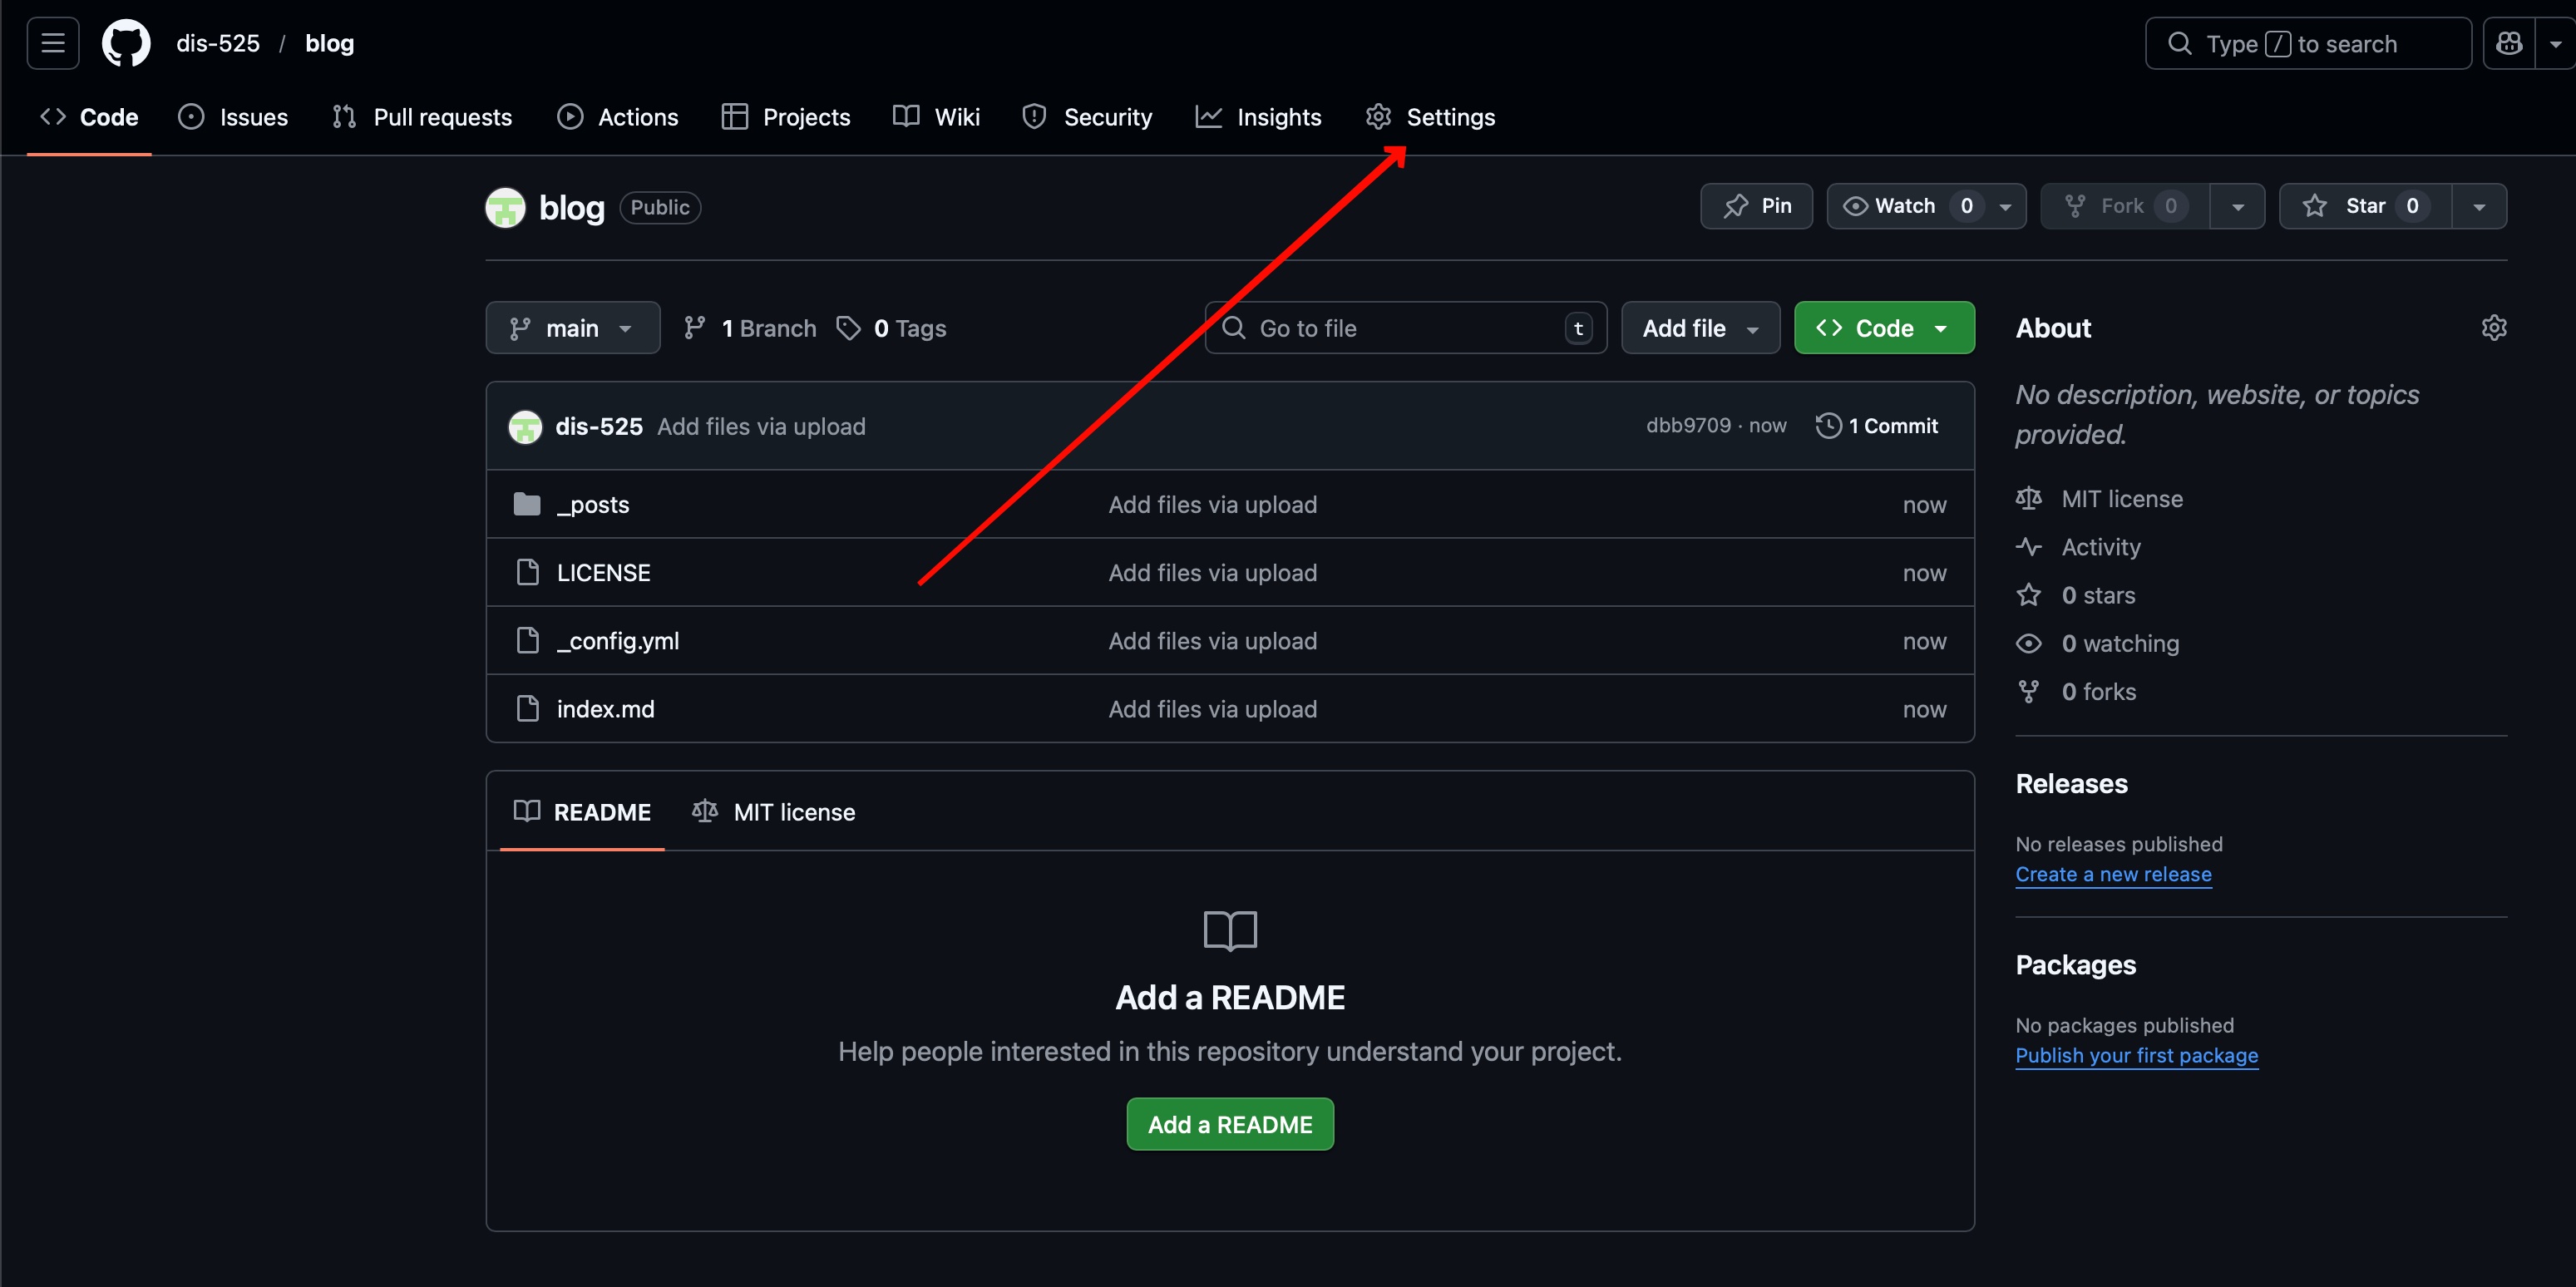
- You’ll see the following page. Hit
Settingsbutton.
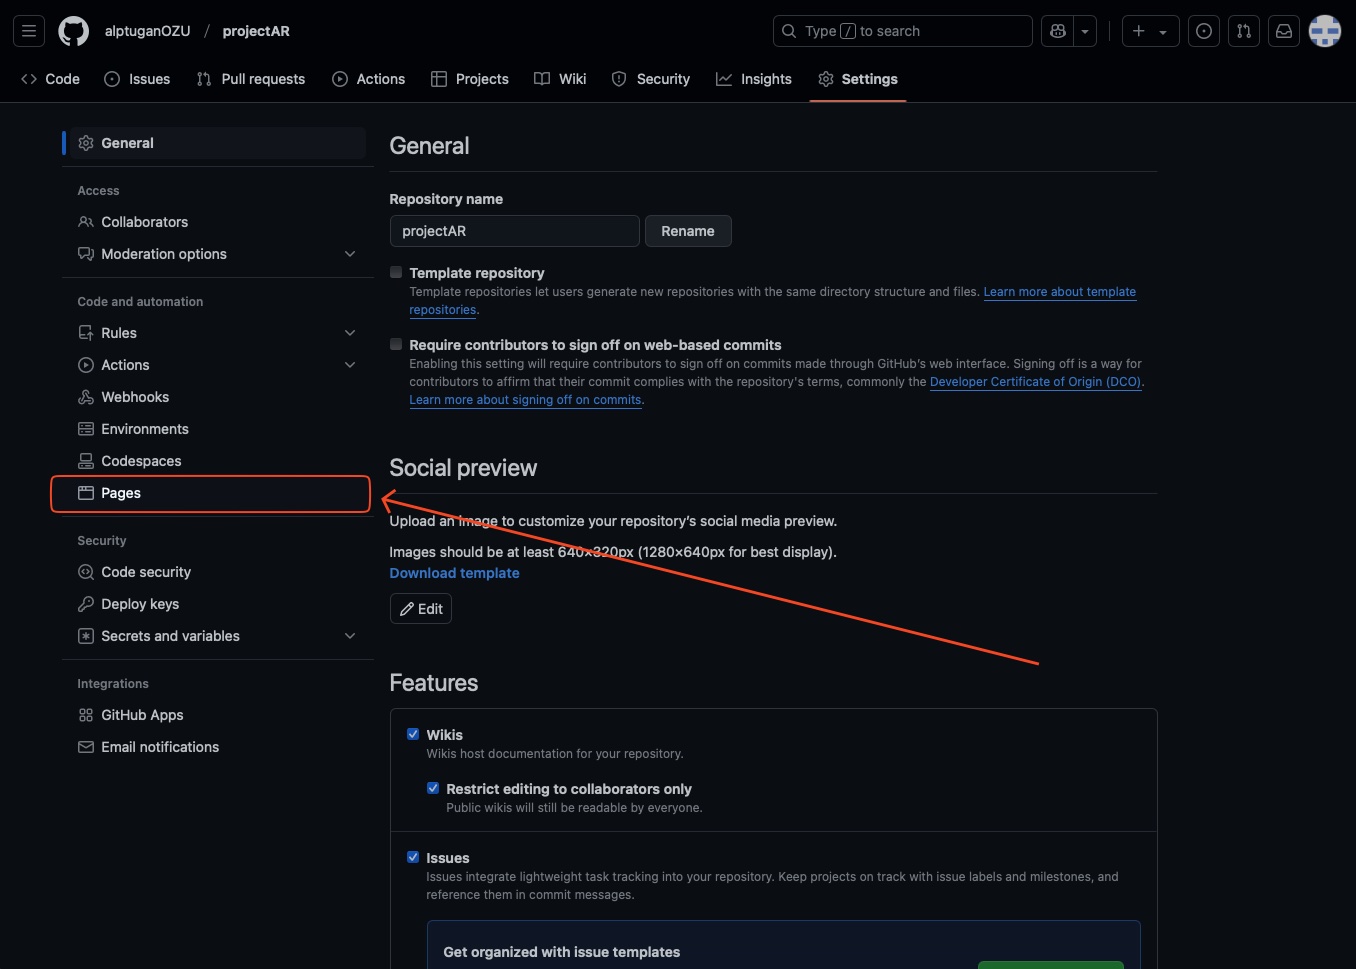
- Navigate to left sidebar menu, and select Pages menu.
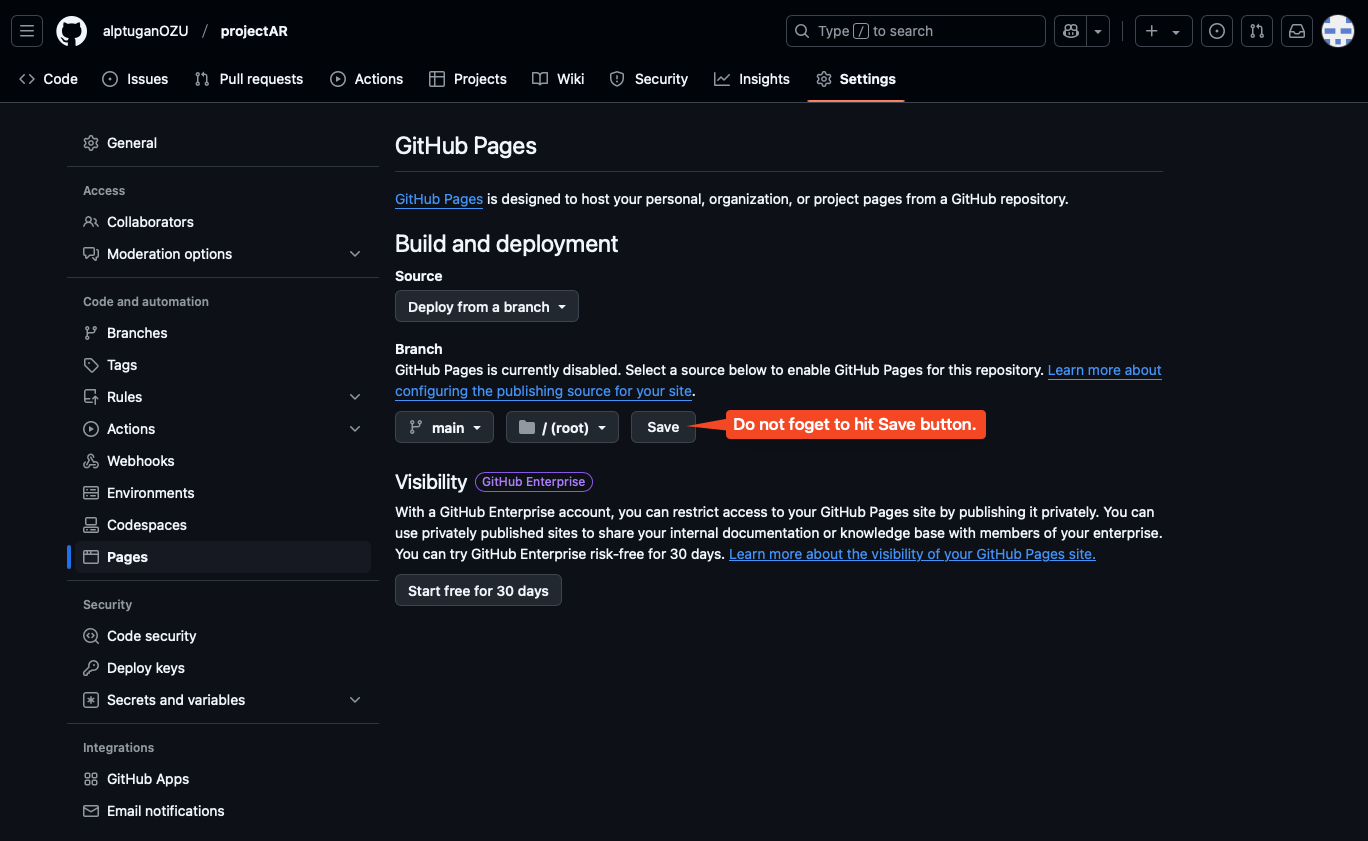
- You will see the title Branch. There is a button called None, click on that button and select main and click Save button to proceed. This action will publish the repository as a web application to the public internet with a custom domain.
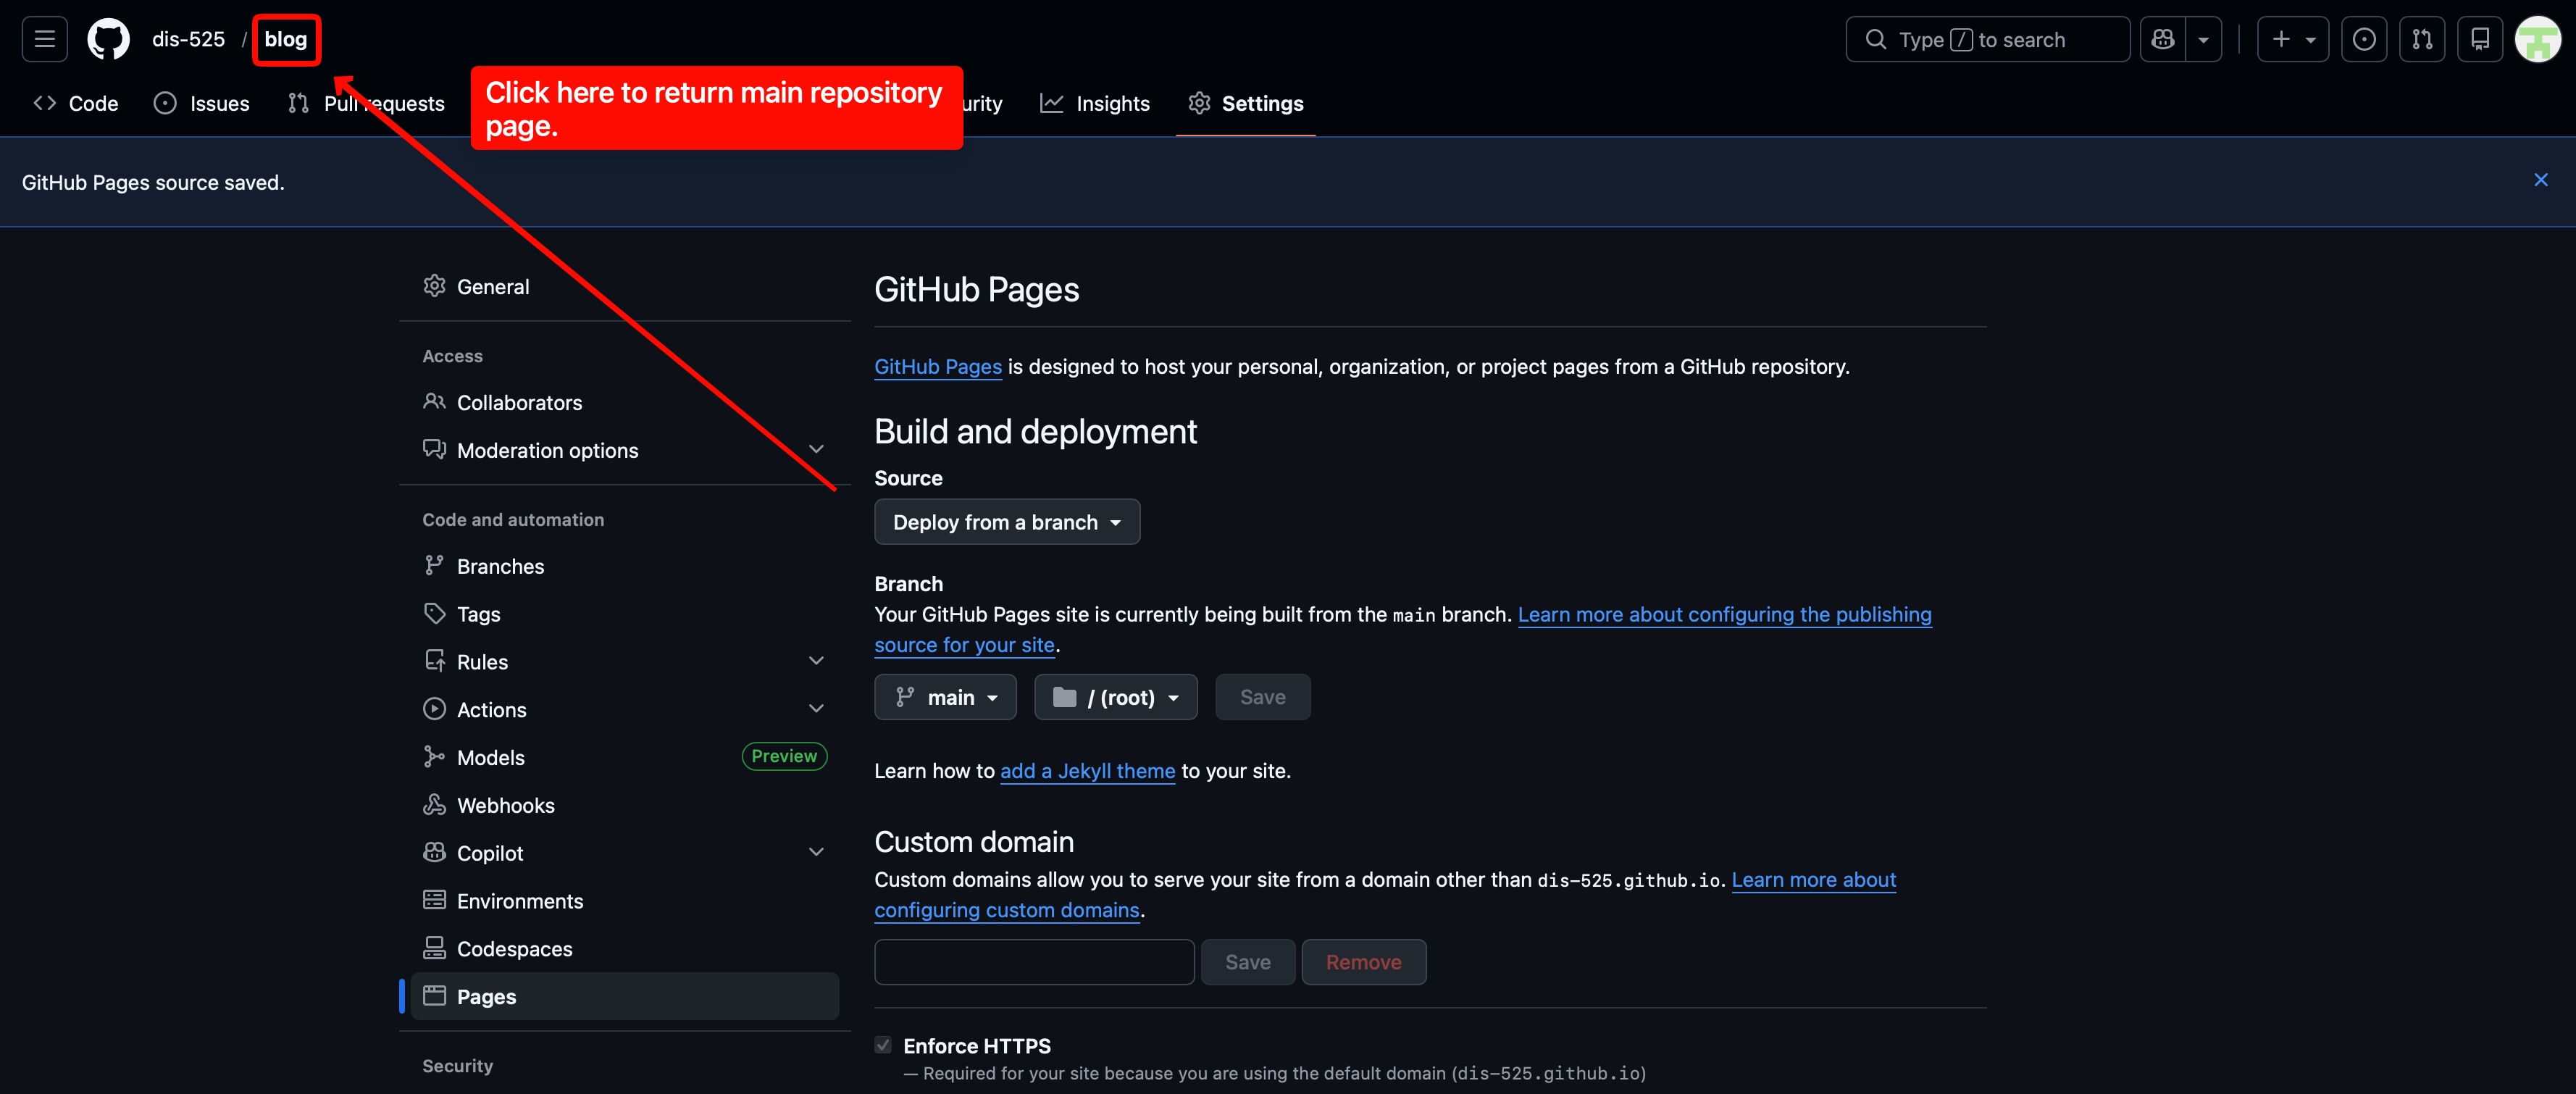
- Now wait few minutes, Github handles all of the technical stuff to deploy your blog page. Return to repository page.
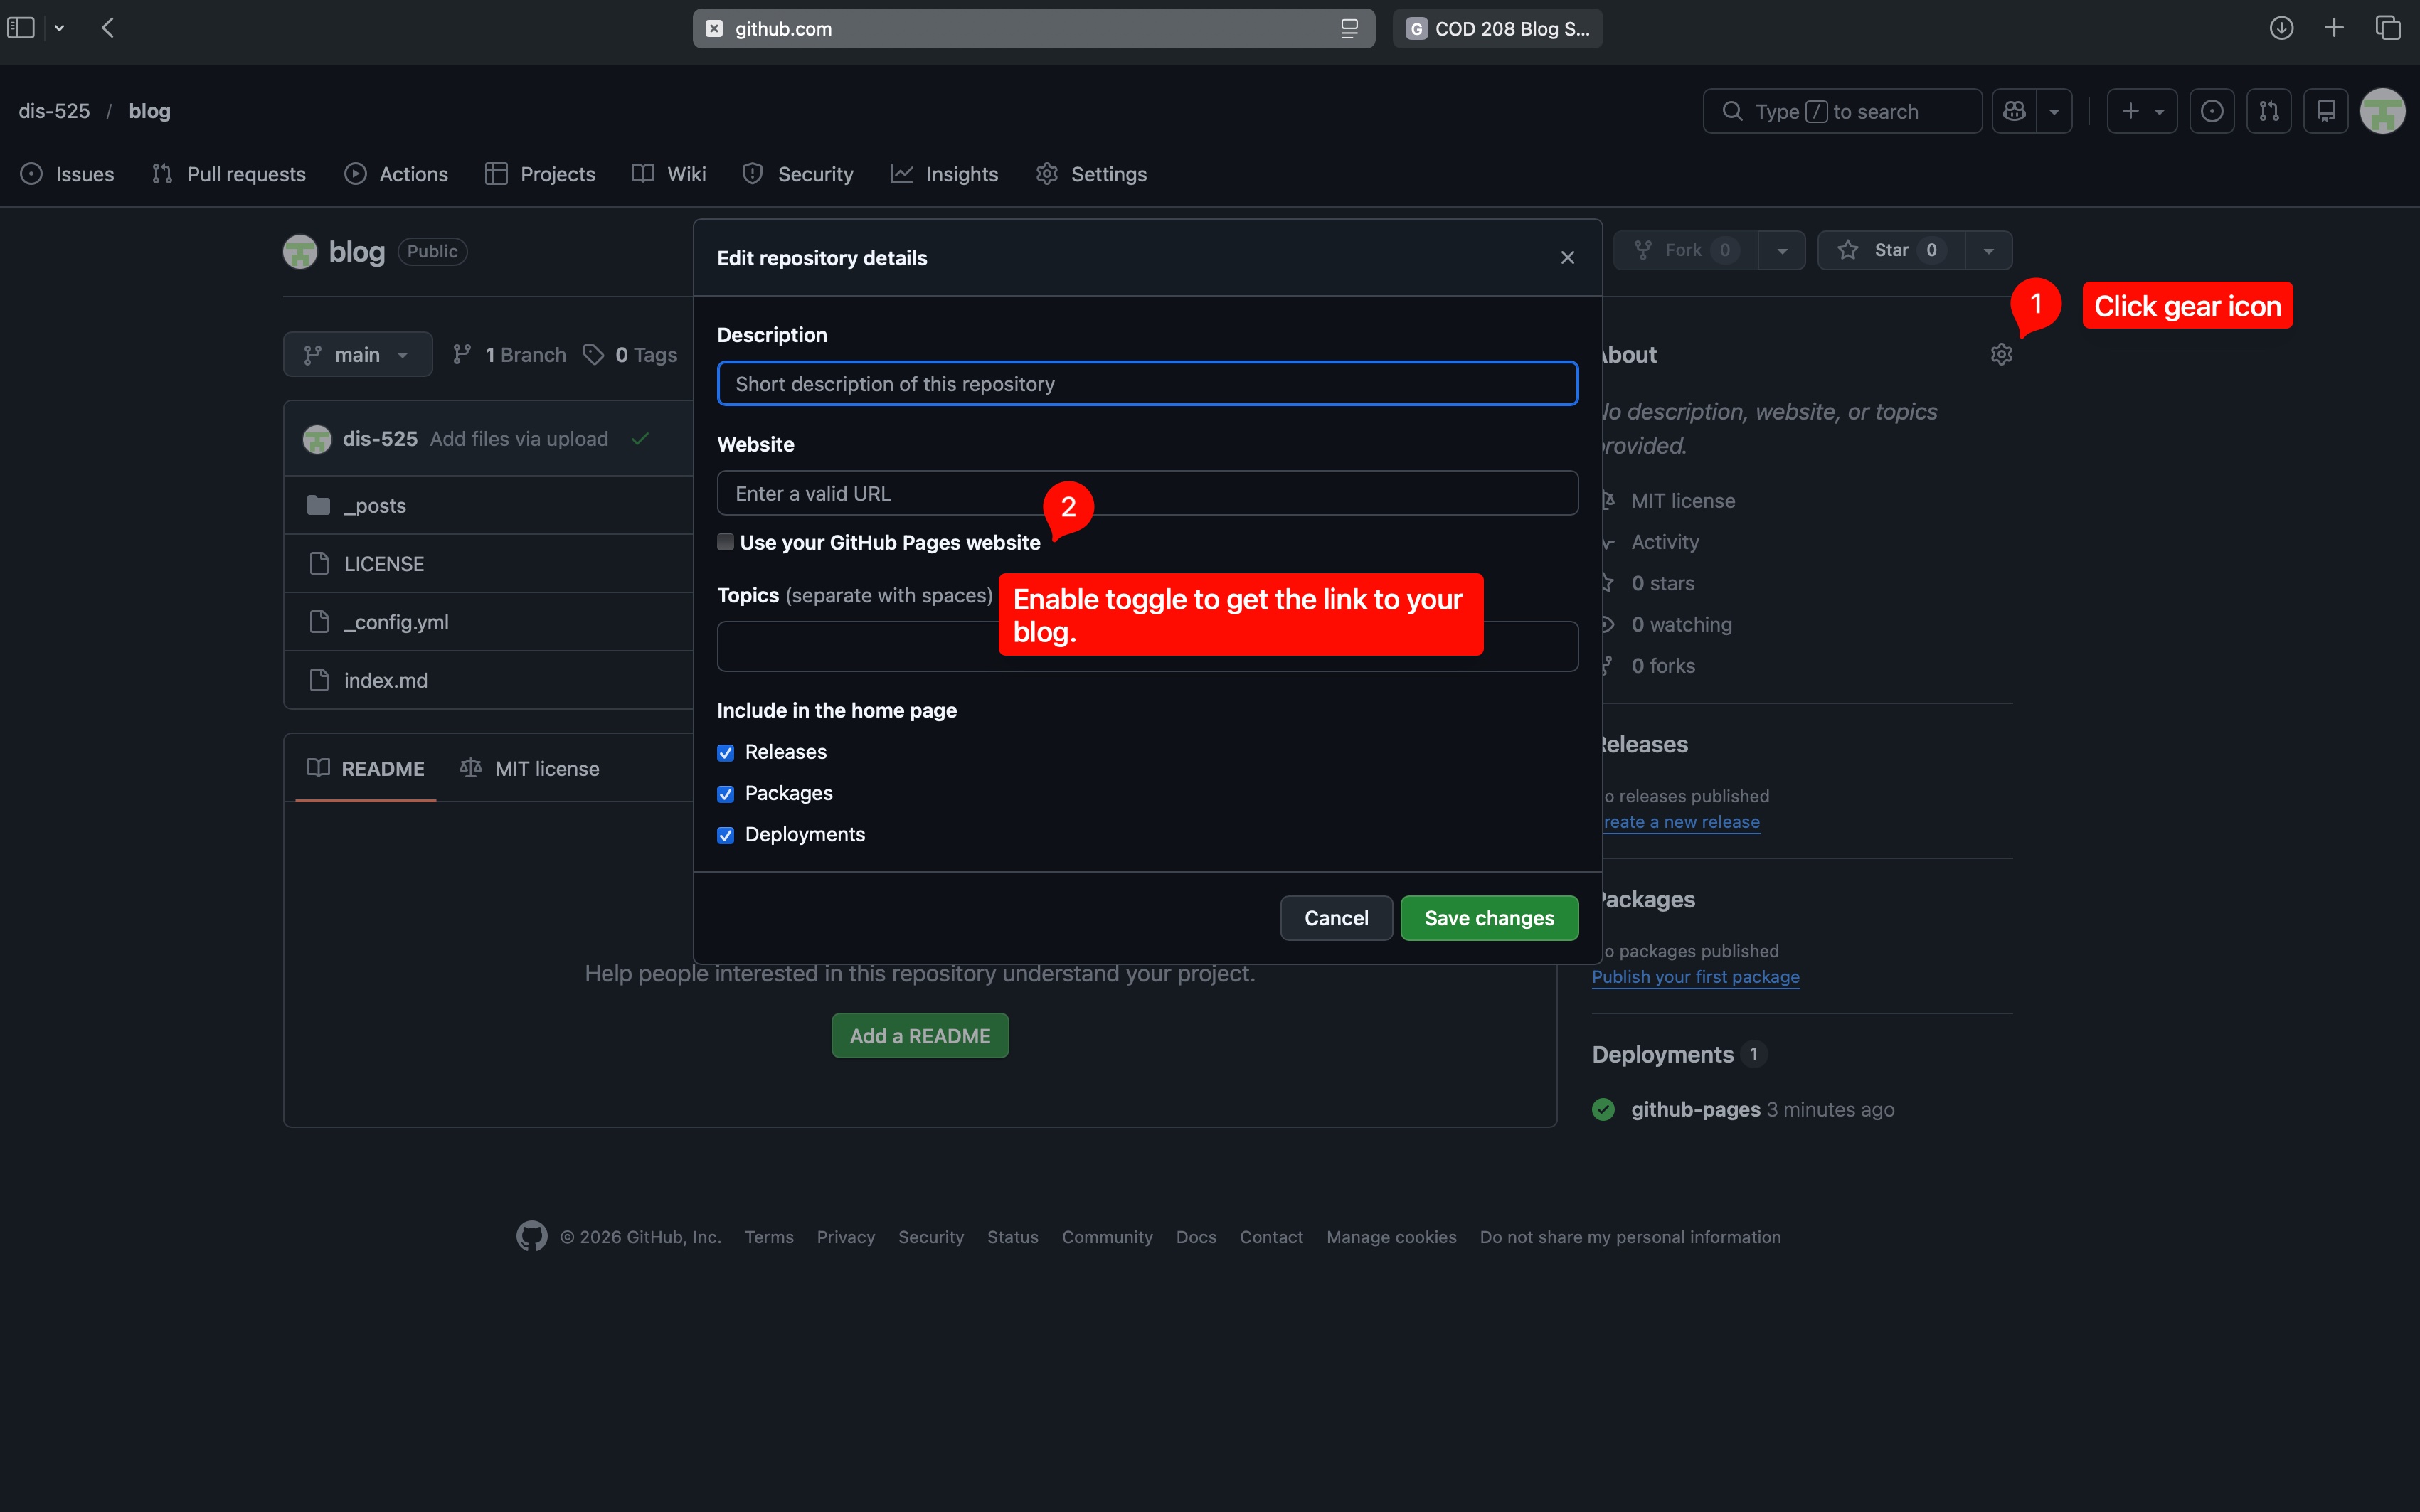
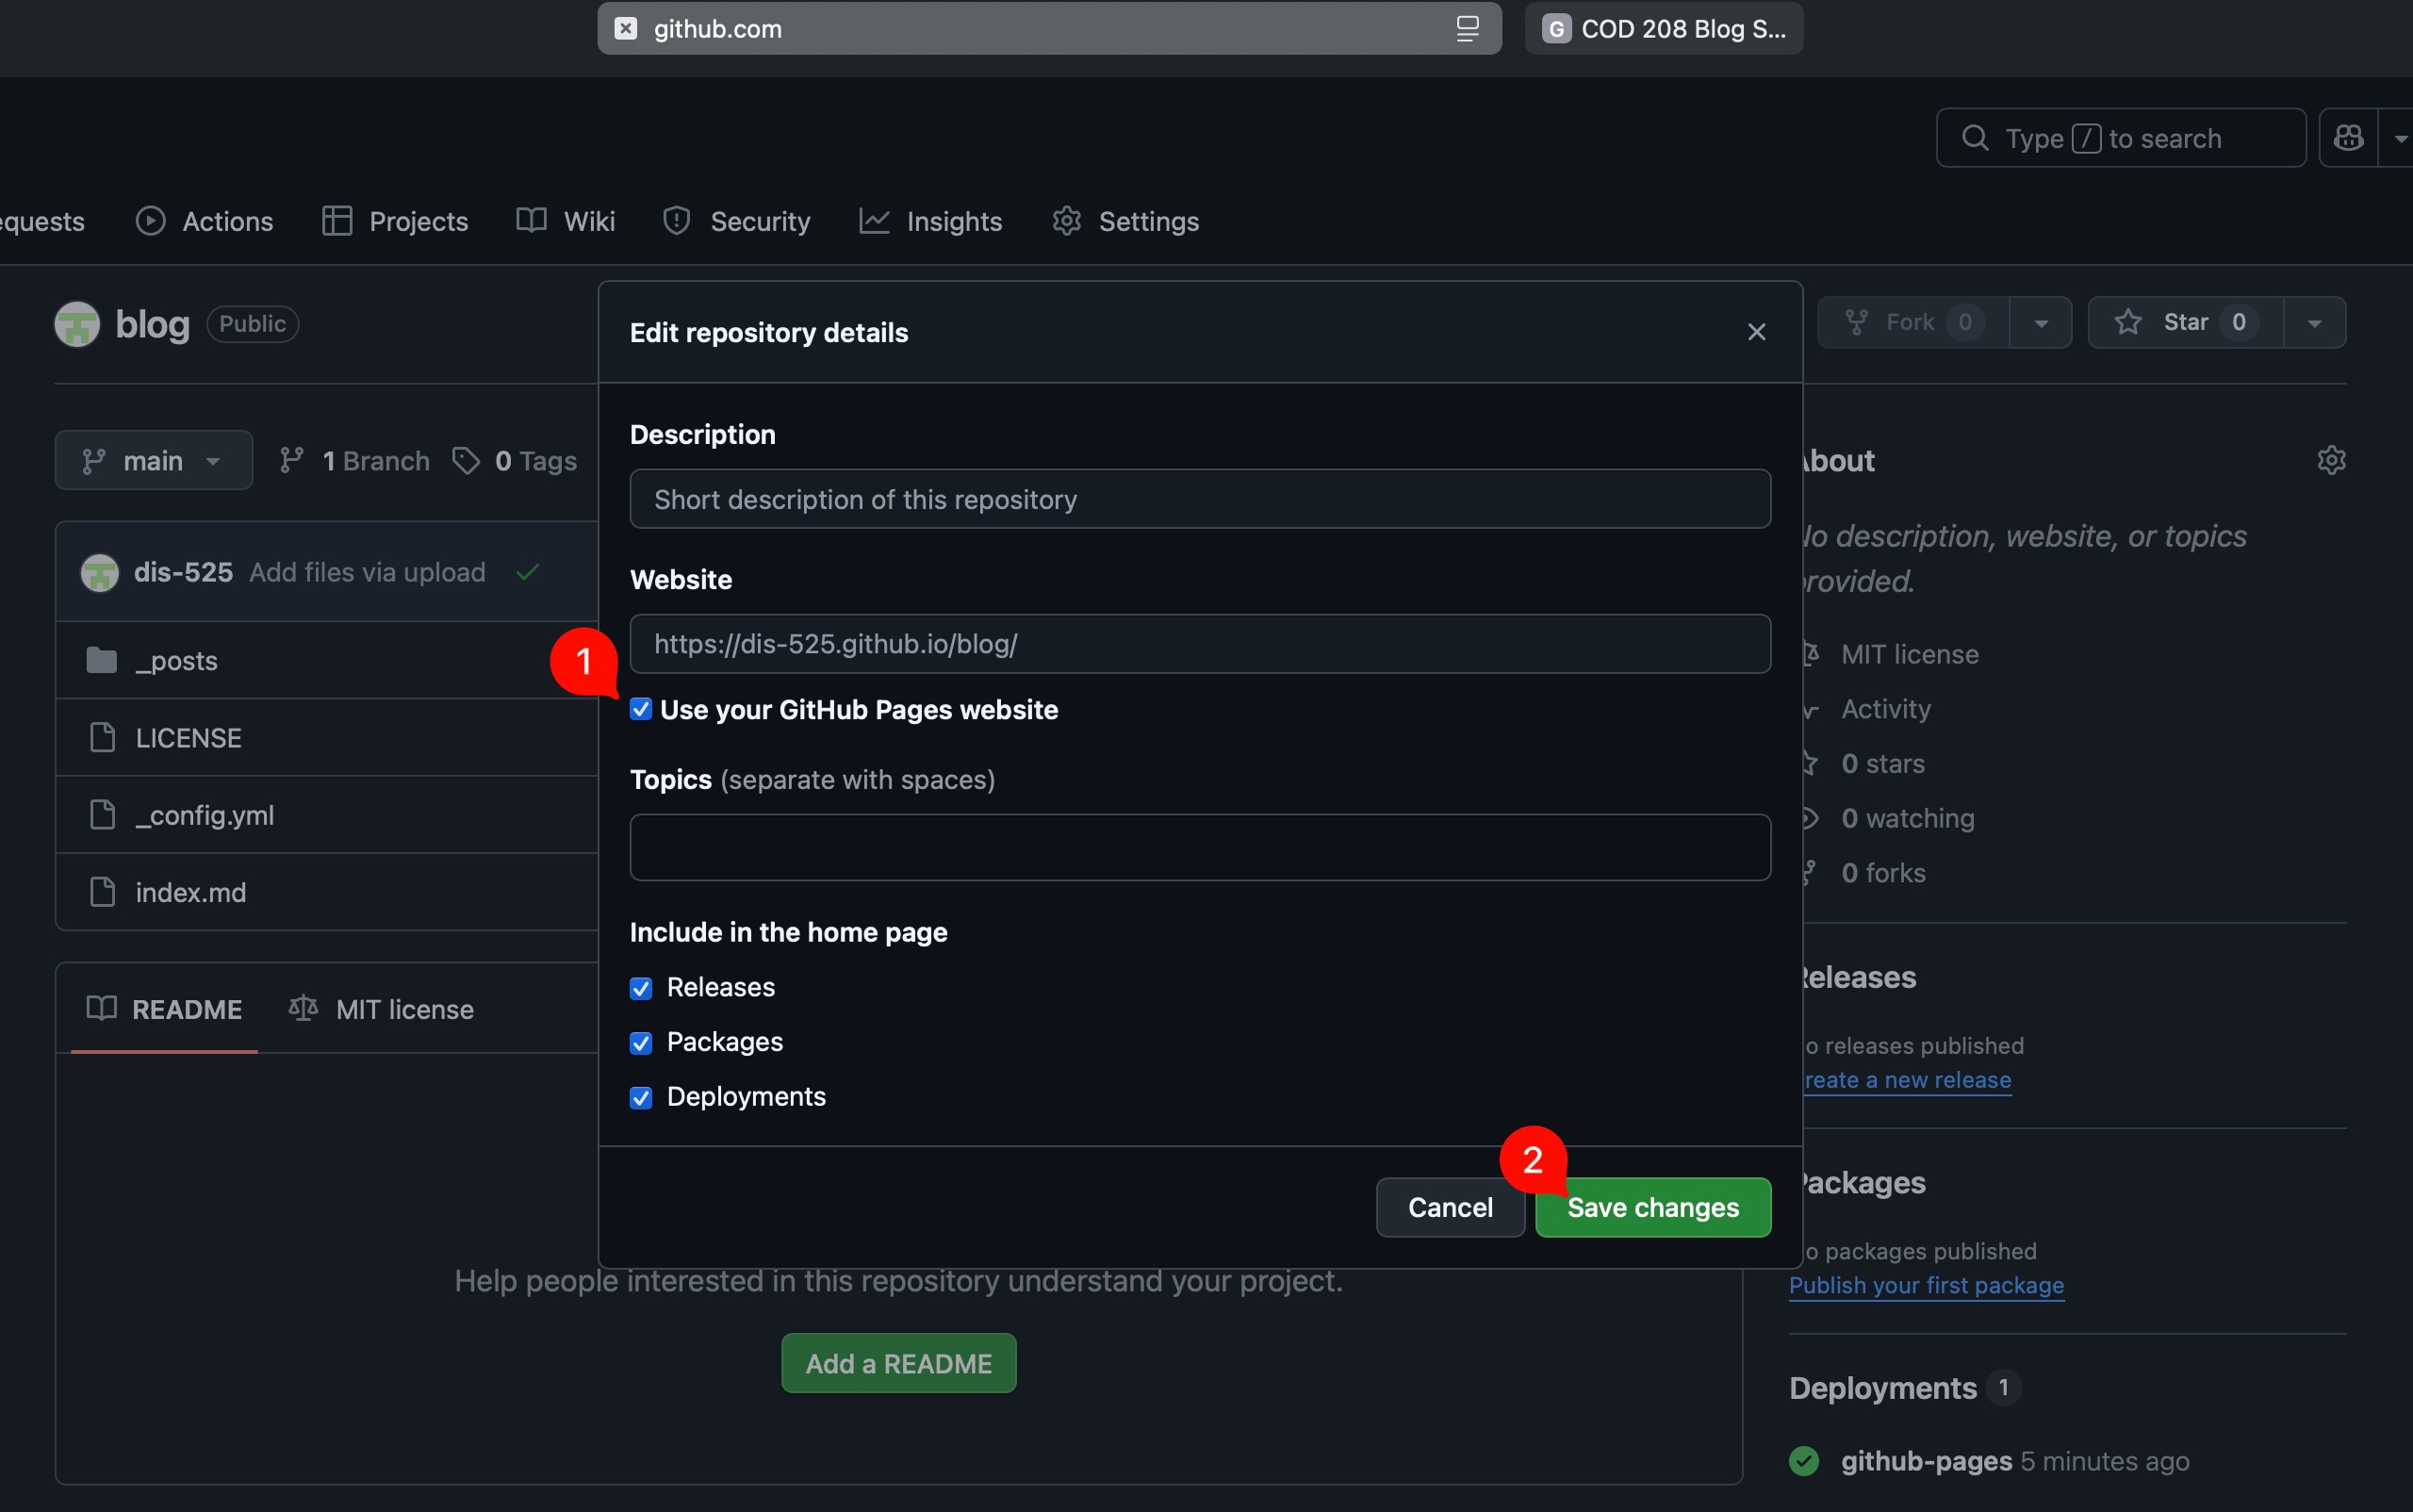
- Get the link to your blog
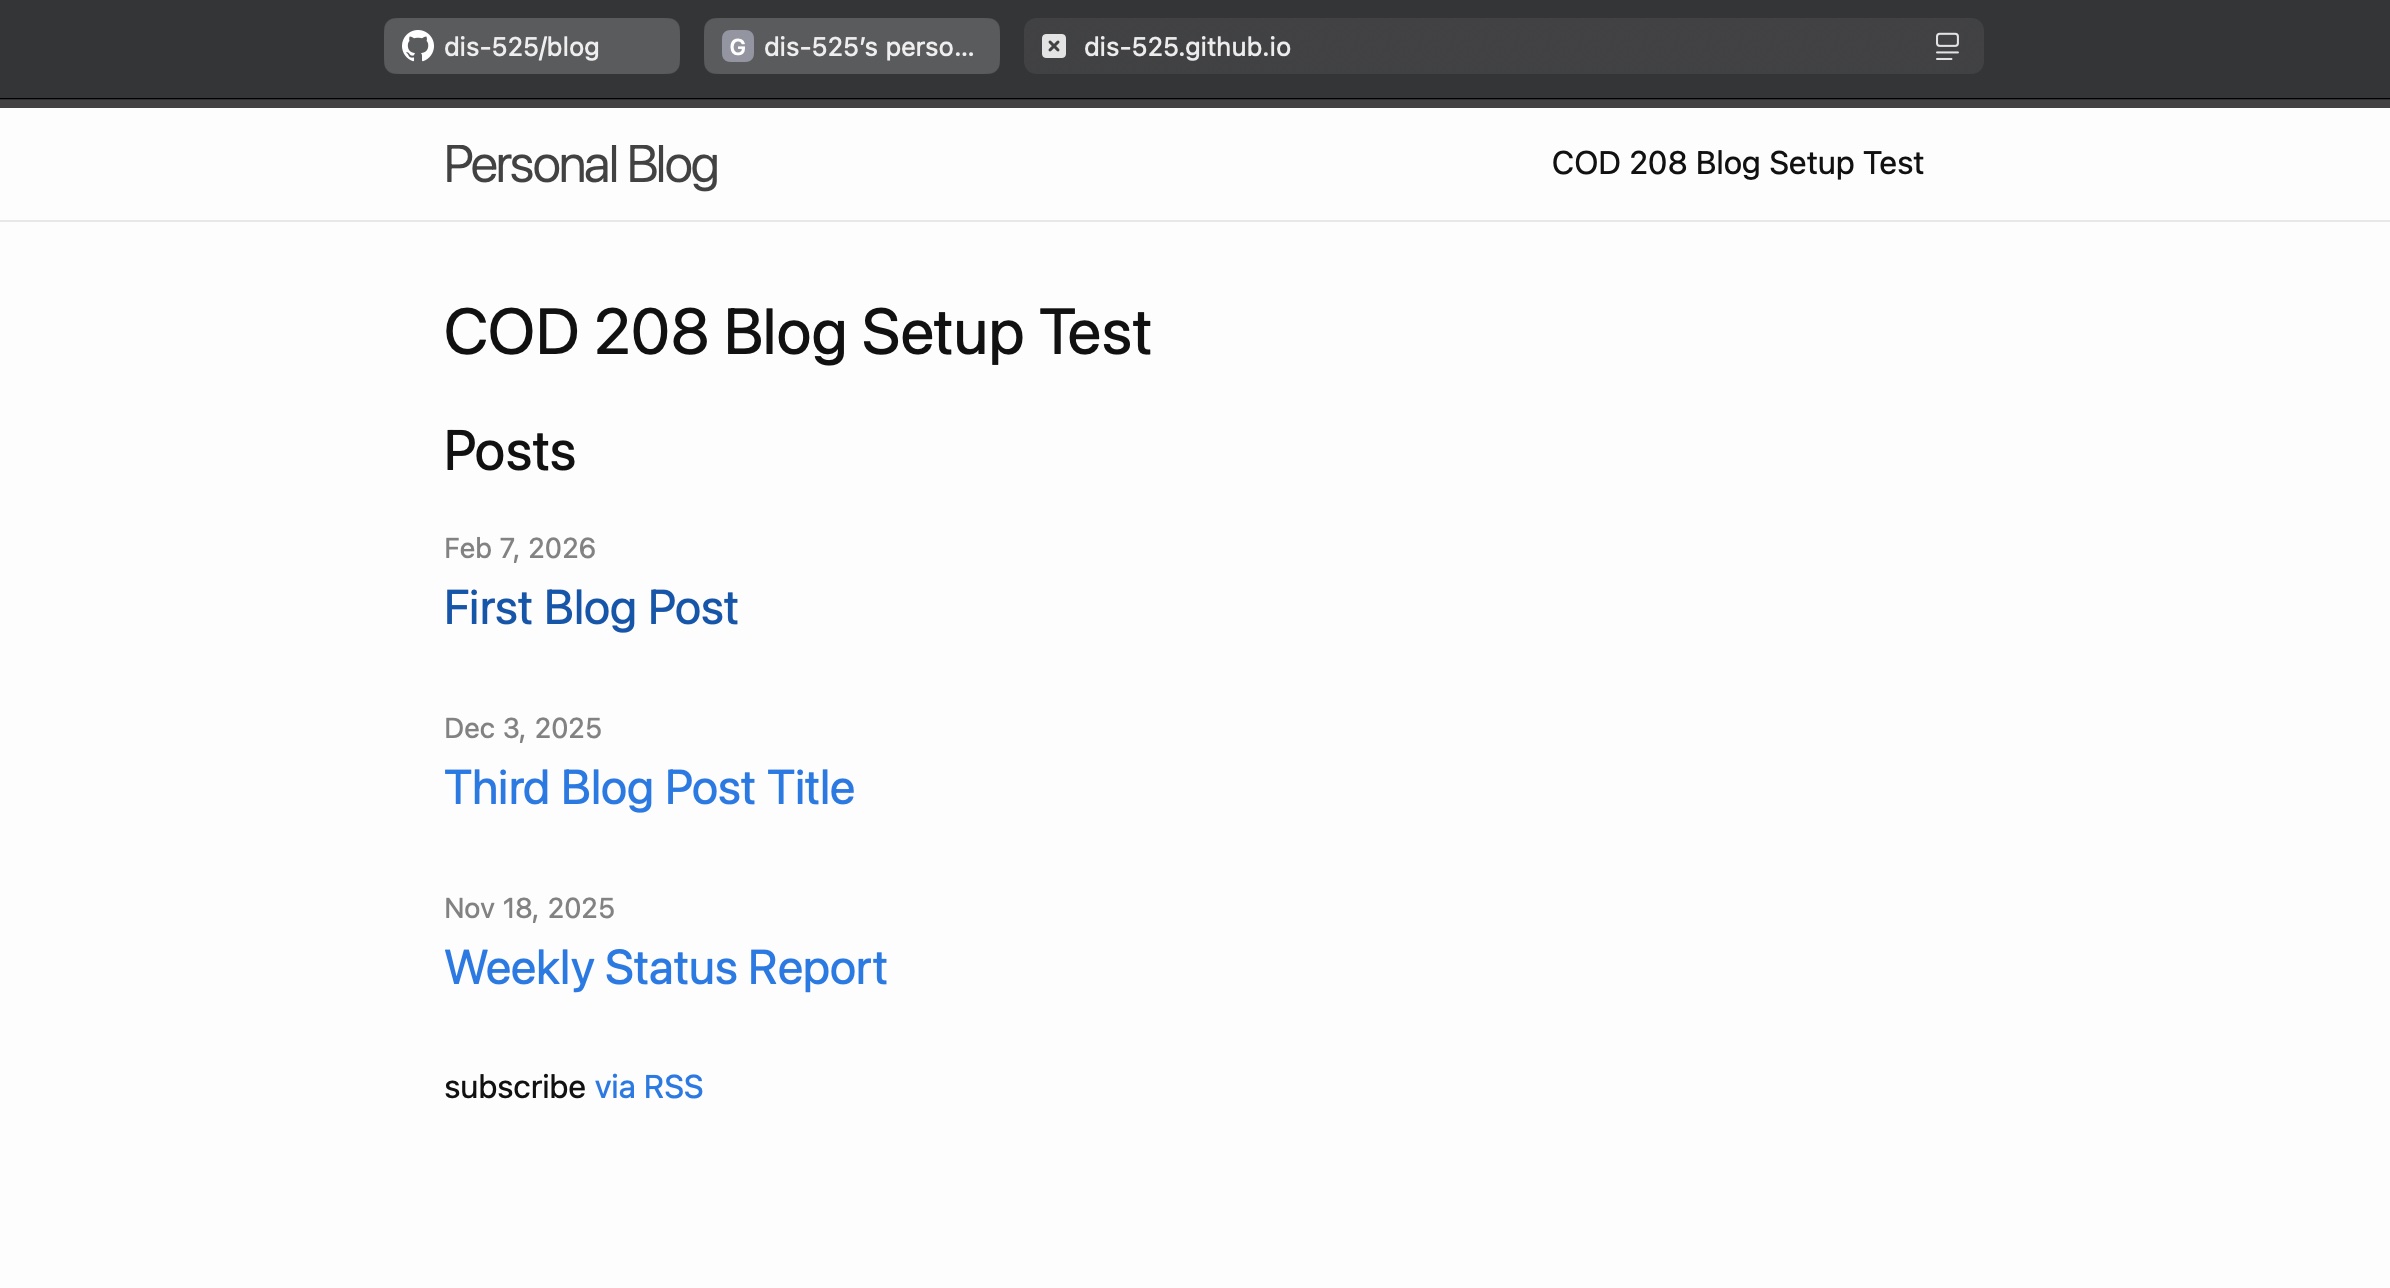
- Click the link and view your blog. It should look like the following screen shot.
How to Update the Blog Content
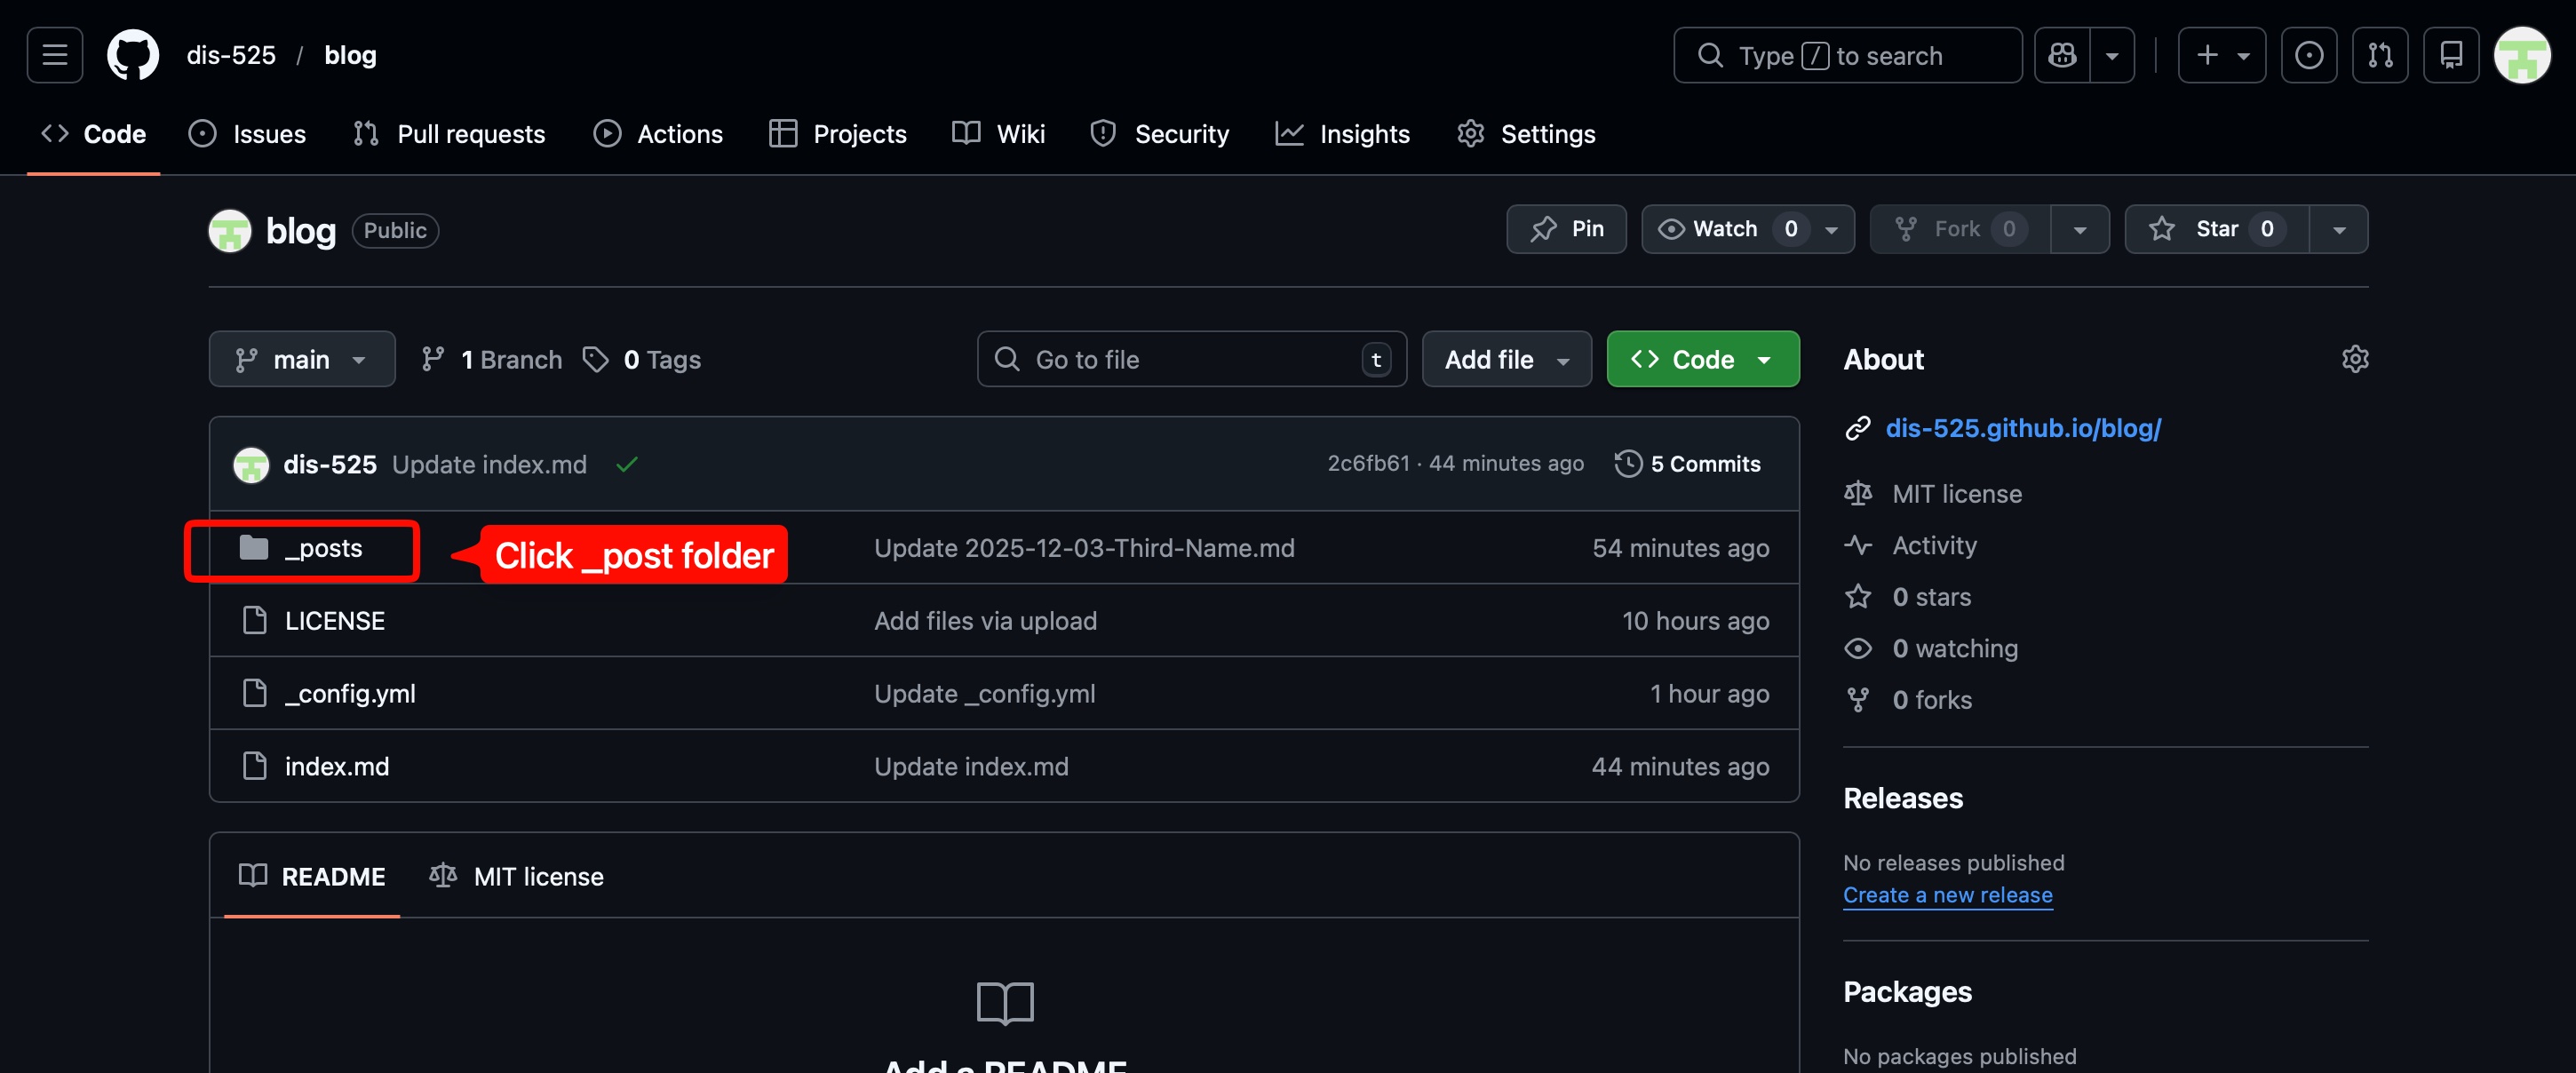
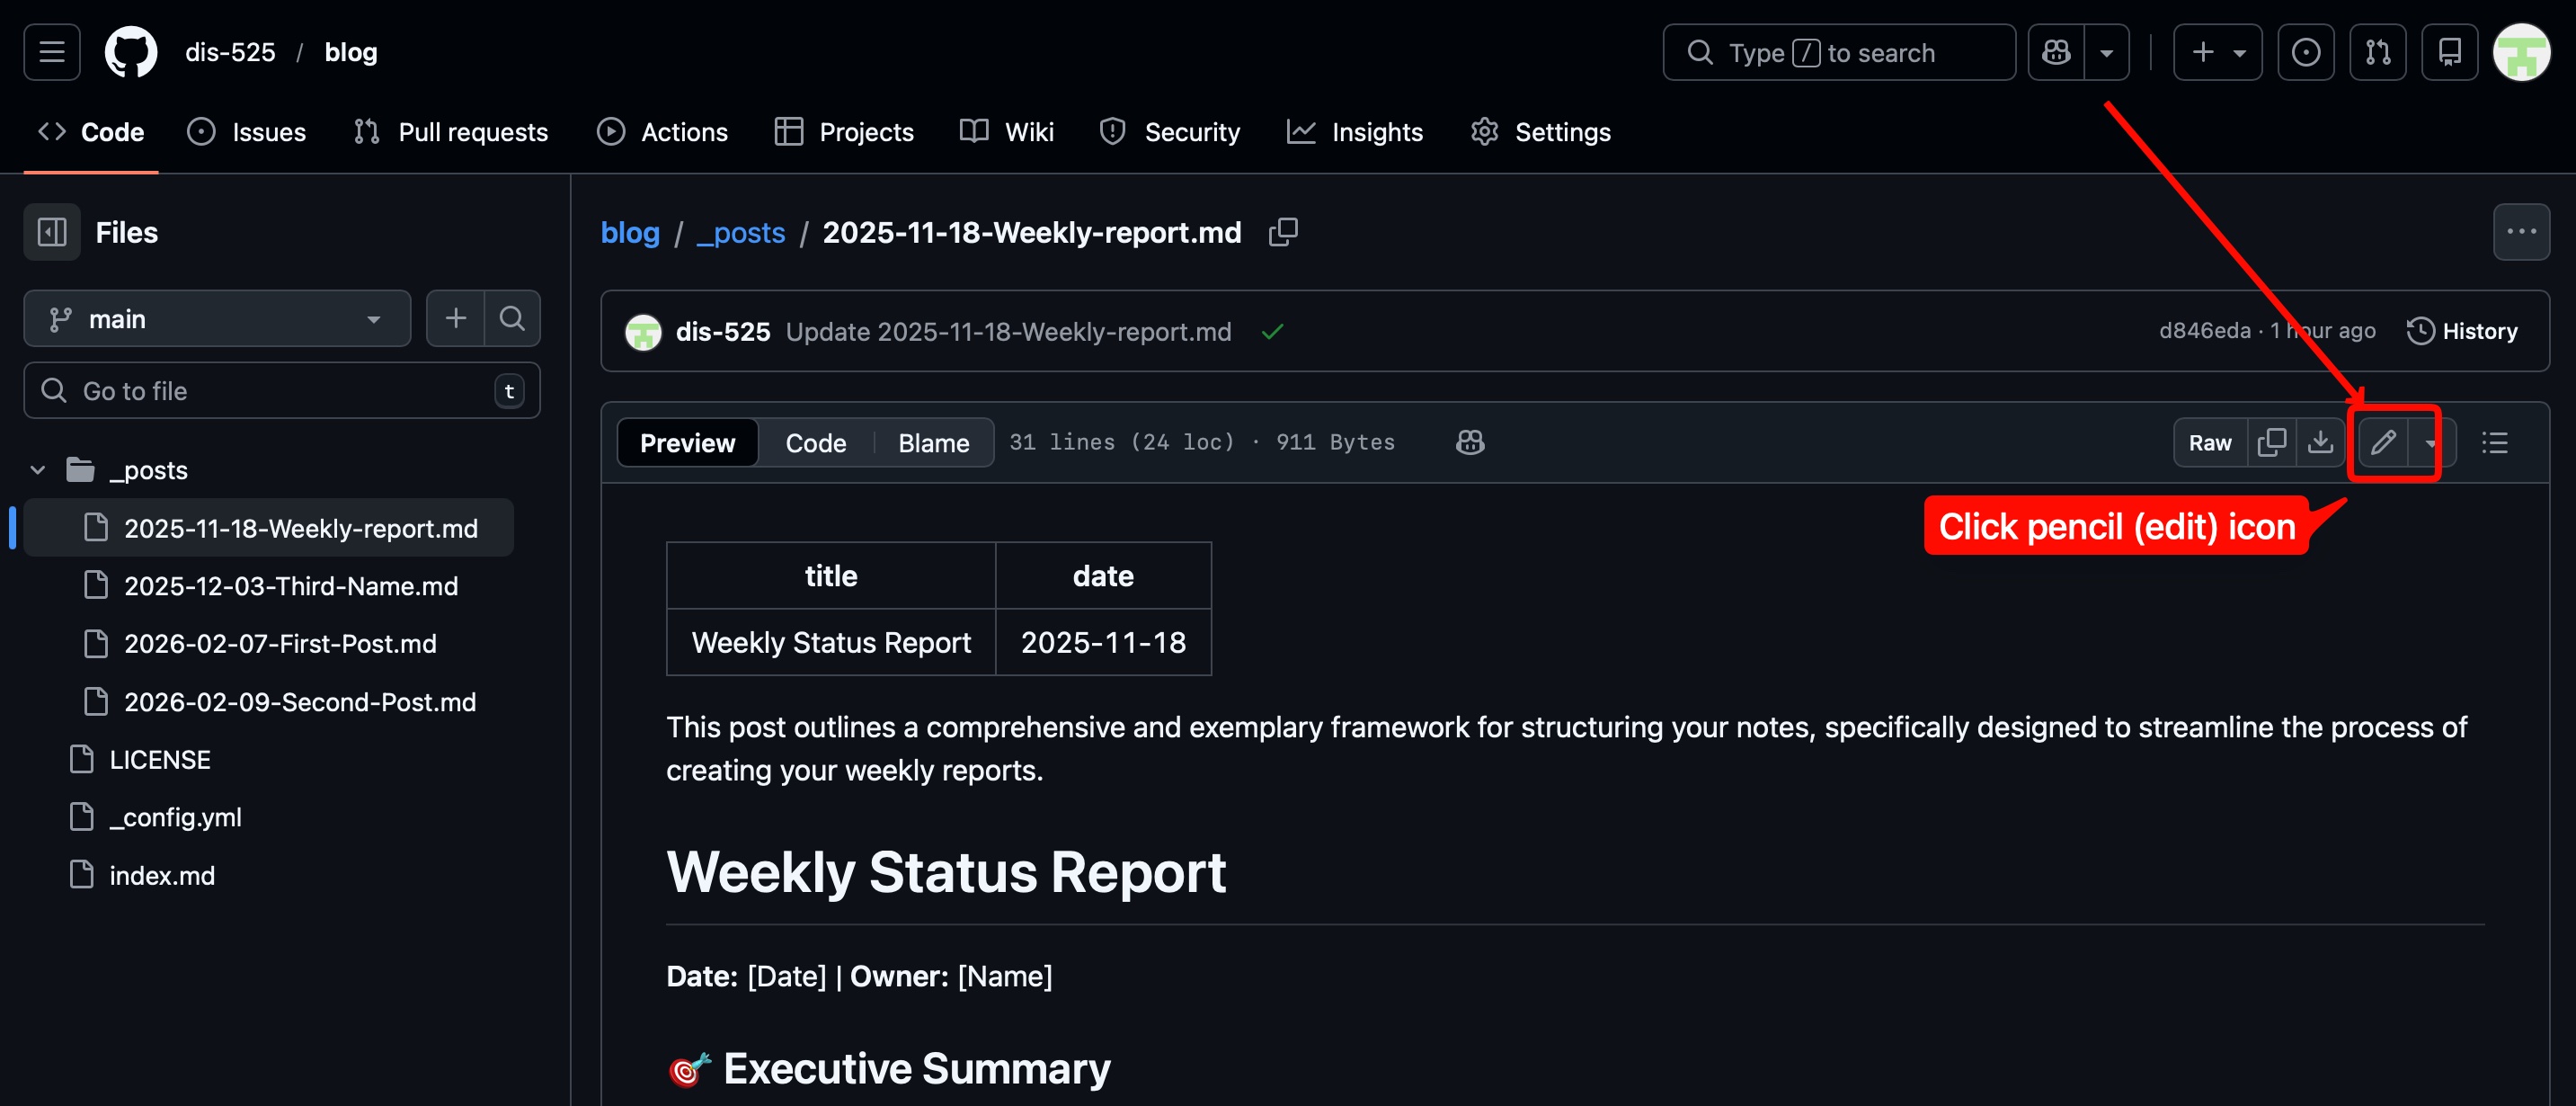
Goto the Github repository page and click one of the blog posts as follows;
Next, choose one of the posts.

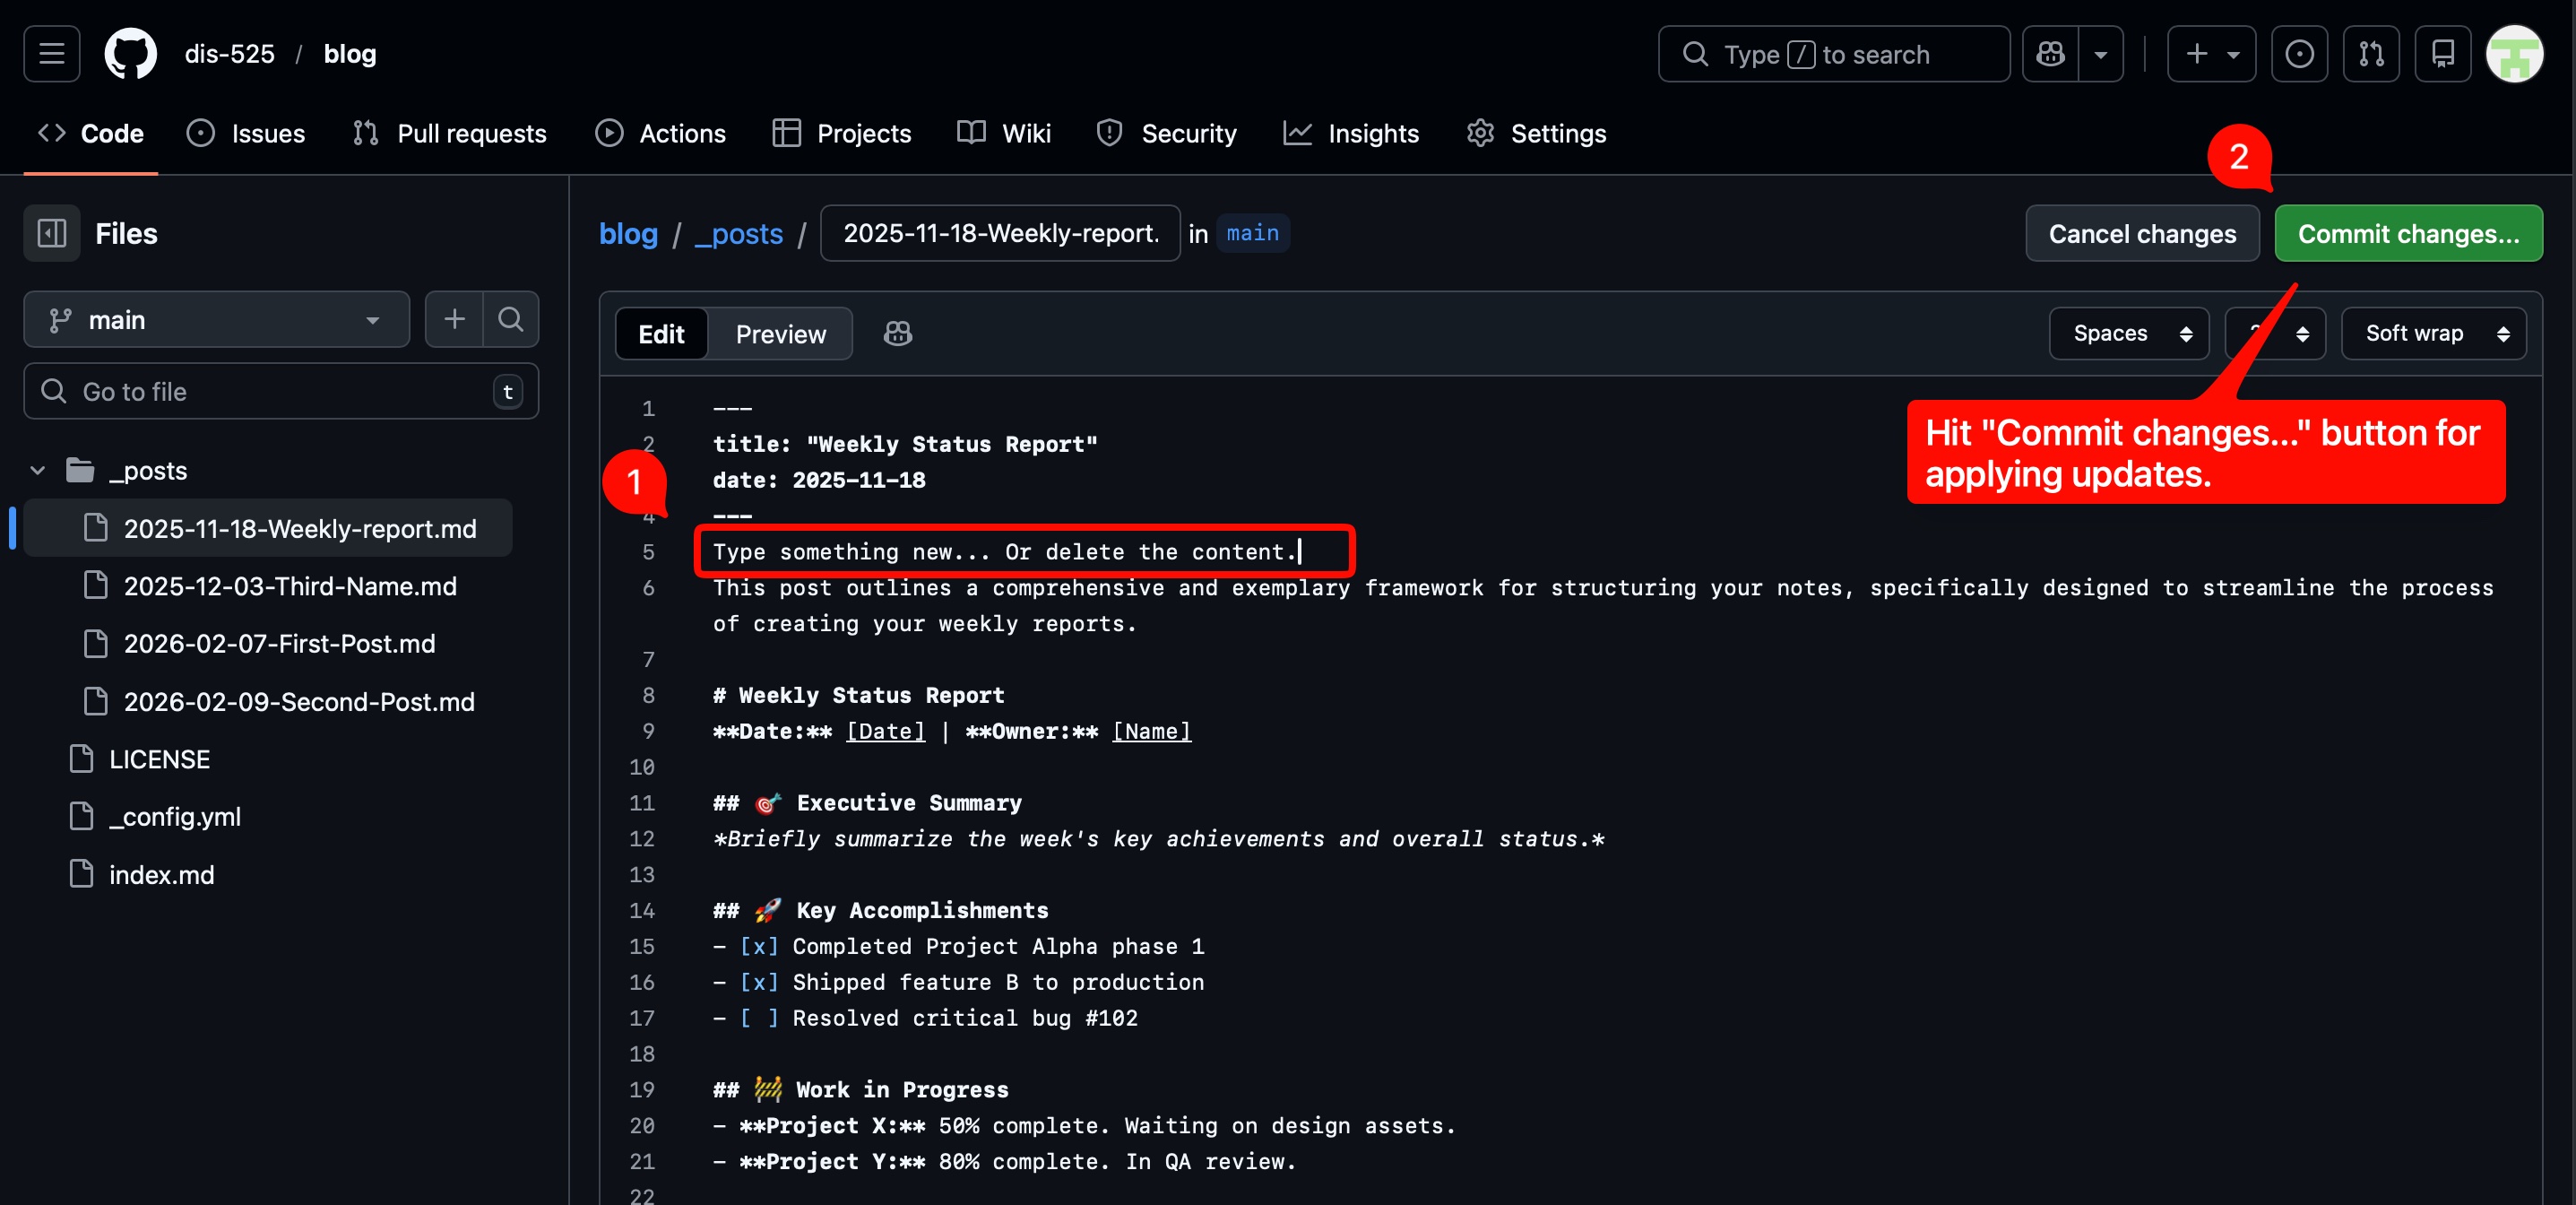
Hit the edit icon to start modifying the content.
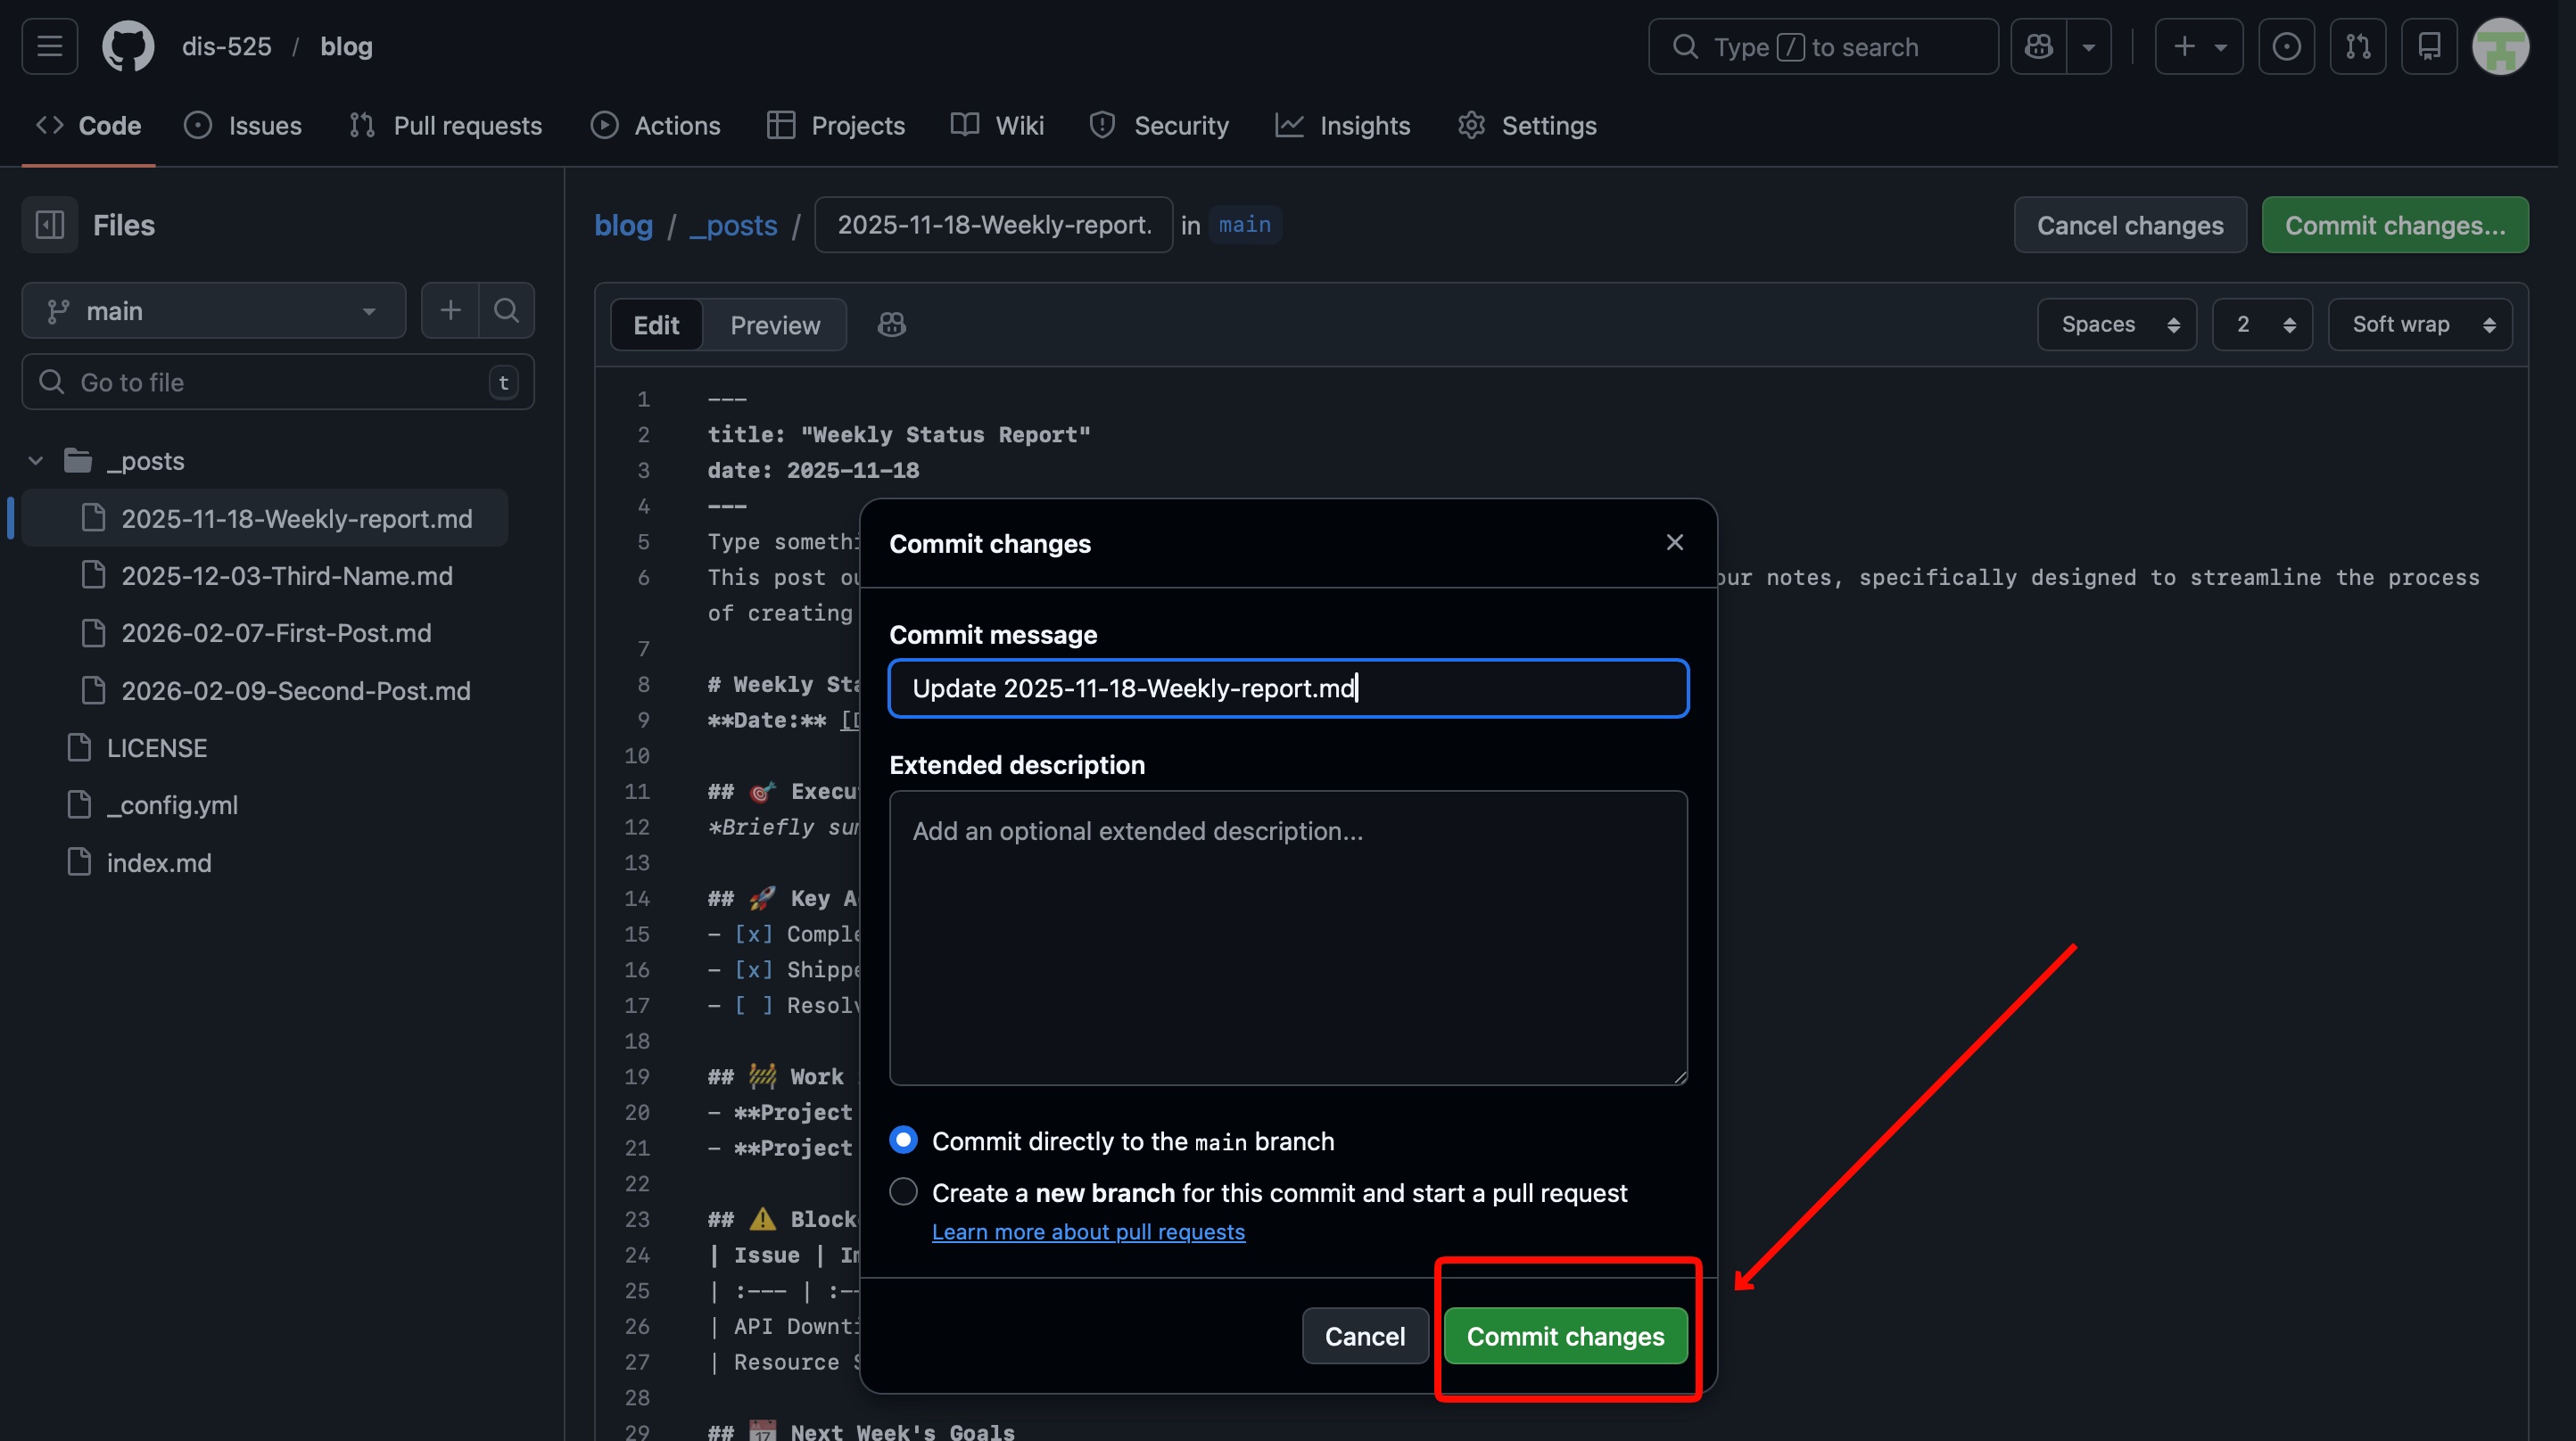
After you are done, click Commit changes... button to stage modifications.
Apply modifications.
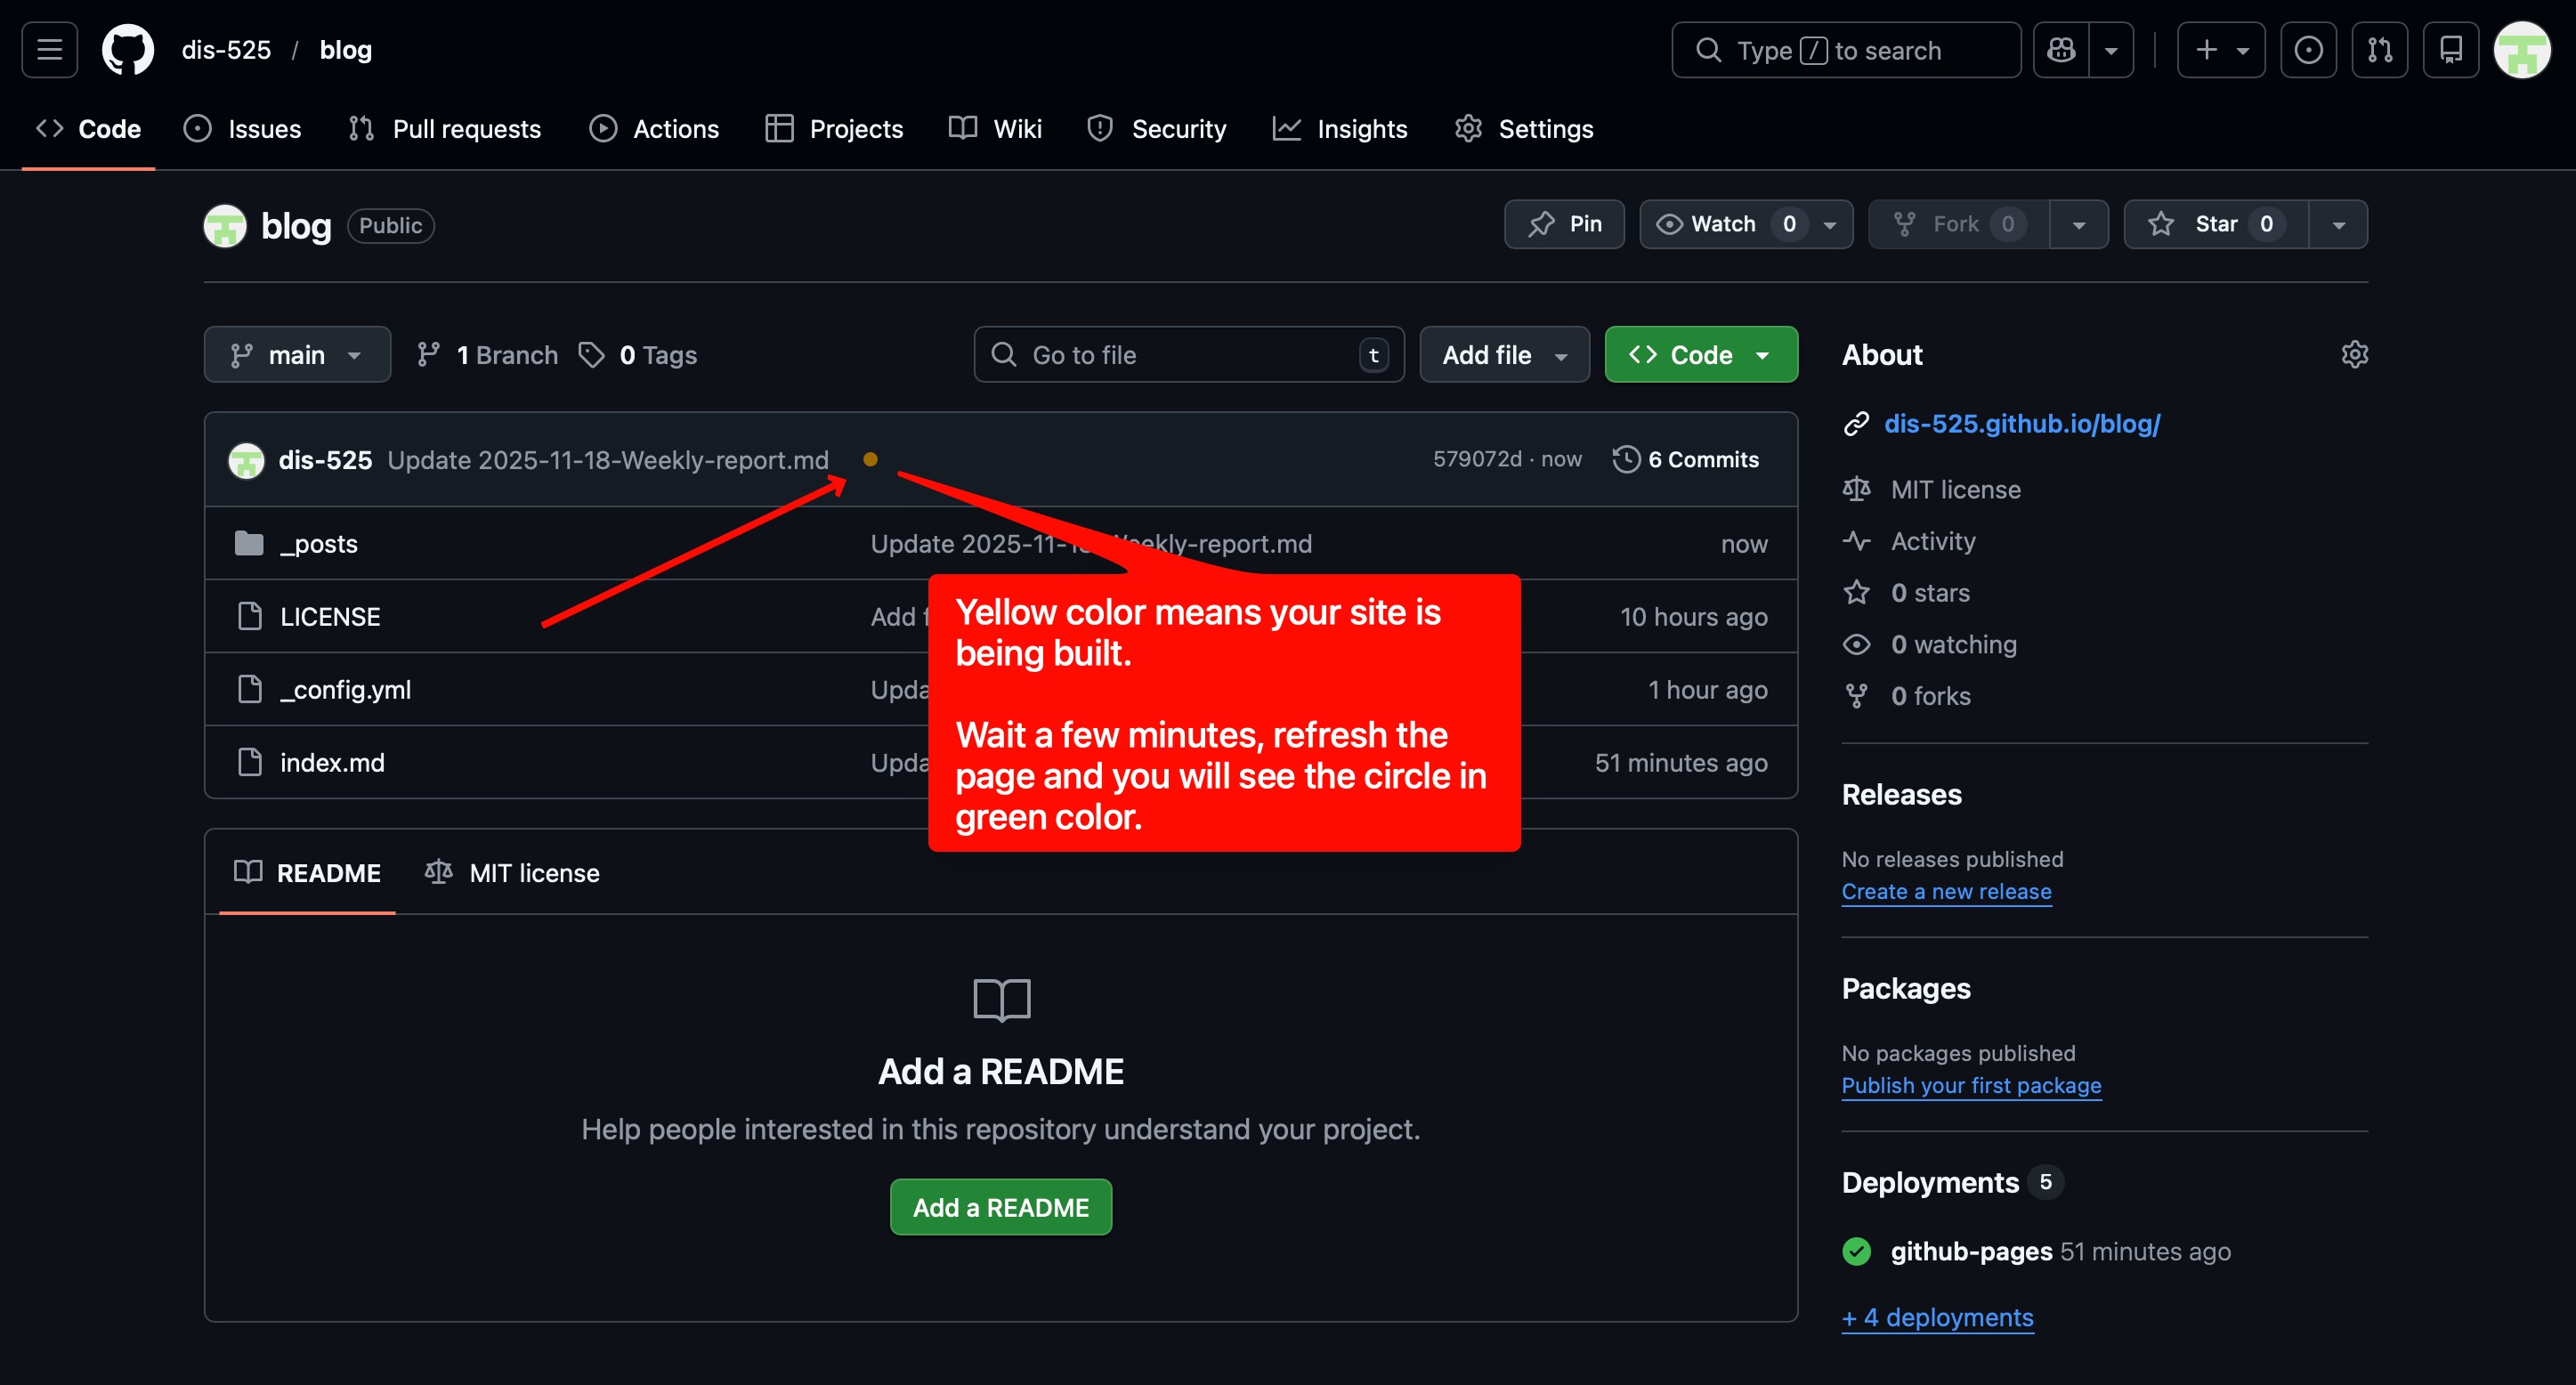
Goto root folder and you will see an orange colored circle. It means that Github is working in the background to apply your changes and deploy your blog page. Wait a few minutes and refresh the page. You will see a green ✅ check mark that means your changes are being applied and the site is online.
How to Create a New Post?
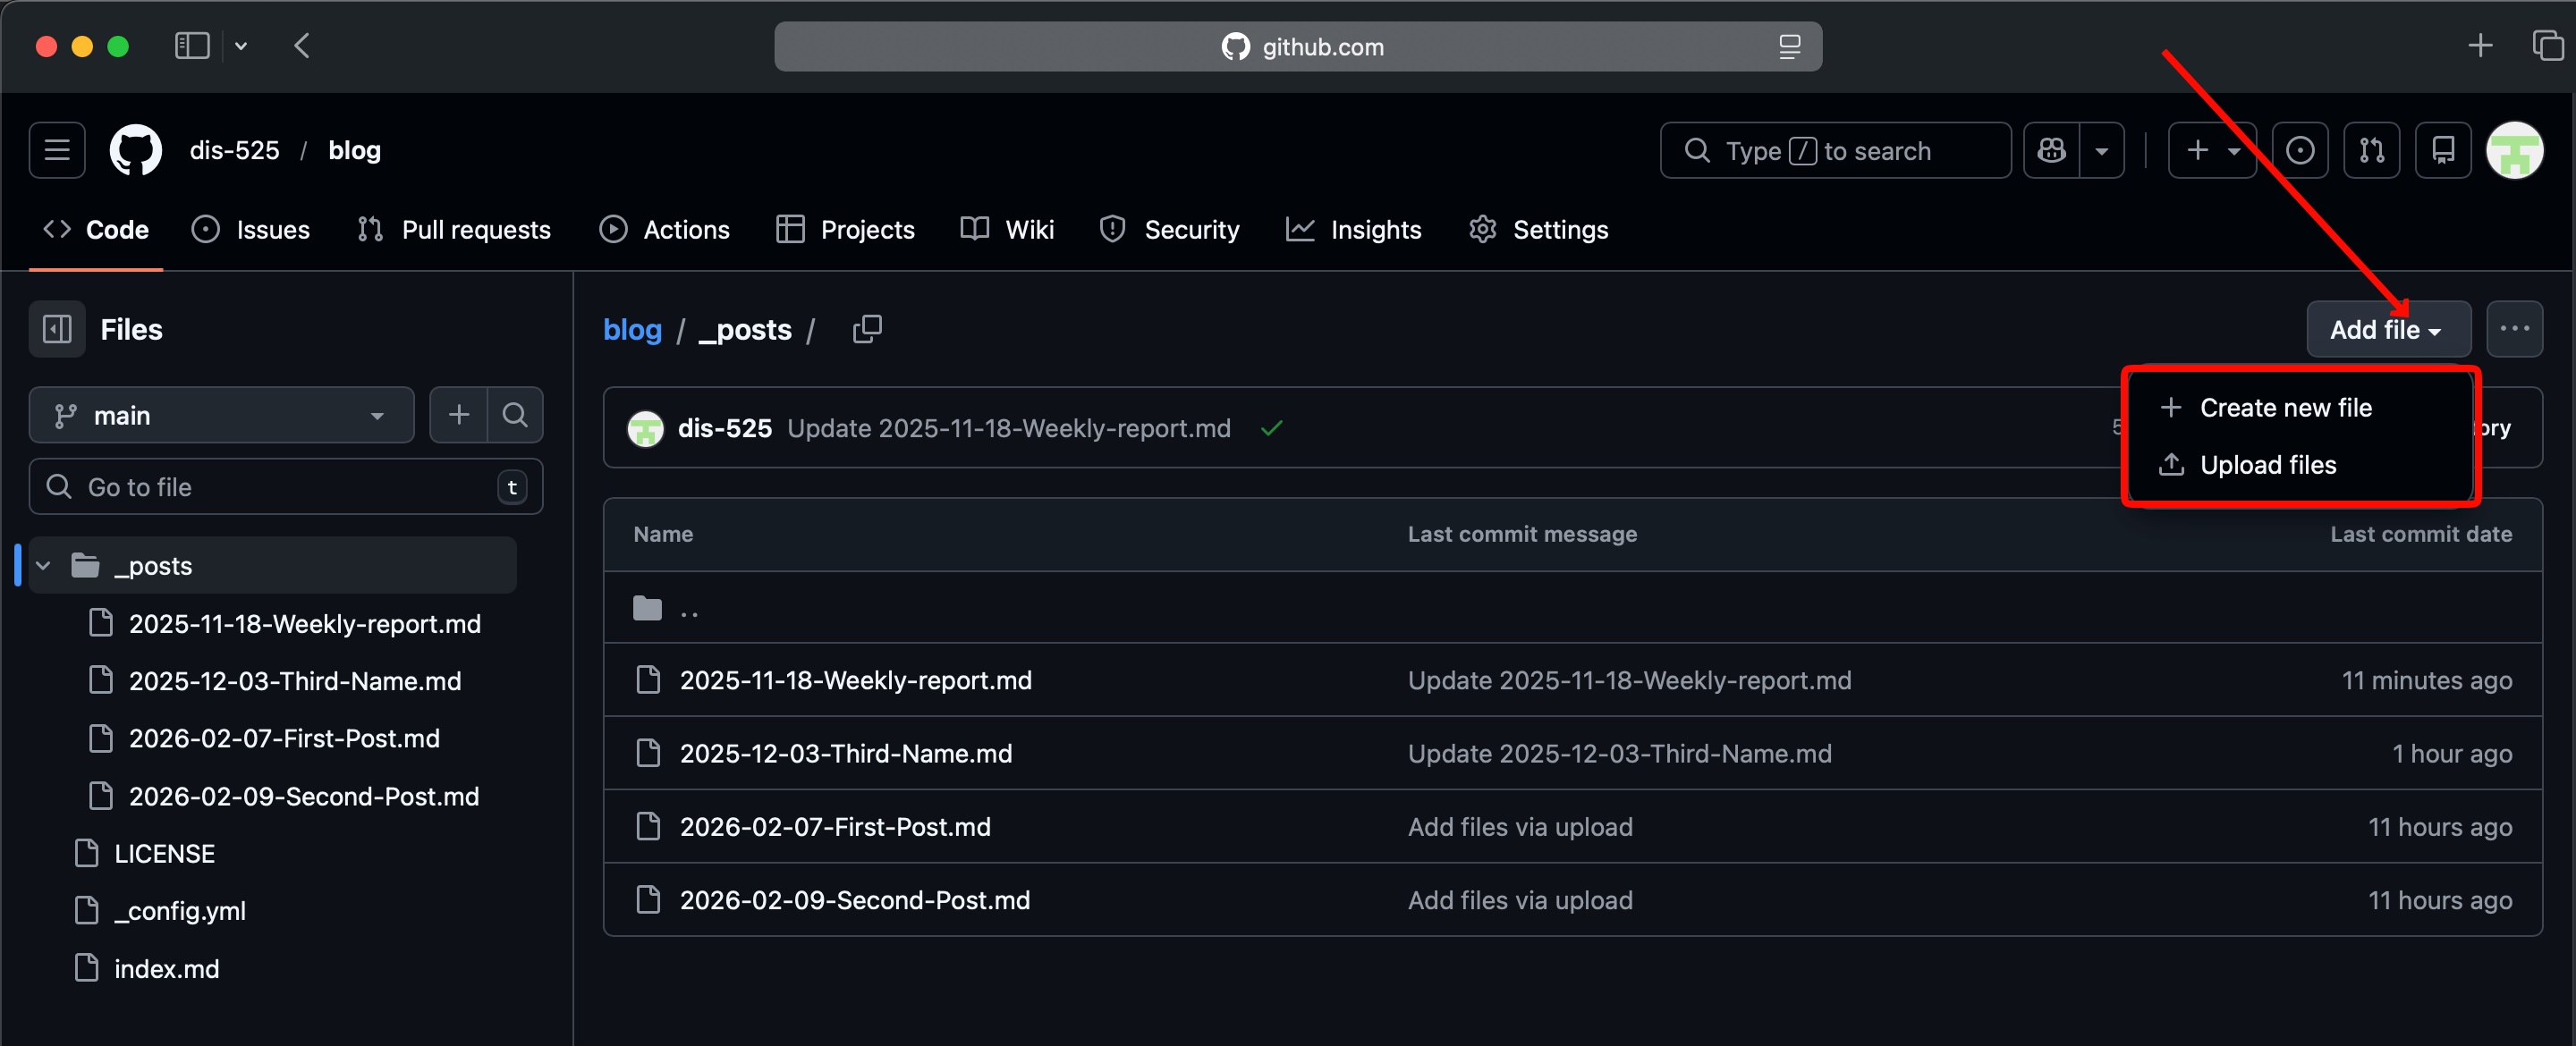
Goto the Github repository page and click one of the blog posts as follows;
Click the ▾ (down arrow) next to Add file button and choose to upload your new blog post from your computer.
Markdown Editing
How To Write and Preview Markdown In VScode
How to Preview Markdown in Visual Studio Code