Improve Wi-fi for ESP32 C3 Super Mini
1. Software configuration
- Default Wi-fi power is set to 20.5dBm. Set the TX power to 8.5 dBm or 10dBm in the code.
#include "esp_wifi.h"

void setup() {
	// Set max TX power to 8.5 dBm or 10 dBm
	esp_wifi_set_max_tx_power(WIFI_POWER_8_5_dBm);

	// Init wifi, etc...
}- Disable Bluetooth
#include "esp_bt.h"

void setup() {
	// Disable bluetooth controller
	esp_bt_controller_disable();
}
2. Antenna & RF Interference
The PCB SMD ceramic antenna is sensitive. Avoid using pins close to the ceramic such as GPIO 20 and 21. Soldering a 31mm looped copper wire directly to the ceramic may improve the antenna coverage. Scraping the ceramic coating makes it easier to solder the copper looped wire.
Serial Monitor Issues
1. Enable “USB CDC On Boot”
By default, the Arduino IDE expects serial communication to go out through dedicated hardware UART pins. Because the Super Mini connects directly via the ESP32-C6’s internal USB, you have to explicitly tell the compiler to route Serial to that USB port.
-
Open the Arduino IDE.
-
Go to Tools > USB CDC On Boot.
-
Change this setting from Disabled to Enabled.
-
Re-upload your sketch.
2. Wait for Booting Process
If the serial monitor does not print logs, add a 1000 ms delay may resolve the issue.
#include "esp_bt.h"

void setup() {
	Serial.begin(9600);
	delay(1000);
	Serial.println("Serial monitor is working...");
}
ESP32 without Flasher issues
Some Chinese boards on the market do not include flasher. You can check the whether it includes flasher or not via reviewing the main IC on the board. If it includes FH or F letters on the IC, it means the flasher is installed.
If you cannot flash the content (uploading the code), you can use an additional USB to Serial adapter.
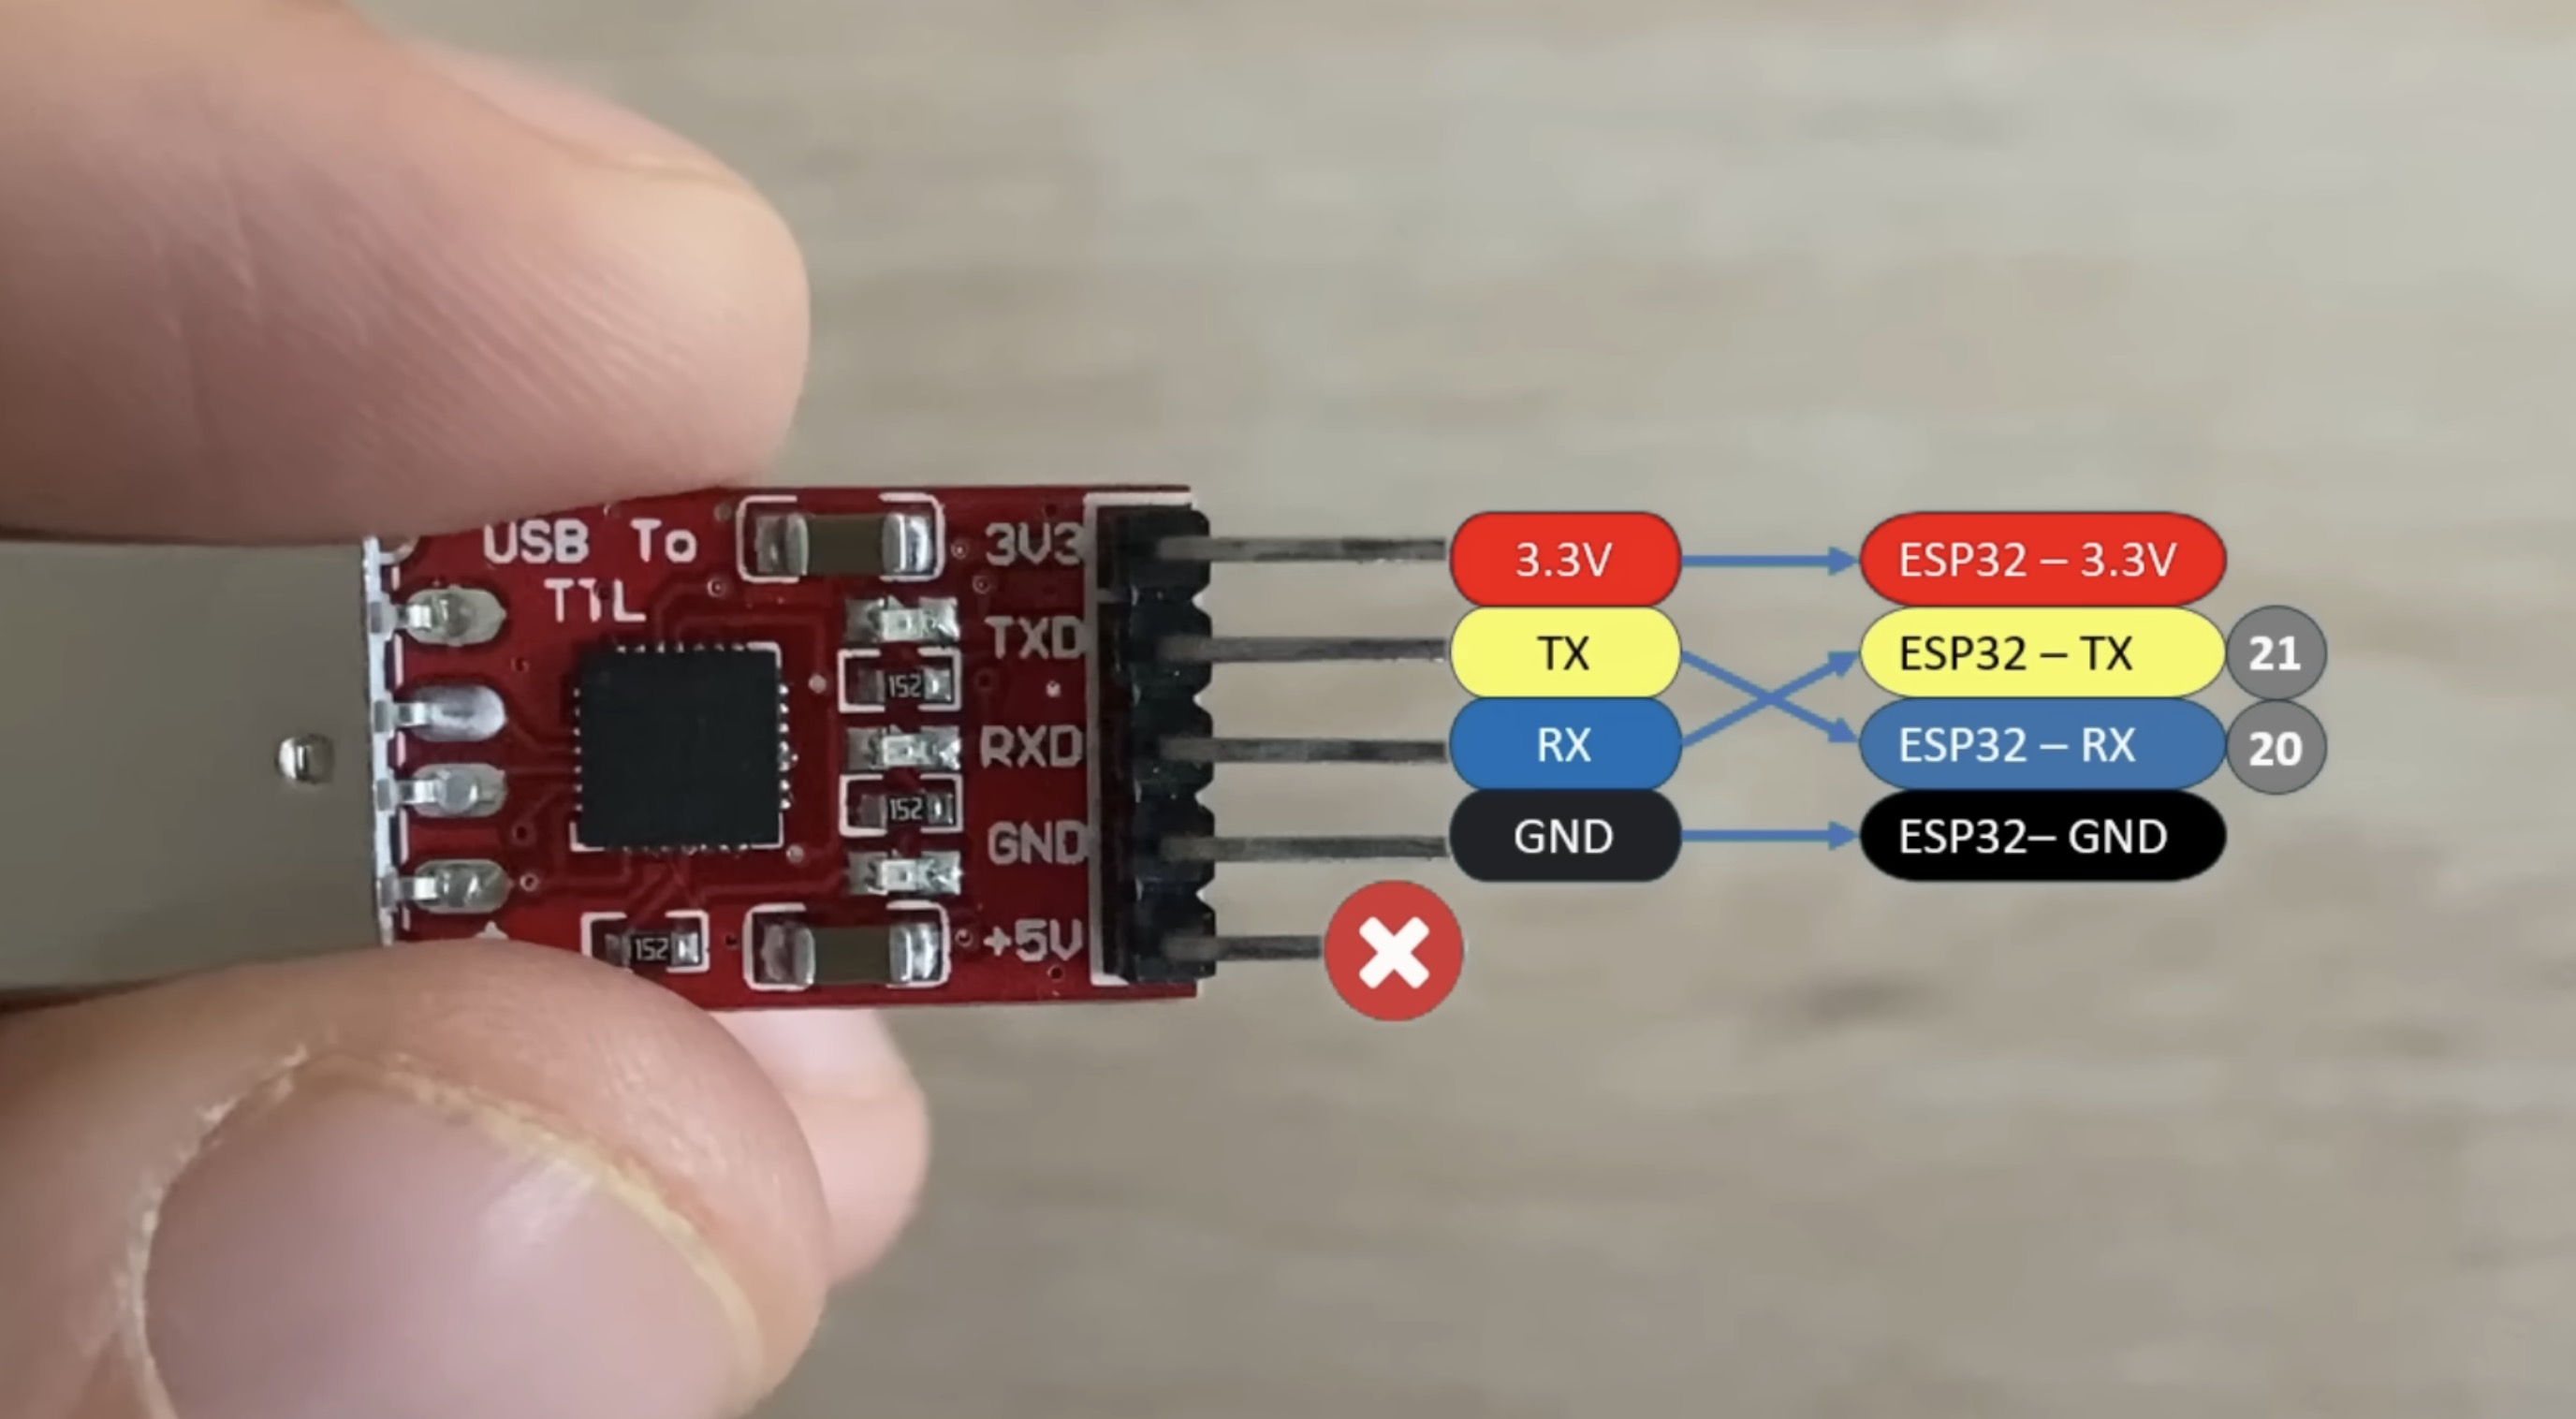
Avoid connecting +5V to ESP32 board. Because they are not built to handle 5V to 3.3V. Sometimes the converter doesn’t work as well. Try the followings;
- Search internet
- Reduce the upload speed on Arduino IDE. To do that goto
Tools → Upload Speedmenu.
Error during build: text section exceeds available space in board
You need to change the “Partition Scheme” to give your app a massive chunk of the flash memory.
-
Go to the top menu and click Tools.
-
Scroll down to Partition Scheme.
-
Change it from “Default” to “Huge APP (3MB No OTA/1MB SPIFFS)”.
-
Click Upload again. It should compile and upload perfectly!